8
ENGLISH
SPRAYER
CONTROLS
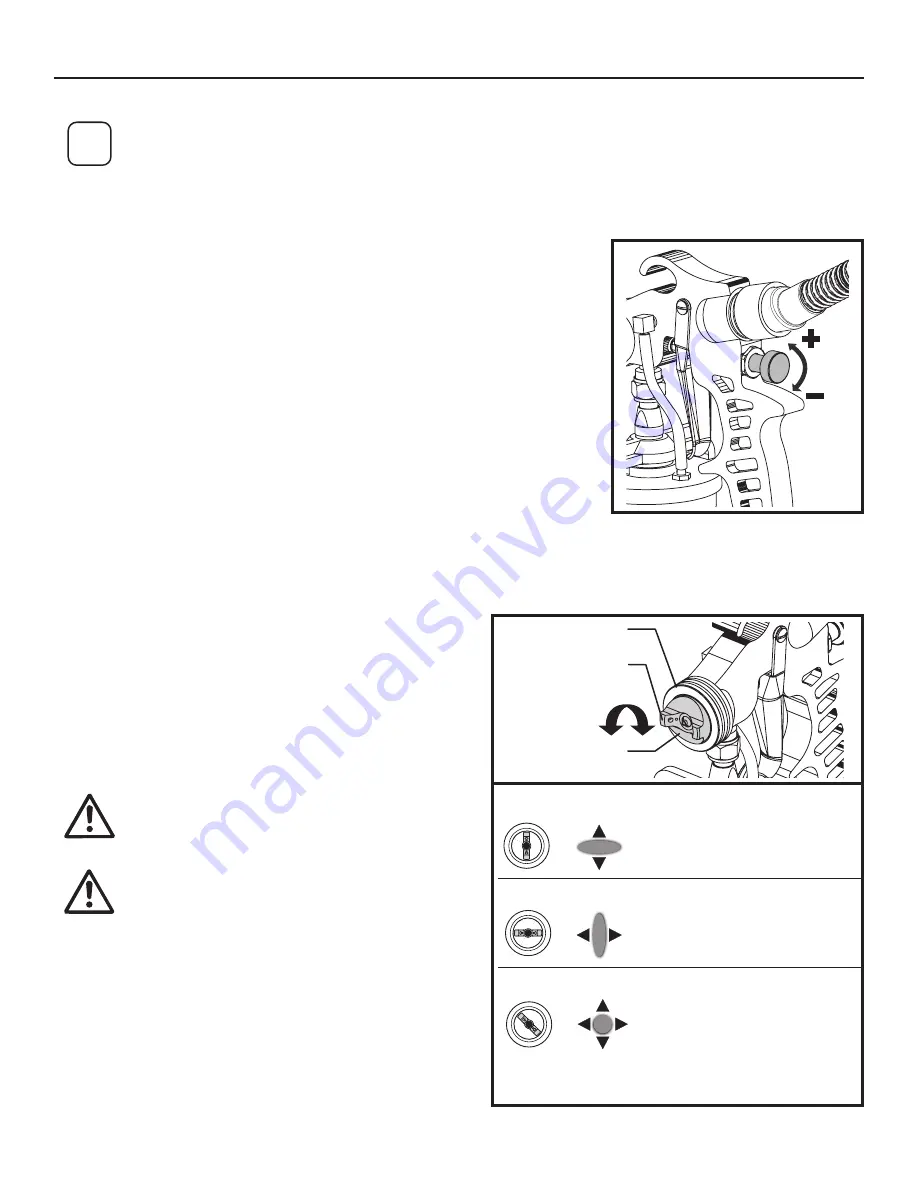
MATERIAL FLOW CONTROL
The material flow control determines the amount of material that is sprayed from the
spray gun.
Set the material flow by turning the knob on the rear of the spray gun.
•
For thicker materials, it is recommended that you start with the highest material
flow setting and then gradually decrease the flow to suit your particular spraying
needs.
•
For thinner materials, it is recommended that you start with a low material flow
setting, and then gradually increase the flow to suit your particular spraying needs.
•
The higher the flow setting, the quicker you will have to work in order to avoid drips
and sags in your spray pattern.
Tip: Spraying with the control set too high will result in a spray pattern that runs and
sags (too much material).
Tip: Spraying with the control set too low will result in a spray pattern that does not
cover (not enough material). Also, if the knob is loosened too much, it can fall out.
Replace by threading it back in.
ADJUST SPRAY PATTERN
Adjust the spray pattern by turning the air cap ears.
The positions of the air cap and the corresponding spray
pattern shapes are illustrated below.
Test each pattern and use whichever pattern is suitable for
your application.
NEVER trigger the gun while turning the air
cap. NEVER point the spray gun at any part of
the body.
Aenon
When changing the spray pattern, make sure
the air cap ring is not loosened.
i
Spray performance will depend upon a number of factors: material thickness, spray pattern selected, and material
flow. Testing different control settings will help you achieve the desired results. See descriptions below to help
with your project.
AIR CAP EARS
AIR CAP
AIR CAP RING
Horizontal pattern
=
=
=
Use ‘up and down’ spraying
motion
Vertical pattern
=
=
=
Use ‘side to side’ spraying
motion
Round pattern
=
Use ‘up and down’ or ‘side to
side’ spraying motion
Use lower material flow
For coating smaller areas,
corners and edges


