

117
FinishControl 4000 18V
PT
7
REGULAÇÃO DA PISTOLA DE
PULVERIZAÇÃO DE TINTA
7.1
REGULAÇÃO DO PADRÃO DE PULVERIZAÇÃO
DESEJADO
Atenção: Durante a regulação da capa de
ar, nunca accionar o gatilho.
Rodando a válvula do ar (Fig. 3, 1) poderá regular 2-3 formas
de jato de pulverização diferentes.
Rodar a válvula do ar de jato
de ar apenas no sentido da
seta, caso contrário a porca
de capa pode soltar-se.
A jacto plano horizontal
para aplicação de tinta
na vertical
B
jacto plano vertical
para aplicação de tinta
na posição horizontal
C* jacto redondo
para cantos e arestas,
bem como para áreas
de difícil acesso
* apenas acessório de pulverização FineSpray
Com o regulador (fig. 4, 1) é possível alternar, adicionalmente,
entre um jato de pulverização largo ( ) e um estreito ( ).
7.2
REGULAÇÃO DA QUANTIDADE DE MATERIAL
(FIG. 5)
A quantidade de material pode ser regulada rodando o regu-
lador da quantidade de material (fig. 5, 1) gradualmente de 1
(mínimo) até 12 (máximo).
7.3
REGULAÇÃO DA QUANTIDADE DE AR (FIG. 6)
Rodar a regulação da quantidade de ar (fig., 6, 1) no sentido
dos ponteiros do relógio para aumentar a quantidade de ar
ou no sentido contrário aos ponteiros do relógio para reduzir
a quantidade de ar (observar a seta no corpo da pistola).
A regulação correcta da quantidade de ar e de
material é decisiva para a pulverização e a forma-
ção de neblina de tinta.
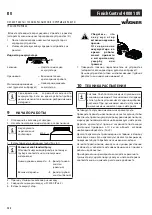
7.4
ALINHAR O TUBO DE ALIMENTAÇÃO
Se o tubo de alimentação estiver na posição correcta, o conteú-
do do depósito pode ser pulverizado, praticamente, até ao fim.
Trabalhos em objectos colocados na horizontal:
Rode o tubo de alimentação para a frente. (Fig. 7 A)
Trabalhos de pulverização de objectos colocados na vertical:
Rode o tubo de alimentação para trás. (Fig. 7 B)
8
CARREGAMENTO
Antes de ligar à corrente, certificar-se de que a tensão de
alimentação corresponde à indicação existente na placa de
identificação do carregador.
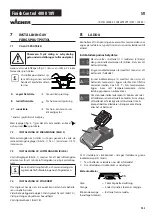
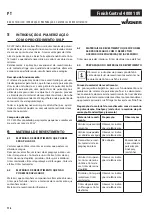
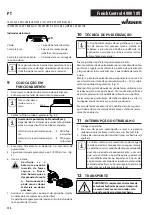
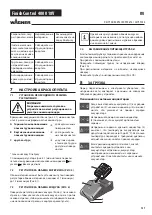
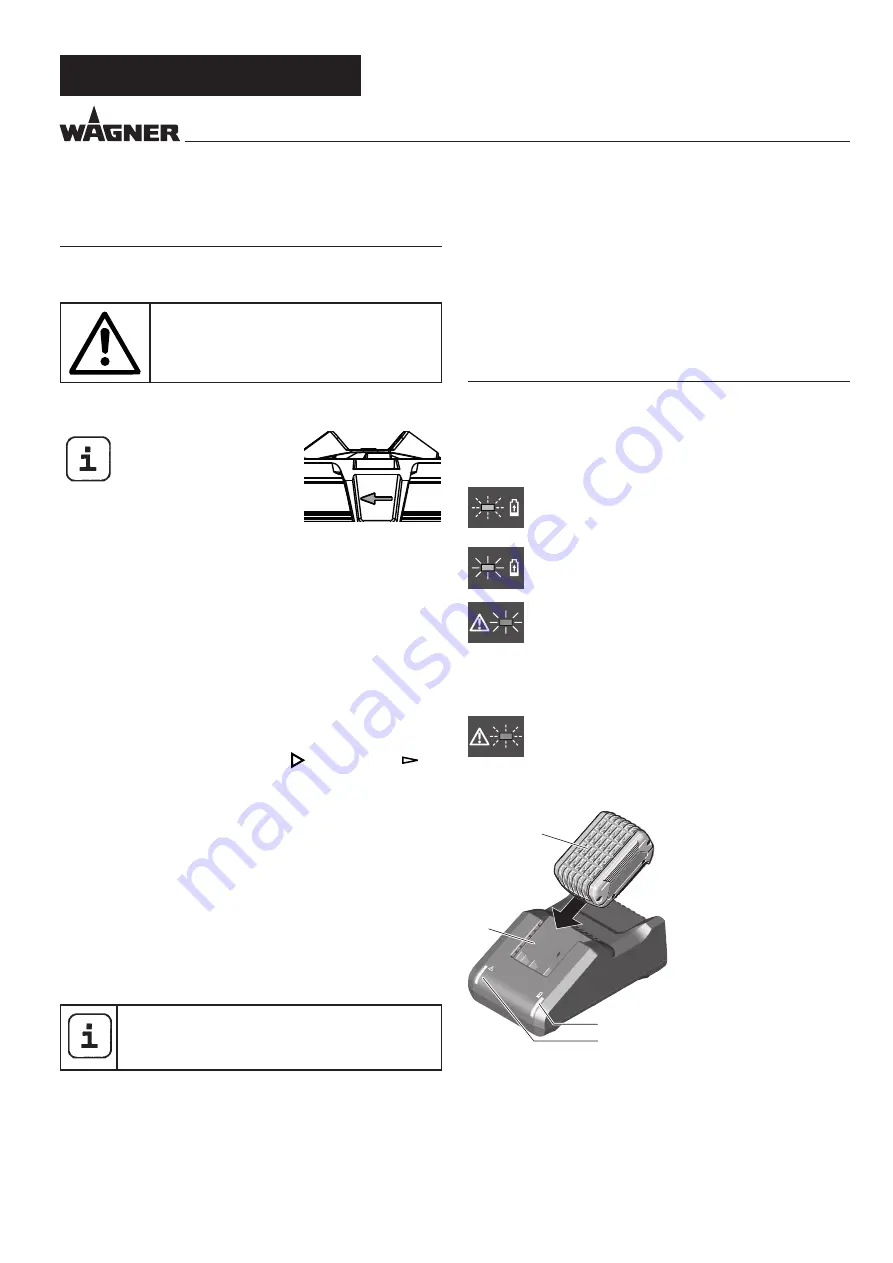
Explicação dos indicadores luminosos
Ao introduzir a bateria (1) no carregador (2), o
indicador luminoso verde (4) começa a “PISCAR”.
Isto indica que a bateria está a carregar.
Um indicador luminoso verde contínuo (4) mostra
que a bateria está totalmente carregada.
Um indicador luminoso vermelho contínuo (3)
significa que os níveis térmicos da bateria se
encontram fora do intervalo permitido (entre 0 °C e
35 °C). Assim que a temperatura se encontrar dentro
do intervalo correto dos níveis térmicos, o processo
de carregamento começa automaticamente.
Se o indicador luminoso vermelho (3) piscar,
significa que os contactos do carregador ou da
bateria estão sujos, que a bateria está danificada,
ou que não é compatível com o carregador. Limpar
os contactos ou substituir a bateria.
4
3
2
1
Ligar a ficha de alimentação do carregador à tomada (o
indicador luminoso verde do carregador (4) acende).
1. Assim que a bateria estiver completamente carregada,
retirar a bateria do carregador.
2. Desligar a ficha de alimentação do carregador da
tomada.
REGULAÇÃO DA PISTOLA DE PULVERIZAÇÃO DE TINTA / CARREGAMENTO
Summary of Contents for FINISH CONTROL 4000 18V
Page 2: ...FinishControl 4000 18V 1 2 3 A A C B 1 c 3 2 12 13 1 14 10 5 4 15 19 7 6 9 16 17 18 11 8 20...
Page 3: ...FinishControl 4000 18V A B 1 1 i 3 10 cm 1 2 j h 1 2 1...
Page 4: ...FinishControl 4000 18V o m q k p 1 l 1 3 2 2 6 1 5 3 n 2 r 1...
Page 5: ...FinishControl 4000 18V 3 2 1 1 2 4 6 7 8 9 10 5 s 3 3 4 2 1 5 7 t 6...
Page 131: ...125 FinishControl 4000 18V RU 1 1 a b c 2 a b c d e f 3 a b c d e f...
Page 132: ...126 FinishControl 4000 18V RU g h 4 a b c d e f g h 5 a b c d e f 130 C g...
Page 133: ...127 FinishControl 4000 18V RU 6 a b 1 2 3 4 5 6 7 1 4 14 2 8 9 10 11...
Page 140: ...134 FinishControl 4000 18V RU 14 14 1 1 2 18 1 3 18 2 14 2 1 19 1 2 3 2 3 4...
Page 141: ...135 FinishControl 4000 18V RU 15 10 14 2 13 1 2434518 14 1 16...
Page 145: ...139 FinishControl 4000 18V RU 4 Wagner 5 18 88677...
Page 146: ...140 FinishControl 4000 18V RU...
Page 147: ...141 FinishControl 4000 18V RU...


