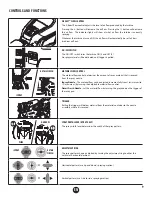
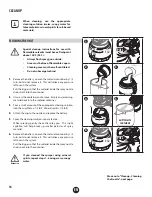
background image

12


EN

SPRAYER CONTROLS 


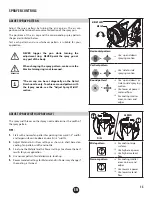
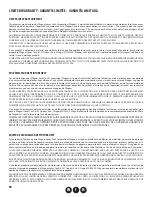
X-BOOST™ FLOW CONTROL 

The X-Boost™ flow control adjusts the level of air flow produced by the turbine.  Pressing 

the (+) button will increase the air flow.  Pressing the (-) button will decrease the air flow.  

The indicator bars will light up and show the air flow the turbine is currently spraying.  
Whenever the turbine is turned ON, the air flow will automatically be set to 3 bars 

(medium air flow).    

 •

A high air flow level will result in faster coverage and a smoother finish with thicker 

materials.    

 •

Lowering the air flow will result in larger drops of material being sprayed from the 

gun, and will create a slightly rougher finish.

Tip:  The thicker the material you are spraying, the higher the turbine air flow you will need.    
Tip:  For fine-finish work with thinner materials, you may want to decrease the air flow.  Spraying a thinner material at high air flow 

will result in more overspray.  Overspray is sprayed material that does not stick to the spray surface and bounces back.  

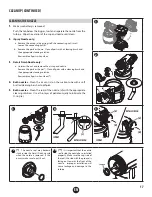
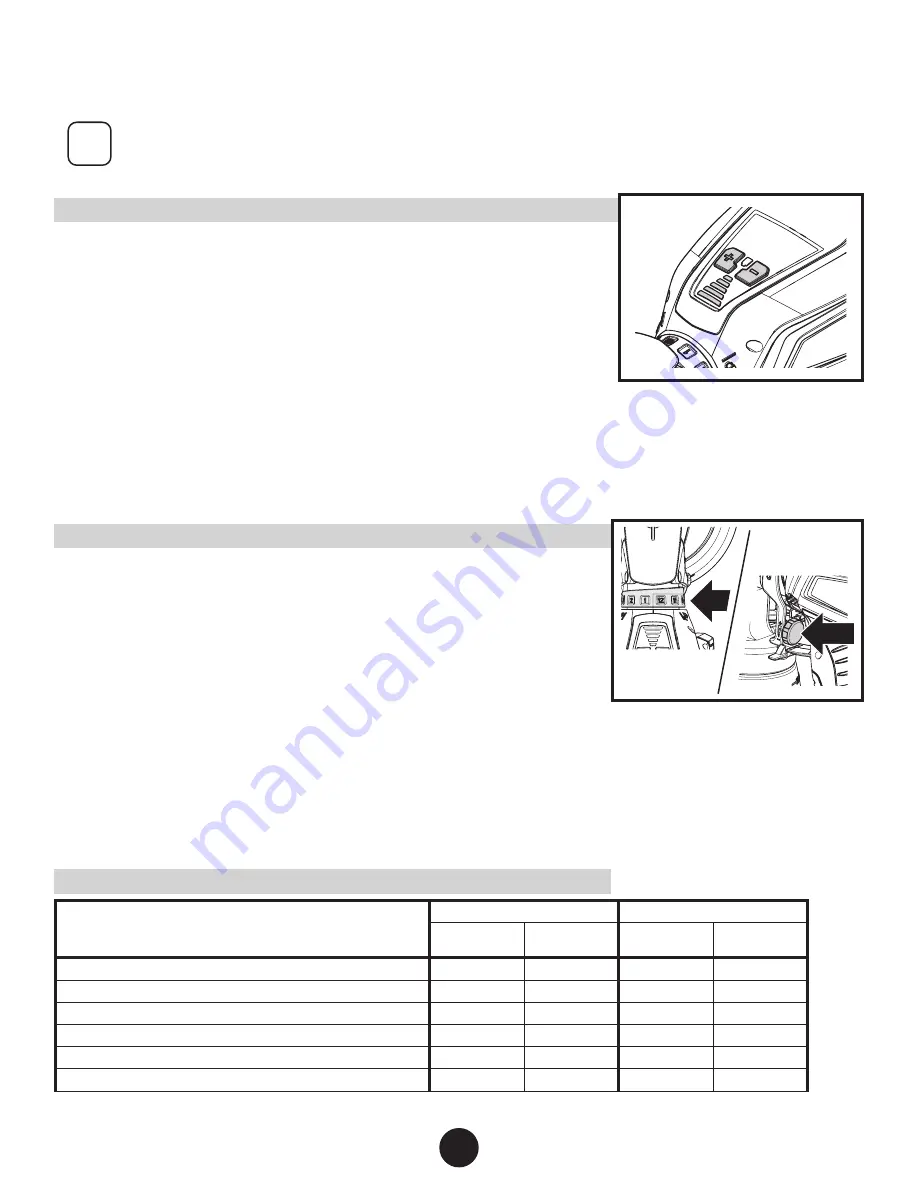
MATERIAL FLOW CONTROL

The material flow control determines the amount of spray material that is sprayed 

from the spray gun.
iSpray Nozzle - The material flow can be adjusted incrementally from 1 (minimum) to 

12 (maximum) by turning the adjustable material flow control
Detail Finish Nozzle  - Set the material flow by turning the grey knob on the trigger 

of the spray gun.

 •

For thicker materials, it is recommended that you start with the highest material 

flow setting and then gradually decrease the flow to suit your particular spraying needs.

 •

For thinner materials, it is recommended that you start with a low material flow setting, and then gradually increase the flow 

to suit your particular spraying needs.  

 •

The higher the flow setting, the quicker you will have to work in order to avoid drips and sags in your spray pattern. 

Tip:  Spraying with the control set too high will result in a spray pattern that runs and sags (too much material).
Tip:  Spraying with the control set too low will result in a spray pattern that does not cover (not enough material).

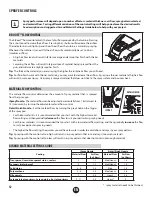
AIR AND MATERIAL SETTINGS GUIDE

Coating

iSpray Nozzle

Detail Finish Nozzle

Material Flow 

Air Flow 

(# of bars)

Material Flow

Air Flow 

(# of bars)

Transparent / semi-transparent stains, sealers

2

1-2

Med/Heavy

1-3

Lacquers (water based)

3

1-2

Med/Heavy

1-3

Solid stains

4 - 6

2-4

Med

2-4

Polyurethane

4 - 6

3-5

Med/Heavy

3-6

Oil enamels

7

3-5

Heavy

3-5

Latex paints plus primers, Latex paints, oil or latex primers

9 - 11

3-5

Heavy*

5

iSPRAY

DETAIL FINISH

i

Spray performance will depend upon a number of factors: material thickness, air flow, spray pattern selected, 

and material flow.  Testing different variations of the control settings will help you achieve the desired results.  

See descriptions and suggested Air and Material Settings Guide below to help with your project.

  *  spray material needs to be thinned

Summary of Contents for FLEXIO 3550

Page 1: ...AL MANUEL DE L UTILISATEUR MANUAL DE USARIO READTHIS MANUAL FOR COMPLETE INSTRUCTIONS LIRE CE MANUEL POUR OBTENIR DES DIRECTIVES COMPL TES LEA ESTE MANUAL PARA OBTENER LAS INSTRUCCIONES COMPLETAS www...

Page 2: ...ty information will follow Attention This symbol indicates a potential hazard to you or to the equipment Important information that tells how to prevent damage to the equipment or how to avoid causes...

Page 3: ...xtinguisher equipment shall be present and working HAZARD ELECTRIC SHOCK This product can cause injury due to electric shock PREVENTION Never submerge electrical parts Never expose the equipment to ra...

Page 4: ...pack or charger Contact customer service immediately 9 Make sure cord is located so that it will not be stepped on tripped over or otherwise subjected to damage or stress Damaged plug and cord may re...

Page 5: ...50 100 150 AWG Size of Cord 18 16 16 14 d An extension cord is a temporary solution Move the charger to a standard receptacle as soon as the job has been completed IMPORTANT CHARGING NOTES 1 The charg...

Page 6: ...ich can be determined by turning the equipment off and on the user is encouraged to try to correct the interference by one or more of the following measures Reorient or relocate the receiving antenna...

Page 7: ...e battery pack may be used at any time even if the green light is still blinking A steady red indicator light 3 means that the battery pack is outside the proper temperature ranges too hot or too cold...

Page 8: ...thinned latex RECHARGEABLE BATTERY The turbine is powered by the rechargeablebattery Afullycharged battery will provide approximately 7 minutes of continuous spraying at the highest Air Power Setting...

Page 9: ...ol determines the amount of spray material that is sprayed from the spray nozzle iSpray Nozzle The material flow can be adjusted incrementally from 1 minimum to 12 maximum by turning the adjustable ma...

Page 10: ...en by the coating manufacturer Most paints do not require thinning but some paints with heavy pigments and solid bases may require thinning to spray as desired If thinning is necessary use water or pa...

Page 11: ...ed as far as it will go to ensure a tight fit Attention Never tip the sprayer at more than a 45 angle Material could get into the turbine and damage the sprayer 4 Make sure the battery is fully charge...

Page 12: ...ey knob on the trigger of the spray gun For thicker materials it is recommended that you start with the highest material flow setting and then gradually decrease the flow to suit your particular spray...

Page 13: ...the black retaining ring is not loosened i The air cap can be set diagonally on the Detail Finish nozzle only To achieve a round pattern with the iSpray nozzle see the Adjust Spray Width section The s...

Page 14: ...eing triggered If you pause or linger in one spot too long too much material will be sprayed to the surface Position the spray gun perpendicular to and six 6 to eight 8 inches from the spray surface d...

Page 15: ...terial is going on too thin increase the material flow If you feel the material is going on too thick decrease the material flow even further or move the spray gun further away from the surface Beside...

Page 16: ...solution into the cup Water 1 2 full Mineral spirits 1 4 full 4 Attach the cup to the nozzle and replace the battery 5 Spray the cleaning solution into a safe area While spraying gently shake the spra...

Page 17: ...ing brush and the appropriate cleaning solution Reassemble all parts when clean 4 Both nozzles Clean the air vent c on the suction tube with a soft bristled cleaning brush or toothpick 5 Both nozzles...

Page 18: ...steps below 1 Pull the air tube a at the top from the nozzle Screw off the valve cover b Remove the valve seal c Clean all the parts carefully Make sure to remove any material from valve seal housing...

Page 19: ...etting 3 Adjust material flow or increase movement of spray gun 4 Thin see page 10 Problem D Spray jet pulsates 1 Material in container running out 2 Air filter clogged 3 Air valve tube disconnected 4...

Page 20: ...Alojamiento de pistola 1 Not included in all models Non inclus dans tous les mod les No se incluye en todos los modelos 4 2422707 Battery Wagner Batterie Wagner Bater a Wagner 1 5 2422706 Battery cha...

Page 21: ...1 7 Ensamblaje de pistola incluye los articulos 1 7 1 2 2382751 Nozzle assembly Ensemble de buse Ensamblaje de boquilla 1 3 2382753 Adjustment ring Anneau de tarage Anillo de ajuste 1 4 417474 Seal J...

Page 22: ...Sello de boquilla 1 3 414381 Nozzle Buse Boquilla 1 4 414384 Air cap Chapeau d air Tapa de aire 1 5 417319 Connecting nut crou d assemblage Tuerca de conexi n 1 6 529005 Tube Valve seal Tube Joint de...

Page 23: ...s de detalle y acabado m s fino 529257 Control Finish nozzle Buse de Control Finish Boquilla de Control Finish Medium coverage speed with semi smooth finish Finishing and painting small projects Vites...

Page 24: ...E AUTRE RAISON LA GARANTIE NE COUVRE PAS LES ACCESSOIRES CET ARTICLE A T CON U EXCLUSIVEMENT EN VUE D UN USAGE DOMESTIQUE LA GARANTIE NE SERA VALABLE QUE POUR 30 JOURS COMPTER DE LA DATE D ACHAT DE L...

Reviews: