

EN
17
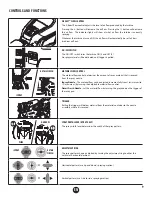
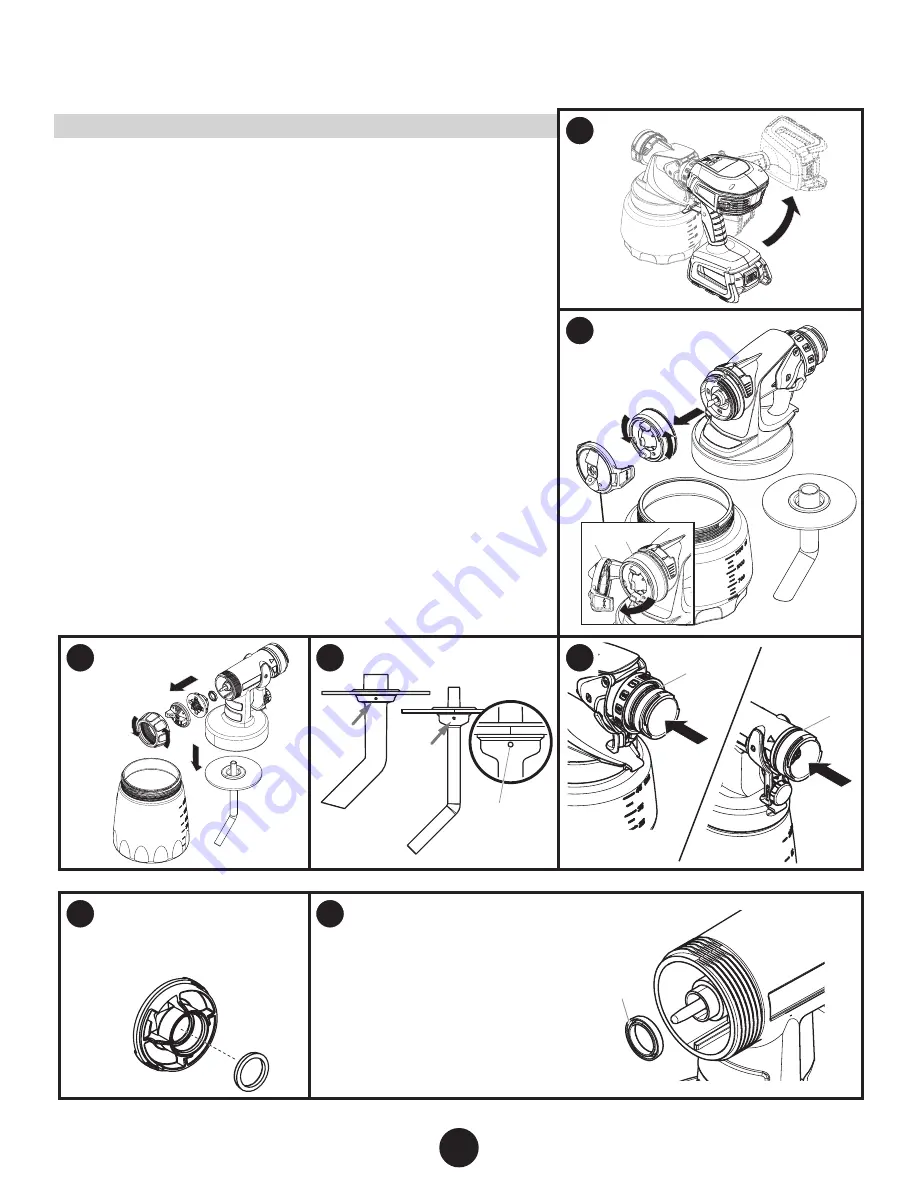
CLEANUP (CONTINUED)
CLEANING THE NOZZLE
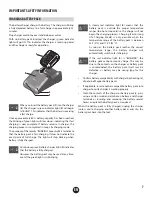
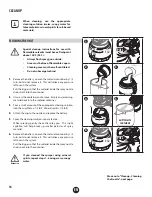
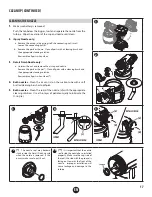
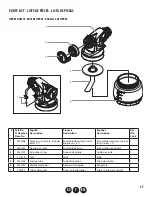
1.
Make sure battery is removed.
Push the tab below the trigger, twist and separate the nozzle from the
turbine. Wipe the exterior of the cup and nozzle until clean.
2.
iSpray Nozzle only -
a. Remove the air cap (a) by prying it off the connecting nut (inset).
Loosen the connecting nut (b).
b. Remove the parts as shown. Clean all parts with a cleaning brush and
the appropriate cleaning solution.
Reassemble all parts when clean.
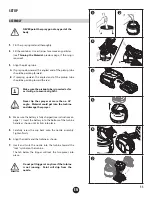
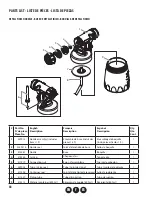
3.
Detail Finish Nozzle only -
a. Unscrew the nut and remove the air cap and nozzle.
Remove the parts as shown(*). Clean all parts with a cleaning brush and
the appropriate cleaning solution.
Reassemble all parts when clean(**).
4.
Both nozzles - Clean the air vent (c) on the suction tube with a soft
bristled cleaning brush or toothpick.
5.
Both nozzles - Clean the rear of the nozzle (d) with the appropriate
cleaning solution. Use a thin layer of petroleum jelly to lubricate the
O-ring (e).
1
2
(a)
(b)
3
4
(c)
DETAIL FINISH
ISPRAY
5
(d)
(e)
(d)
(e)
DETAIL FINISH
ISPRAY
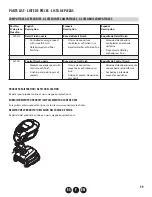
*
(*)
The nozzle seal may become
stuck inside the Detail Finish nozzle
when the nozzle is removed. If this
occurs, make sure to pull it out.
**
(**)
It is important that the nozzle
seal inside the nozzle be re-installed
properly. Make sure the cup side of
the seal (the side with the groove) is
facing out towards the front of the
nozzle. Improper installation will
cause leakage and damage to the
turbine.
Groove


