


29
GM 4100AC
B_02268
21
22
35
84
50
51
52
53
B_02274
B_02688
OPERATING MANUAL
EDITION 12/2008
PART NO. DOC394821
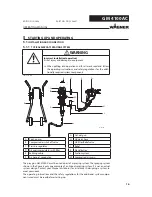
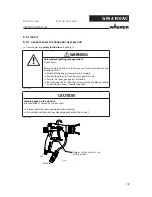
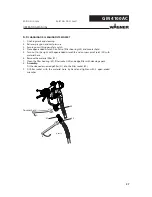
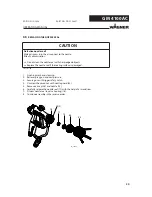
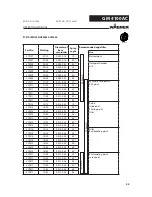
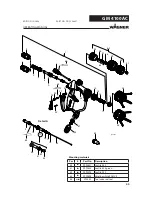
6.4.2
REPLACEMENT OF VALVE ROCKER SEALS
1. Support valve tappet (50) with single open-end wrench SW 13 mm; 0.51
inch and unscrew cover (53) with single open-end wrench SW 7 mm; 0.28
inch.
2. Remove air valve seal (51) and seal (52) and replace with new seals.
3. Screw valve tappet (50) and cover (53) together by hand. Carefully tighten
in small increments with open-end wrench SW 7 mm; 0.28 inch and SW
13 mm; 0.51 inch until a slight resistance is perceptible when moving the
valve rod (34) in the valve tappet.
Note:
The seal (52) can be pulled out of the cover (53) with the help of
an eye bolt.
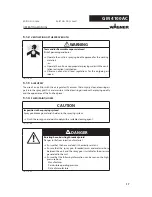
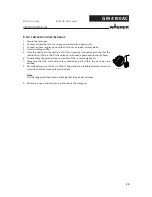
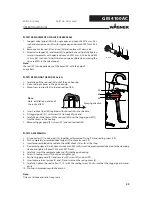
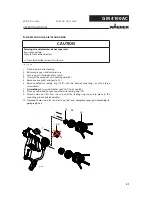
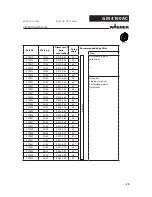
6.4.3
REPLACING THE ROD SEAL (35)
1. Carefully pull the rod seal (35) out of the gun housing.
2. Clean sealing surfaces in the gun housing.
3. Mount new rod seal (35) to the rod seal tool (84).
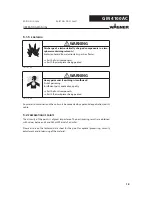
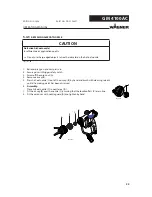
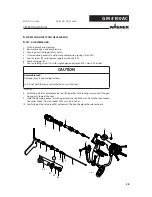
6.4.4
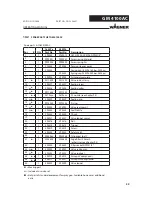
ASSEMBLING
1. Fit seal collar (11) to valve rod (14), together with inserted O-ring (12) and sealing screw (10).
2. Push completely assembled valve tappet (19) onto valve rod (14).
3. Insert preassembled valve rod into the collet chuck (18) as far as the stop.
4. Fix clamping sleeve (4) with wrench size 6 mm; 0.24 inch, screw the preassembled valve rod to the clamping
sleeve and tighten. (Socket SW 2 mm; 0.079 inch)
5. Carefully insert the complete valve rod (B) into the gun housing.
6. Screw in sealing screw (10) but do not tighten yet.
7. Position trigger guard (21) and secure with screw (22) and nut (20).
8. Insert compression springs (3) and (2) and screw on the spring cover (5).
9. Carefully tighten the seal collar (11, 12) with the sealing screw (10). Ensure that the trigger guard moves
easily.
10. Start up in accordance with chapter 5.3.
Note:
Only use silicone and resin free grease.
Note:
Note installation position of
the rod seal (35).
4. Insert rod seal tool (84) together with rod seal (35) into the hole.
5. Fit trigger guard (21) with screw (22) to body of gun and
6. Carefully push the tool with the rod seal (35) over the trigger guard (21)
into the recess in the housing.
7. Remove trigger guard (21), screw (22) and rod seal tool (84).
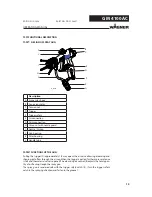
Spraying direction


