background image

GB

5

HVLP handle extension

Translation of the original operating instructions

Before using the extension for the first time read through these Operating Instructions 

and familiarise yourself with the Operating Instructions for the basic unit. The safety 

instructions for the basic unit apply  to this handle extension 

This  handle  extension  makes  the  coating  of  ceilings  and  objects  on  the  floor 

(e.g. wooden decking) much easier. 


It can be used with all Wagner HVLP units with Click & Paint technology. 


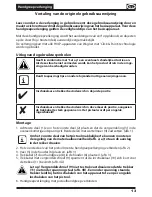
Explanation of symbols used

In combination with "Attention!" this identifies a possibly danger-

ous situation. If this cannot be avoided the product or something in 

its environment can be damaged. 

i

Indicates tips for use and other particularly useful information.

Actuator and trigger are in the correct position. 

Actuator and trigger are in the wrong position, as the tension cable 

is too tight. The gun will be accidentally triggered! 

Assembly

 Insert the rear section (1) into the front section (2) so that the latch (3) locates in the 

1. 

appropriate recess. Secure both sections with sleeve nut (4) (Fig. 1). 

i

In order to facilitate the assembly of the front section of the gun, 

turn the material quantity control (Fig. 2, a) as far as it will go into the 

trigger. 

 Connect front section of gun to handle extension (Fig. 2). 

2. 

Fit the spring (5) in the pick-up (6). (Fig. 3)

3. 

 Insert the tension cable (7) into the pick-up (6) through the handgrip (8) (Fig. 3).

4. 

 Tighten the tension cable with the locking screw (9) until the actuator (10) is located 

5. 

just in front of the trigger (10). (Fig. 4 A).

Attention! Do not tighten the locking screw (9) too much or the trigger (11) 

will be under tension (Fig. 4 B). A trigger which is under tension will lead to 

unintentional triggering of the gun when the unit is switched on.  


6.  Connect the handle extension to the gun handle.

Summary of Contents for HVLP

Page 1: ...2 ans de garantie 2 jaar garantie 2 years Guarantee 2 Jahre Garantie HVLP Griffverlängerung Handle extension Extension de poignée Basse Pression Handgreepverlenging D GB F NL Originalbetriebsanleitung ...

Page 2: ... 4 3 1 2 a ...

Page 3: ... 6 5 8 7 OK NOT OK 11 10 9 A B ...

Page 4: ...D 1 4 5 8 9 12 13 16 20 GB NL F A B 2 1 3 ...

Page 5: ...efinden sich in korrekter Position Auslöser und Abzugsbügel befinden sich in falscher Position da Zugseil zu stark gespannt Pistole wird unbeabsichtigt ausgelöst Montage Hinterteil 1 so inVorderteil 2 einsetzen dass die Rasterung 3 in der entsprechenden 1 Aussparung sitzt Beide Teile mit Überwurfmutter 4 fixieren Abb 1 i Zur leichteren Montage des Pistolenvorderteils die Materialmengenregulierung ...

Page 6: ...inigung werden keine Garantieansprüche übernommen Gerät ausschalten und Netzstecker ziehen 1 Haken Abb 2 click leicht nach unten drücken Pistolenvorderteil entfernen 2 Griffverlängerung vom Pistolengriff auf die gleiche Weise entfernen 3 Achtung Griffverlängerung ist nur bedingt Lösemittelbeständig Nicht in Lösemittel einlegen sondern nur abwischen Griffverlängerung demontieren und bei Bedarf mit ...

Page 7: ... Nischen etc 0417 915 WallPerfect Sprühaufsatz incl Behälter 1800 ml Zur Verarbeitung von Innenwandfarbe Wir empfehlen den WallPerfect Sprühaufsatz nicht mit der W550 W560 W610 zu verwenden 2301 734 Weitere Informationen zur WAGNER Produktpalette rund ums Renovieren unter www wagner group com Behebung von Störungen Störung Ursache Abhilfe Pistole sprüht ohne das der Abzug betätigt wird Zugseil zu ...

Page 8: ...r die Garantieleistungen Der Nachweis über den Erwerb des Gerätes muss bei Inanspruchnahme der Gewährleistung durch Vorlage des Originalbeleges geführt werden Soweit gesetzlich möglich schließen wir jede Haftung für jegliche Personen Sach oder Folgeschäden aus insbesondere wenn das Gerät anders als für den in der Bedienungsanleitung angegebenen Verwendungszweck eingesetzt wurde nichtnachunsererBed...

Page 9: ... and trigger are in the wrong position as the tension cable is too tight The gun will be accidentally triggered Assembly Insert the rear section 1 into the front section 2 so that the latch 3 locates in the 1 appropriate recess Secure both sections with sleeve nut 4 Fig 1 i In order to facilitate the assembly of the front section of the gun turn the material quantity control Fig 2 a as far as it w...

Page 10: ...ne and remove the plug 1 Press the hook Fig 2 click slightly downwards Remove the front section of the 2 gun Remove the handle extension from the gun handle in the same way 3 Attention The handle extension is only solvent resistant to a limited extent Do not immerse in solvent only wipe Remove the handle extension and if required wipe it with a cloth soaked with water 4 or solvent i To clean the f...

Page 11: ... 1800 ml container For processing interior wall paint We recommend against using the WallPerfect spray attachment with the W550 W560 W610 2301 734 Further information about the WAGNER range of products for renovating is available under www wagner group com Correction of Malfunctions Problem Cause Remedy Gun sprays without the trigger being operated Tension cable is too tight Slacken the locking sc...

Page 12: ...The guarantee expires if the tool is opened up by persons other than WAGNER service personnel Transport damage maintenance work and loss and damage due to faulty maintenance work are not covered by the guarantee Under any guarantee claim there must be proof of purchase of the tool through submission of the original receipt Wherever legally possible we exclude all liability for injury damage or con...

Page 13: ...une position correcte La gâchette et le pontet se trouvent en position incorrecte car le câble de traction est trop fortement tendu Le pistolet est déclenché involontairement Assemblage Mettre en place la partie arrière 1 dans la partie avant 2 de façon à ce que le tramage 1 3 soit calé dans le logement correspondant Fixer les deux parties à l aide d un écrou de raccordement 4 Fig 1 i Pour facilit...

Page 14: ...sence de nettoyage ou de nettoyage inapproprié Mettre l appareil hors service et tirer la fiche de la prise 1 Pousser légèrement le crochet Fig 2 clic vers le bas Retirer la partie avant du 2 pistolet Retirer la rallonge de la poignée du pistolet de la même manière 3 Attention La rallonge de la poignée n est que relativement résistante aux dissolvants Ne pas la plonger dans du solvant mais l essuy...

Page 15: ...els que des meubles des objets 0417 914 Façade amovible petites surfaces avec réservoir 250 ml Pour objets filigranes travaux détaillés et créatifs 0417 918 Façade amovible Perfect Spray avec réservoir 1400 ml Travail rapide pour objets de grande taille tels que maisons en bois portes de garages etc 0417 917 Façade amovible Murs Plafonds Pour la mise en peinture de grandes surfaces et de peintures...

Page 16: ...ou la mise en service ainsi que des montages ou réparations effectués et qui ne figurent pas dans nos instructions de service excluent toute responsabilité Il en va de même pour des pièces assujetties à l usure La garantie ne s étend pas sur l utilisation commerciale Nous nous réservons formellement la fourniture de la garantie La garantie est exclue si l appareil a été ouvert par des personnes ne...

Page 17: ...sitie Inschakelaar en trekker bevinden zich in de verkeerde positie aangezien de trekkabel te sterk gespannen is Het pistool wordt per ongeluk ingeschakeld Montage Achterste deel 1 zo in het voorste deel 2 plaatsen dat de vergrendeling 3 in de 1 overeenkomstige uitsparing zit Beide delen met wartelmoer 4 vastzetten afb 1 i Om het voorste deel van het pistool makkelijker te kunnen monteren de regel...

Page 18: ...len en netstekker verwijderen 1 Haak afb 2 klik iets omlaag drukken Voorste deel van het pistool verwijderen 2 Handgreepverlenging op dezelfde manier van de pistoolhandgreep verwijderen 3 Let op Handgreepverlenging is maar beperkt oplosmiddelbestendig Niet in oplosmiddel leggen maar alleen afvegen Demonteer de handgreepverlenging en veeg deze indien nodig met een in water of 4 oplosmiddel gedrenkt...

Page 19: ...Spuitopzet incl reservoir 1800 ml Voor de verwerking van binnenwandverf Wij adviseren om het WallPerfect spuitopzetstuk niet met de W550 W560 W610 te gebruiken 2301 734 MeerinformatieoverdeproductenreeksvanWAGNERvoorrenovatiewerkzaamheden onder www wagner group com Verhelpen van storingen Storing Oorzaak Oplossing Pistool spuit zonder dat aan de trekker wordt getrokken Trekkabel te strak gespannen...

Page 20: ...voor De garantie vervalt indien het apparaat door andere personen dan het Wagner personeel wordt geopend Transportschade onderhoudswerkzaam heden evenals schade en storingen door ondeskundige onderhoudswerkzaamheden zijn uitgesloten van garantie De garantie geldt alleen als het aankoopbewijs en de volledig ingevulde garantiekaart kunnen worden voorgelegd Tenzij de Wet anders oordeelt zijn garantie...

Page 21: ...17 Handgreepverlenging ...

Page 22: ...71 7 57 22 11 41 71 7 57 23 23 H Magyarországi szerviz Hondimpex KFT Kossuth L u 48 50 8060 Mór 36 22 407 321 36 22 407 852 DK S Wagner Spraytech Scandinavia A S Helgeshøj Allé 28 DK 2630 Tåstrup 45 43 27 18 18 45 43 43 05 28 E J Wagner Spraytech Ibérica S A Ctra N 340 Km 1245 4 08750 Molins de Rei Barcelona 34 93 6 80 00 28 34 93 6 68 01 56 B Wagner Spraytech Belgie Veilinglaan 58 1861 Meise Wolv...

Reviews: