


l
O
l
O
ON
OFF
2-3 MINUTES
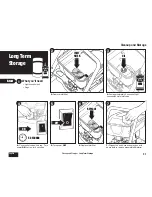
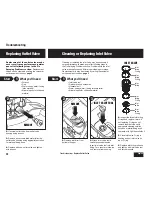
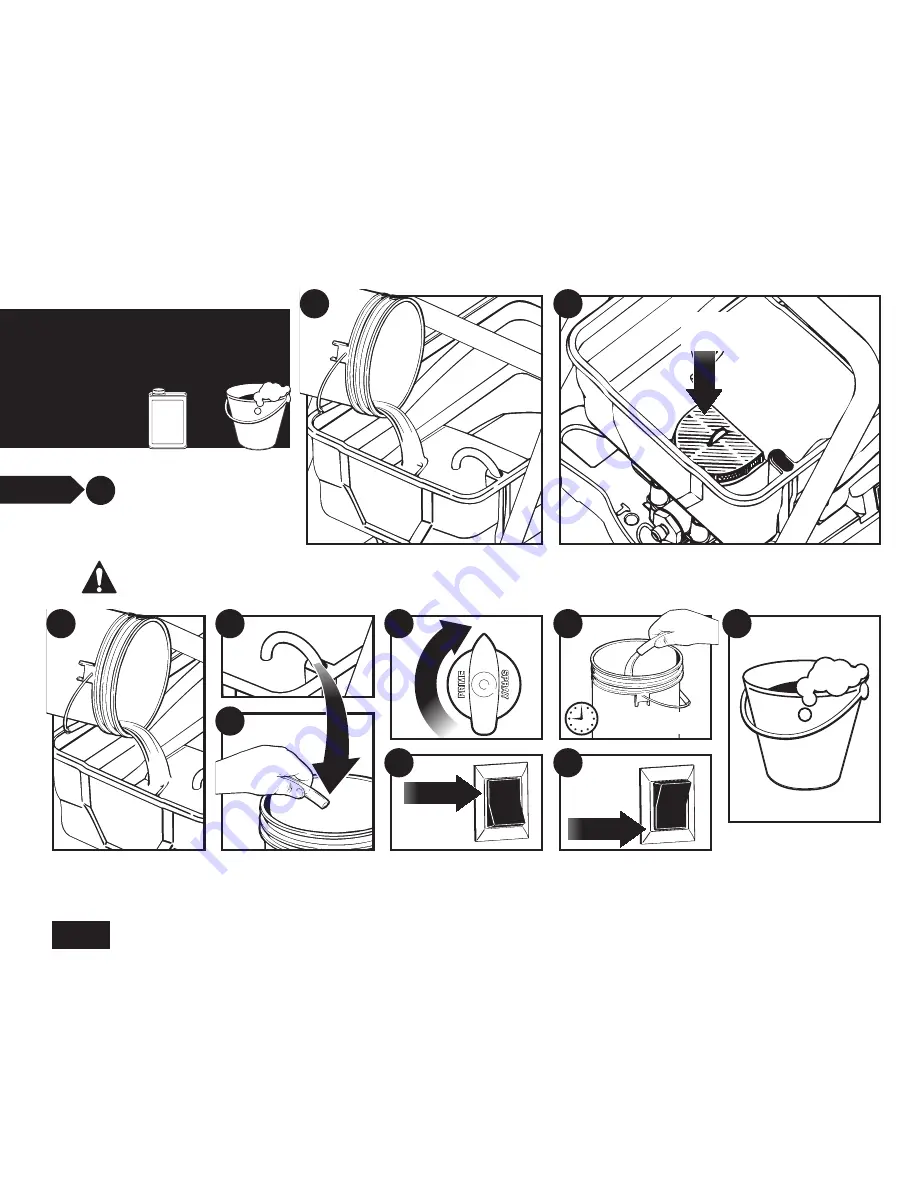
3.
Remove inlet filter and clean with appropriate cleaning solution.
Replace inlet filter in hopper
9.
Hold material return tube
over a waste container. Run for
2 to 3 minutes
10.
Turn power
OFF
7.
Turn knob to
PRIME
8.
Turn power
ON
4.
Partially fill hopper with
NEW cleaning solution
2.
Rinse hopper with appropriate cleaning
solution
What you’ll need
• Warm, soapy water
• Mineral spirits if using oil-
based material
• Rags
Start
Clean the Hopper
INLET
FILTER
TU
RN
11.
Properly dispose of
cleaning solution in hopper
Note:
If mineral spirits were
used to clean hopper repeat
clean hopper instructions using
warm, soapy water
MINERAL
SPIRITS
or
5.
Remove material return
tube from hopper
6.
Hold tube over waste
container
Do not allow any fluid to drip
onto the motor housing.
3
9
7
10
4
2
1
8
11
5
6
English
19
Cleanup and Storage
• Clean the Hopper
Cleanup and Storage


