Inlet
fitting
O-ring
Inlet
fitting
O-ring
Inlet
fitting
O-ring
Inlet
fitting
Inlet
valve
Inlet
valve
O-ring
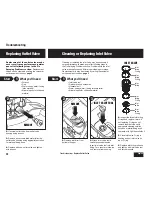
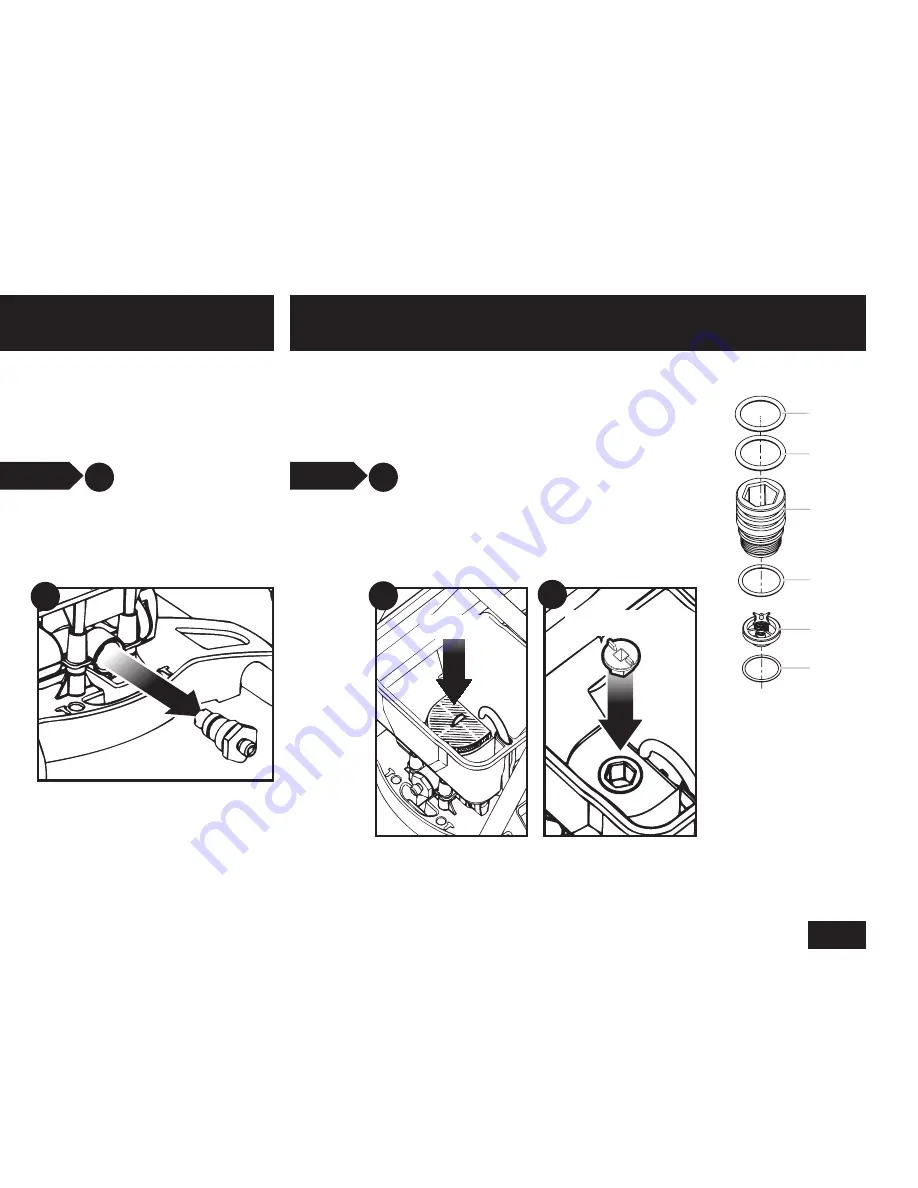
2.
Remove inlet filter from
bottom of hopper
4.
Inspect the three inlet fitting
O-rings and replace if worn. If
not replacing O-rings do not
remove them but clean with
appropriate cleaning solution
based on material being used.
Lubricate with light household oil
5.
Place inlet valve O-ring in
housing and set inlet valve on
top of O-ring
6.
Replace inlet fitting in house
and tighten with inlet valve tool
and ratchet wrench
INLET VALVE TOOL
What you’ll need
•
Wrench
•
Rag
•
Warm, soapy water if using
latex material
•
Mineral spirits for oil based
material
Start
Replacing Outlet Valve
REMOVE
3.
Attach inlet valve tool to
ratchet wrench extension.
Insert inlet valve tool into inlet
fitting. Turn counter-clockwise
and remove from housing
2.
Unscrew outlet valve from outlet valve
housing using wrench
3.
Remove any accumulated material inside
outlet valve housing using appropriate solution
for material being used
4.
Replace with new outlet valve and tighten
with wrench
REMOVE
Cleaning or replacing the inlet valve may be necessary if
spray performance remains poor after following steps in
the Fix Spraying Problems section. Problems with the inlet
valve are usually caused by improper cleaning or storage.
Replacement kits may be ordered by calling the customer
service number found on
page 2
Replacement of the outlet valve may be
necessary if spray performance remains
poor after following steps in the Fix
Spraying Problems section.
Replacement
valves can be ordered by calling the customer
service number found on
page 2
What you’ll need
•
Inlet valve tool
•
Ratchet wrench, extension
•
Household oil
•
Warm, soapy water if using latex material
•
Mineral spirits for oil based material
Cleaning or Replacing Inlet Valve
Start
INLET VALVE
2
1
3
2
1
English
24
Troubleshooting
Troubleshooting
• Replace Outlet Valve


