40
Plast Coat 25 · 35
GB
using coating materials in sacks
• Pull sliding cover back about 15 cm.
• Place sack on the sliding cover in such a way that the top
faces the front end of the sliding cover.
• Cut sack open.
• Allow the coating material to flow into the receptacle.
• Move sack mangle forwards over the sack by turning the
crank handle until the guide rollers reach the stop pins.
• To ease pressing – move sack mangle to frame of sack man
-
gle with your left hand.
• Strip remaining coating material from sack opening with a
spatula.
9.3
CONtAINeR SuCtION SySteM
• Turn off device at master switch.
• Pull out mains plug from the socket and ensure that it can
-
not be plugged back in unintentionally.
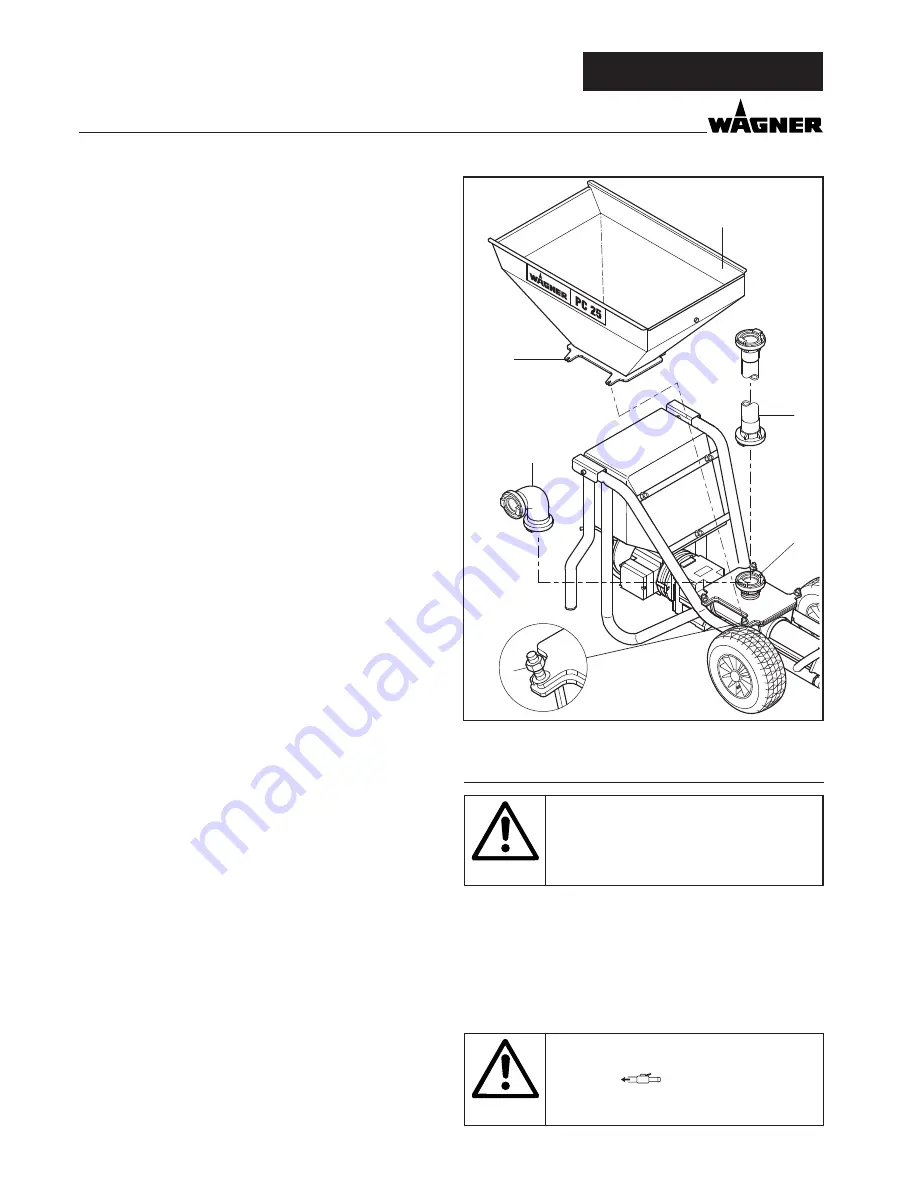
• Unscrew the hexagon nuts (2) on the receptacle (1, Fig. 19),
remove washers.
• Remove receptacle.
• Attach container connection (3) to the base of the recepta
-
cle. Mount disks and secure with hexagon nuts (2).
• Connect suction hose (5) to container connection (3). Al
-
ternatively, connect connecting bridge (6) to the container
connection (3) and connect suction hose (5) to connecting
bridge.
• Fill suction hose with water and connect to the container.
• Turn on mortar spraying machine.
Note:
All connections must be sealed air tight so that a vacuum can
be produced.
Place a small amount of machine lubricant onto the rubber
seals of the connections in order to allow for the easy opening
and closing of the connectors.
10
PlACING Out OF OPeRAtION ANd
CleANING
10.1
CleANING tHe MORtAR HOSe
• Pump until receptacle is empty.
When operating using the container suction system, remove
suction hose from the container.
Important: do not let the mortar spray machine run
dry.
• Remove texture nozzle from spray lance and clean.
do not spray the motor or control unit of
the mortar spraying machine with wa-
ter jet, high-pressure or steam cleaning
equipment. Water could penetrate the ma-
chine and cause a short-circuit.
the mortar hose must be without pres-
sure. If necessary, turn changeover switch
briefly to
(backwards).
Note the pressure gauge ––> 0 bar.
Wear protective goggles.
placIng out of operatIon and cleanIng
5
1
2
3
6
2
Summary of Contents for Plast Coat 25
Page 25: ...49 Plast Coat 25 35 GB...
Page 32: ...109 Plast Coat 25 35...


