35
Plast Coat HP 30
EN
GENERAL INFORMATION ABOUT THE APPLICATION TECHNIQUE
8
SHUTTING DOWN AND CLEANING
Do not clean the motor and control unit of
the machine moistly. And certainly do not
spray down the unit with high-pressure
cleaners or high-pressure steam cleaners.
Danger of short-circuits caused by water
ingressing.
For reasons of environmental protection and
to ensure an adequate supply of water, we
recommend only carrying out cleaning at a
suitable washing station.
7.1
SPRAYING TECHNIQUE
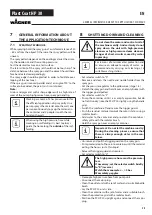
While spraying hold the spray gun at a uniform distance of 30
– 60 cm from the object. Otherwise the spray pattern will be
uneven.
The spray pattern depends on the coating material, the viscos-
ity, the nozzle size and the working pressure.
Test the desired texture on a test surface.
The lateral limit of the spray jet should not be too sharp. The
distance between the spray gun and the object should there-
fore be selected correspondingly.
The spray edge should be gradual in order to facilitate over-
lapping of the next coat.
If the spray gun is moved parallel and at an angle of 90° to the
surface to be coated, the paint mist is minimized.
Note:
Grains and pigments with a sharp edge result in a high rate of
wear of the pump, high presure hose, speay gun and tip.
Working as a team of 4 has proven useful for
the efficient application of spray putty. One
person sprays the material onto the wall, one
person continuously tops up the material in
the container and 2 people smooth the ma-
terial on the wall.
When using the high pressure hose while
working on scaffolding, it is best to always
guide the hose along the
outside
of the scaf-
folding.
7
GENERAL INFORMATION ABOUT
THE APPLICATION TECHNIQUE
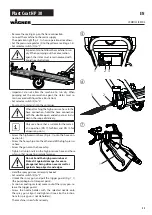
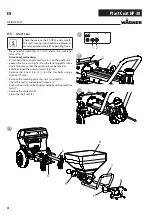
• Set selector switch to “0”.
• Remove and clean the nozzle and nozzle holder from the
spray gun.
• Set the pressure regulator to the yellow area (stage 1-4).
• Detach the spray gun and hold it over an empty bucket with
the trigger guard pulled.
• Set selector switch to “F”.
• Pump the container until it is as empty as possible, but do
not let it run dry (raise the PC HP 30 slightly using the handle
grip).
• Switch the machine off and secure the trigger guard.
• Push the residual material towards the rotor / stator using a
radiator brush.
• Add water to the container and pre-clean the container /
safety grille with the radiator brush.
• Hold the spray gun over an empty container.
Important: Do not let the machine run dry.
During the cleaning process, ensure that
there is always enough water in the con-
tainer.
• Un-secure and pull the trigger guard on the spray gun.
• Pump material out of hose into container until the material
exiting the hose is just a thin liquid.
• Release the trigger guard and secure it.
• Set selector switch to “0”.
The high pressure hose must be pressure-
less.
If necessary, set the selector switch briefly
to “R” (reverse).
Watch the manometer ––> 0 bar.
Wear safety goggles.
• Decouple high pressure hose from pump unit.
• Disconnect the mains plug.
• Clean the outlet unit with a jet of water and a suitable bottle
brush.
• Lay the PC HP 30 on its side.
• Clean the container with a jet of water and a suitable brush.
• Clean the protective grid with a radiator brush.
• Position the PC HP 30 upright again and connect the mains
plug.
Summary of Contents for PLAST COAT HP 30
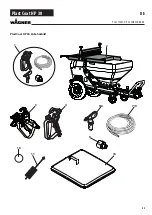
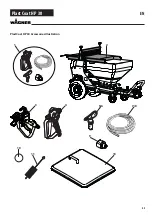
Page 45: ...45 Plast Coat HP 30 EN PlastCoat HP 30 Accessories illustration 1 9 11 10 5 6 8 2 3 4 7 8 13...
Page 67: ...67 Plast Coat HP 30 DA PlastCoat HP 30 Tilbeh rsbillede 1 9 11 10 5 6 8 2 3 4 7 8 13...
Page 89: ...89 Plast Coat HP 30 SV 1 9 11 10 5 6 8 2 3 4 7 8 13 PlastCoat HP 30 Tillbeh rsbild...

