34
PlastCoat HP 10
GB
Start-up
1. Pour suitable pump lubricant into the container.
2. Plug in the machine.
3. Disconnect the electric connector which is at the spray-gun (plug beneath the electric box)
4. Open the spray-gun.
5. Set the product flow-rate on the display (A1) to 30 with help of the b/- (4) or (5).
6. Push the button MANU/AUTO (2) the warning light (L2) lights up. The drive shaft at the bottom of the
tank must turn. If this is not the case, see 4.1. on
page 33.
7. Push once again on the button MANU/AUTO (2) to switch to AUTO mode, the warning light (L3) lights
up.
8. Put your product in the tank.
9. Switch the machine to MANU mode until the product comes out of the spray-gun.
10. As soon as the product comes out of the spray-gun, switch to AUTO mode.
11. Close the spray-gun, reconnect the electric connector
12. Put the nozzle-carrier onto the spray-gun and use the desired nozzle for the used product.
13. Set theworking pressure on the display (A1) to 60 with help of the b/- (4) or (5).
14. Open the spray-gun and verify that the warning light (L6) lights up, then start to atomize.
15. Adjust the pressure to your needs.
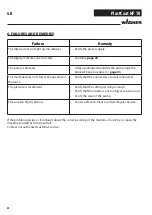
4.3. ERROR CODES
The different error codes show up on the display (A1).
CODES
DEFINITION
TO DO
No display
Plug the machine into the power supply, assure the power supply is
230 V, verify the fuse in the electric box.
Emergency stop is on. Unlock the emergency stop button (AU).
Machine is in the stop
mode.
Switch the machine on by pressing on the button (1).
Default control engine. Set the machine to «OFF» for one minute and then switch it back
on. If the sensor is defective, MOT remains constantly lit.
Default command
departure.
Verify that the lance is closed when the macine is switched on.
If the problem persists or if in doubt about the correct working of the machine, do not try to repair the
machine yourself or to dismantle it.
Contact our authorised customer service.
Summary of Contents for PlastCoat HP 10
Page 14: ...14 PlastCoat HP 10 5 2 DEMONTAGE 1 3 2 6 7 8 8mm 9 10 4 5 D ...
Page 15: ...15 PlastCoat HP 10 D 11 12 5 2 DEMONTAGE Fortsetzung ...
Page 16: ...16 PlastCoat HP 10 17 13 14 15 16 15 5 3 ZUSAMMENBAU D ...
Page 17: ...17 PlastCoat HP 10 23 22 21 18 19 20 25 24 5 3 ZUSAMMENBAU Fortsetzung D ...
Page 36: ...36 PlastCoat HP 10 GB 5 2 DISMANTLING 1 3 2 6 7 8 8mm 9 10 4 5 ...
Page 37: ...37 PlastCoat HP 10 GB 11 12 5 2 DISMANTLING CONTINUED ...
Page 38: ...38 PlastCoat HP 10 GB 17 13 14 15 16 15 5 3 REASSEMBLY ...
Page 39: ...39 PlastCoat HP 10 GB 23 22 21 18 19 20 25 24 5 3 REASSEMBLY CONTINUED ...
Page 57: ...57 PlastCoat HP 10 DK 5 2 AFMONTERING 1 3 4 2 5 6 7 8 8mm 9 10 ...
Page 58: ...58 PlastCoat HP 10 DK 11 12 5 2 AFMONTERING fortsættelse ...
Page 59: ...59 PlastCoat HP 10 DK 17 13 14 15 16 15 5 3 MONTERING ...
Page 60: ...60 PlastCoat HP 10 DK 23 22 21 18 19 20 25 24 5 3 MONTERING fortsat ...
Page 78: ...78 PlastCoat HP 10 S 5 2 DEMONTERING 1 3 2 6 7 8 8 mm 9 10 4 5 ...
Page 79: ...79 PlastCoat HP 10 S 11 12 5 2 DEMONTERING fortsättning ...
Page 80: ...80 PlastCoat HP 10 S 17 13 14 15 16 15 5 3 HOPSÄTTNING ...
Page 81: ...81 PlastCoat HP 10 S 23 22 21 18 19 20 25 24 5 3 HOPSÄTTNING fortsättning ...
Page 87: ...87 PlastCoat HP 10 ...
Page 88: ...88 PlastCoat HP 10 ...
Page 89: ...89 PlastCoat HP 10 ...
Page 90: ...90 PlastCoat HP 10 ...
Page 91: ...91 PlastCoat HP 10 ...


