


18
ProSpray 3.23
D
Anhang
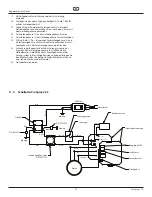
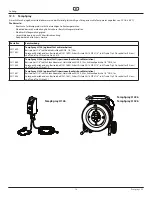
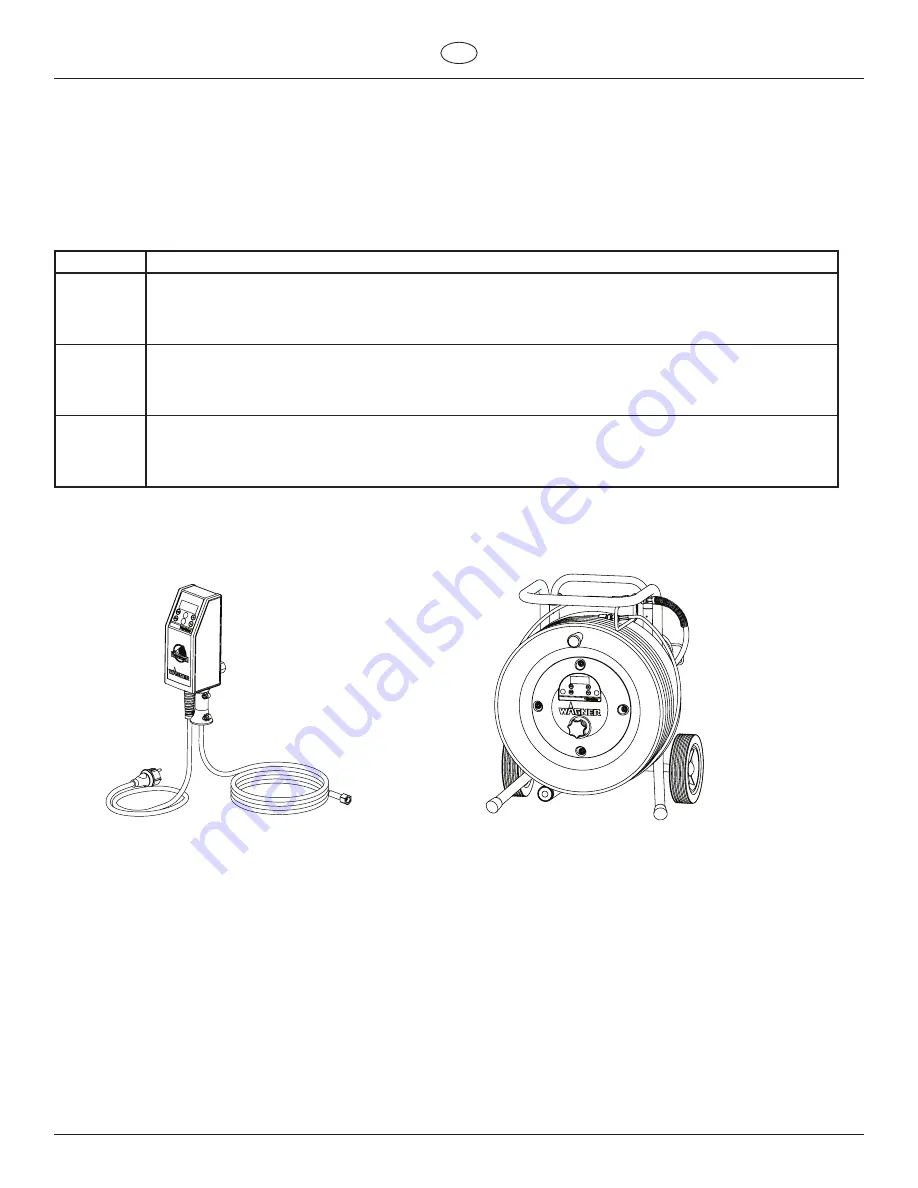
12.5 TempSpray
Ein im Schlauch eingebauter Heizleiter erwärmt das Material gleichmäßig auf die gewünschte Temperatur (regelbar von 20°C bis 60°C).
Die Vorteile:
• Konstante Farbtemperatur, selbst bei niedrigen Außentemperaturen
• Erheblich bessere Verarbeitung höherviskoser Beschichtungsmaterialien
• Erhöhter Auftragswirkungsgrad
• Lösemittelersparnis durch Viskositätsabsenkung
• Adaptierbar an alle Airless-Geräte
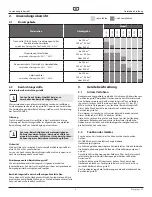
Bestellnr.
Beschreibung
2311659
2311852
TempSpray H 126 (optimal für Lackierarbeiten)
Basiseinheit 1/4“ inkl. Edelstahlschlauch DN6, 1/4“,10m
Spraypack bestehend aus: Basiseinheit (2311659), Airless Pistole AG 14 NPS 1/4“, inkl. Trade Tip 2 Düsenhalter (F-Gew.)
und Trade Tip 2 Düse Fine Finish 410
2311660
2311853
TempSpray H 226 (optimal für Dispersionen/hochviskose Materialien)
Basiseinheit 1/4“ inkl. Schlauchtrommel, Heizschlauch DN10, 15m, Schlauchpeitsche 1/4“ DN4, 1m
Spraypack bestehend aus: Basiseinheit (2311660), Airless Pistole AG 14 NPS 1/4“, inkl. Trade Tip 2 Düsenhalter (F-Gew.)
und Trade Tip 2 Düse 419
2311661
2311854
TempSpray H 326 (optimal für Dispersionen/hochviskose Materialien)
Basiseinheit 1/4“ inkl. Schlauchtrommel, Heizschlauch DN10, 30m, Schlauchpeitsche 1/4“ DN4, 1m
Spraypack bestehend aus: Basiseinheit (2311661), Airless Pistole AG 14 NPS 1/4“, inkl. Trade Tip 2 Düsenhalter (F-Gew.)
und Trade Tip 2 Düse 421
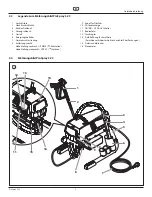
TempSpray H 126
TempSpray H 226
TempSpray H 326


