
ProSpray 3.25
81
I
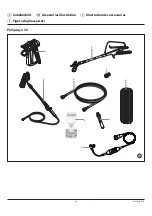
3JQBSB[JPOFEFMMBQQBSFDDIJP
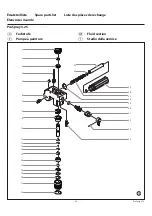
11.
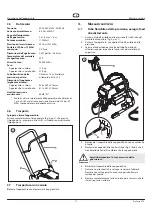
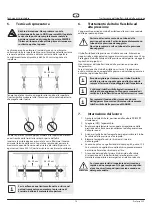
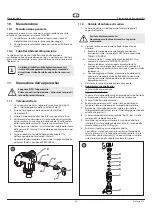
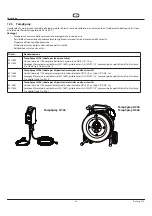
Con una chiave fissa svitare il corpo della valvola di scarico (fig.
14, pos. 8) dal pistone (9).
12. Smontare la guida della sfera superiore (11), rondella (10),
la sfera della valvola di scarico (12) e la sede della valvola di
scarico (13).
13. Pulire tutti i pezzi con un detergente adatto. Controllare
MVTVSBFTFOFDFTTBSJPTPTUJUVJSFJMDPSQPEFMMBWBMWPMBEJ
scarico (8), la sede della valvola di scarico (13), la sfera della
valvola di scarico (12), rondella (10) e la guida della sfera
superiore (11). Se non utilizzata su un lato, rimontare la sede
della valvola di scarico (13) rigirata.
14. Eseguire il montaggio in successione inversa. Spalmare grasso
QFSNBDDIJOFTVMM03JOH ñHQPTFWFSJñDBSFJMTVP
corretto posizionamento nel corpo della valvola di entrata (fig.
13 pos. 1).
11
10
12
13
9
8
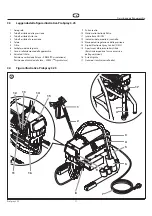
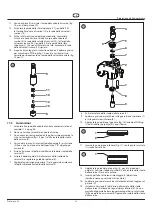
11.3
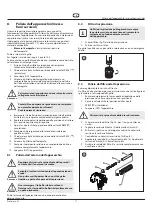
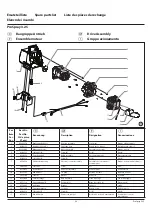
Guarnizioni
1. Smontare il corpo della valvola di entrata come des critto nel
capitolo 11.2 a pag. 80.
/POÍOFDFTTBSJPTNPOUBSFMBWBMWPMBEJTDBSJDP
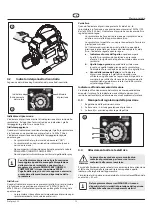
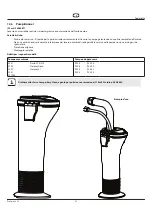
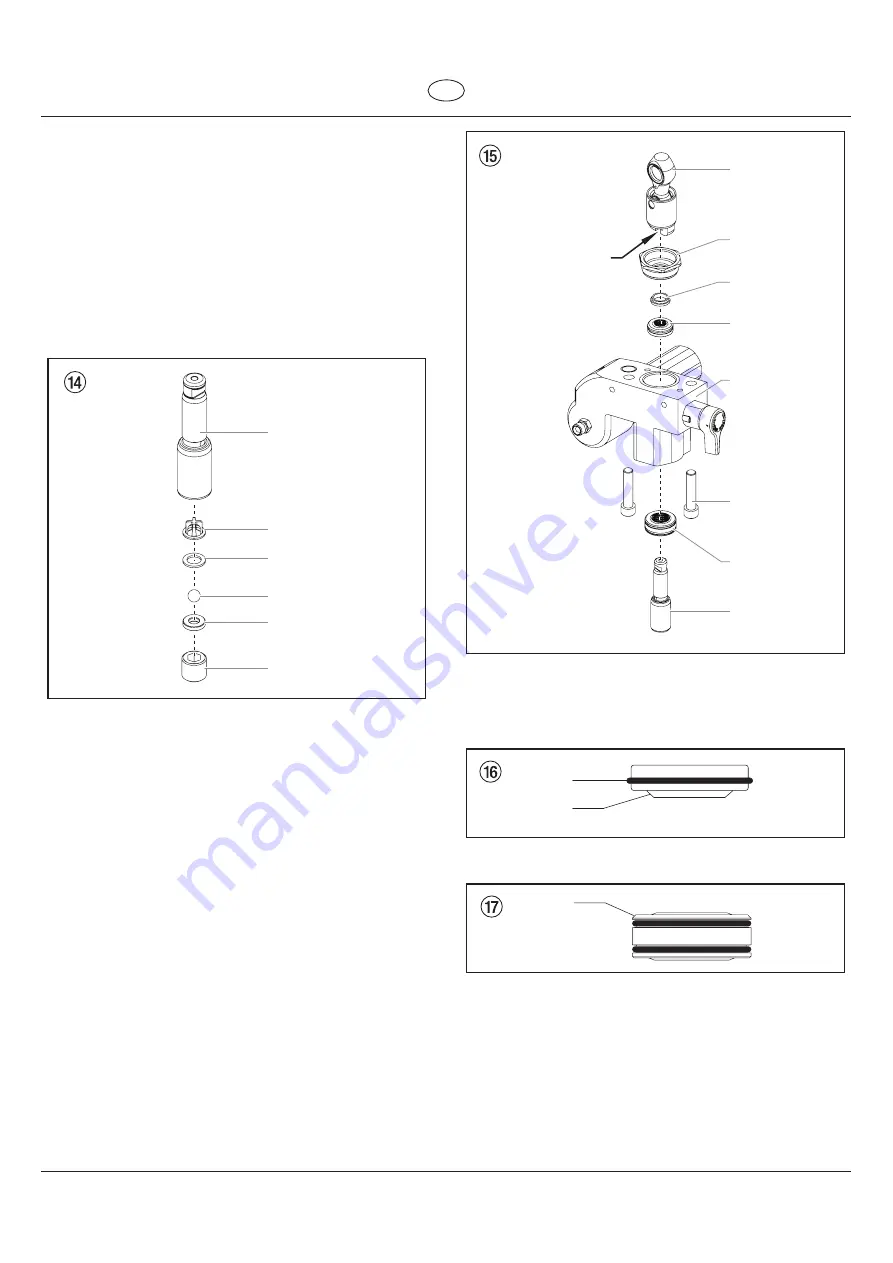
3. Con un cacciavite esagonale da 3/8 pollici svitare entrambe le
viti a testa cilindrica (fig. 15, pos. 1) dalla scatola dello stadio
della vernice (2).
4. Far scorrere in avanti il manicotto della pompa (2) e il pistone
ñOPBDIFJMQJTUPOFFTDFEBMMBQFSUVSBB5 EFMHSVQQP
cursore (4).
5. Estrarre il pistone (3) dal basso dalla scatola dello stadio della
vernice (2).
6. Svitare il dado di guida (5) dalla scatola dello stadio della
vernice (2) e togliere la guida del pistone (6).
7. Togliere la guarnizione superiore (7) e le guarnizioni inferiore
(8) dalla scatola dello stadio della vernice (2).
4
5
6
7
2
8
1
3
9
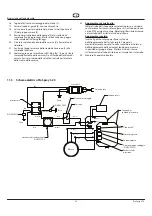
8. Pulire la scatola dello stadio della vernice (2).
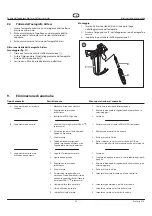
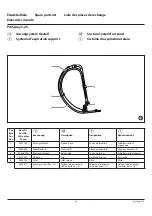
9. Spalmare grasso per macchine sulla guarnizione superiore (7)
e sulle guarnizioni inferiore (8).
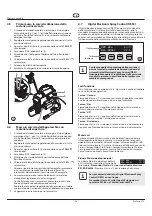
"QQMJDBSFMBHVBSOJ[JPOFTVQFSJPSF ñHJOTJFNFBMM03JOH
(1) ed al labbro sporgente (2) verso il basso.
1
2
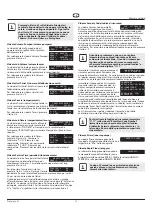
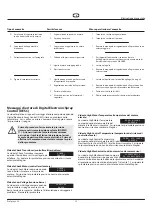
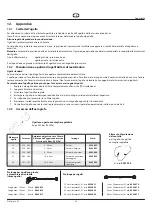
11. Inserire la guarnizione inferiore (Fig. 17) con la punta smussata
SJWPMUBWFSTPMBMUP
1
12. Applicare la guida del pistone (fig. 15, pos. 6) nel dado di
guida (5). Avvitare il dado di guida (5) nella scatola dello stadio
della vernice (2) e serrare a mano.
*OTFSJSFEBMMBMUPMBUUSF[[PEJNPOUBHHJP EFMQJTUPOF
(fornito insieme a guarnizioni di ricambio).
4QBMNBSFHSBTTPQFSNBDDIJOFTVMMBUUSF[[PEJNPOUBHHJPFTVM
pistone (3).
15. Introdurre il pistone (3) dal basso nella scatola dello stadio
della vernice (2) attraverso le guarnizioni inferiori (8). Con un
martello di gomma battere leggermente dal basso sul pistone
(3) fino a poterlo osservare al di sopra della scatola dello stadio
della vernice.