background image

GB

21

W 150

8. Start-up

Before connecting to the mains supply, be sure that the supply voltage is identical with 

the value given on the rating plate.

• 

Unscrew the container from the spray gun.

• 

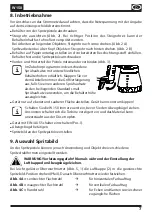
Aligning suction tube. (Fig. 2) 


If the suction tube is positioned correctly, the container contents can be sprayed 

without 

almost 

any 

residue. 


When working on lying objects: Turn the suction tube forwards. (Fig. 2 A) 


Spraying work when working on overhead objects: Turn the suction tube rearwards.

(Fig. 2 B)

• 

Set the container on a sheet of paper, pour in the prepared coating material and screw 

the container tightly onto the spray gun.

• 

Connect the front part with the rear part of the gun (Fig. 3).

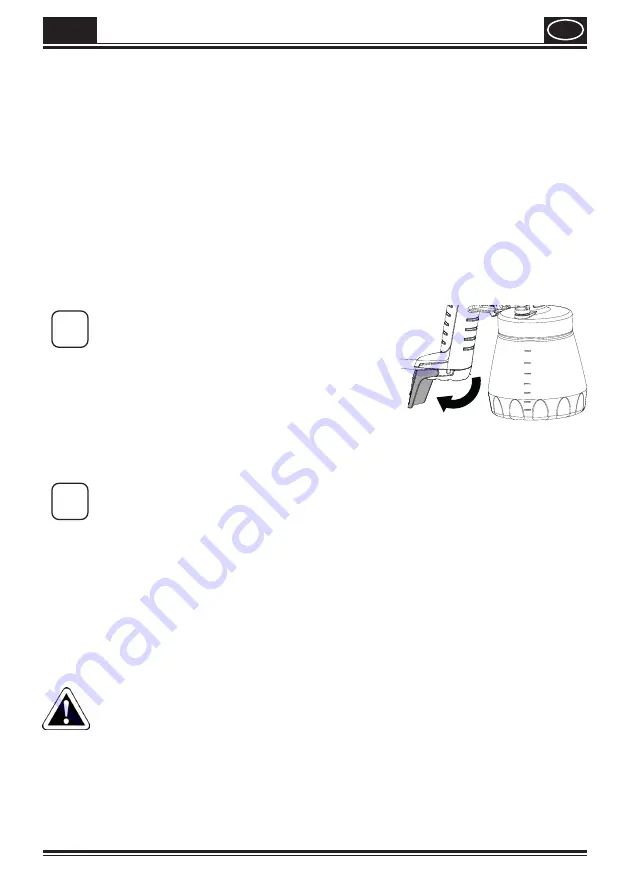
i

A selection of spray attachments with different 

container heights are available as accessories. 

Always fold out the handle extension before 

placing on the ground if you are using a different 

spray attachment to the included Standard 

small spray attachment to balance the container 

height.

• 

Put the machine down only on a level, clean surface. Otherwise the machine could tip 

over!

i

Always switch the W 150 on first before pulling the trigger. Otherwise, there 

will be a delay in the turbine starting up and the material may drip unatomised 

from the nozzle.

• 

Switch the unit on using the ON/OFF switch (Pos. I).

• 

Pull the trigger. 

• 

Adjust the spray setting on the spray gun.

9. Adjusting the desired Spray Setting

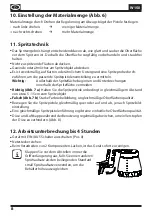
Three different spray jet settings can be chosen on the spray gun, depending on the 

application and target object.

WARNING! Danger of injury! Never pull the trigger guard while adjusting 

the air cap.

With the union nut (fig. 5, 1) slightly unscrewed, turn the air cap (2) to the desired spray 

setting position (arrow). Then tighten the union nut.

Fig. 4 A

 = vertical flat jet

for horizontal surfaces

Fig. 4 B

 = horizontal flat jet

for vertical surfaces

Fig. 4 C

 = circular jet

for corners, edges and hard-to-reach surfaces

Summary of Contents for W 150

Page 1: ...wagner group com D GB NL F WOOD METAL SPRAYER W 150 ORIGINAL BETRIEBSANLEITUNG...

Page 2: ...W 150 a A B b wagner group com D GB NL F WOOD METAL SPRAYER W 150 ORIGINAL BETRIEBSANLEITUNG 12 10 9 6 4 5 3 1 2 16 15 14 17 11 7 8 13...

Page 3: ...W 150 click c d 2 1 A B C...

Page 4: ...W 150 5 15 cm g A B 14 13 15 18 4 3 1 2 3 4 C...

Page 5: ...W 150 13 12 14 6 1 2 11 5 4 3 10 9 8 7 1 1 2...

Page 6: ...W 150 D 1 14 15 28 29 42 43 56 58 GB NL F Fragen Questions Des questions Vragen...

Page 7: ...ls Sie es einmal weitergeben sollten F r Fragen Anregungen undW nsche stehen wir Ihnen gerne unter der auf der R ckseite angegebenen Rufnummer oder der Internetseite www wagner group com service zur V...

Page 8: ...Halten Sie Ihren Arbeitsbereich sauber und gut beleuchtet Unordnung oder unbeleuchtete Arbeitsbereiche k nnen zu Unf llen f hren b Arbeiten Sie mit dem Ger t nicht in explosionsgef hrdeter Umgebung i...

Page 9: ...t beim Gebrauch des Ger tes kann zu ernsthaften Verletzungen f hren b Tragen Sie pers nliche Schutzausr stung und immer eine Schutzbrille Das Tragenpers nlicherSchutzausr stung wieStaubmaske rutschfes...

Page 10: ...ch wenn Sie von unerfahrenen Personen benutzt werden e PflegenSiedasGer tmitSorgfalt KontrollierenSie obbeweglicheGer teteile einwandfrei funktionieren und nicht klemmen ob Teile gebrochen oder so bes...

Page 11: ...TUNG VERLETZUNGSGEFAHR Niemals die Pistole auf sich Personen oder Tiere richten Steckdosen und Schalter unbedingt abkleben Gefahr eines elektrischen Schlages durch eindringendes Spr hmaterial Achtung...

Page 12: ...ogo 6 Nichtverarbeitbare Beschichtungsstoffe Wandfarben ohne rotes Perfect Spray Logo Laugen und s urehaltige Beschichtungsstoffe Brennbare Beschichtungsstoffe 7 Vorbereitung des Beschichtungsstoffes...

Page 13: ...haufsatz als den beiliegenden Standard small Spr haufsatz verwenden um die Beh lterh he auszugleichen Ger t nur auf ebener und sauberer Fl che abstellen Ger t kann sonst umkippen i Schalten Sie die W...

Page 14: ...en innerhalb der Spritzfl che vermeiden Richtig Abb 7 a Halten Sie die Spritzpistole unbedingt in gleichm igem Abstand von etwa 5 15 cm zum Spritzobjekt Falsch Abb 7 b Starke Farbnebelbildung ungleich...

Page 15: ...wieder zusammenbauen Abb 3 7 Ger t einschalten und L semittel bzw Wasser in einen Beh lter oder einTuch spritzen 8 Den obigen Vorgang wiederholen bis an der D se klares L semittel bzw Wasser austritt...

Page 16: ...gen gro z gig Gleitfett ist beigelegt am O Ring des Spr haufsatzes Abb 13 Pos 6 auf 14 Wartung Luftfilter Achtung Ger t niemals ohne Luftfilter betreiben es k nnte Schmutz angesaugt werden und den Bet...

Page 17: ...ohr 2371151 11 Beh lter mit Deckel 2370528 12 Luftfilter 2370530 13 Luftfilter Abdeckung 2370532 14 R hrstab 2304419 15 Gleitfett ohne Abb 2315539 Ersatzteilbestellung 0180 5 59 24 637 14 Cent Min aus...

Page 18: ...ngen Einstell schraube zu weit nach rechts gedreht D se verunreinigt Luftfilter stark verschmutzt Zu geringer Druckaufbau im Beh lter Verd nnen Materialmengen Einstell schraube nach links drehen Reini...

Page 19: ...n abh ngig von der Art undWeise in der das Elektrowerkzeug verwendet wird Es ist notwendig Sicherheitsma nahmen zum Schutz der Bedienperson festzulegen die auf einer Absch tzung der Aussetzung w hrend...

Page 20: ...terworfene Teile sind ebenfalls von der Garantie ausgeschlossen Die Garantieleistung schlie t den gewerblichen Einsatz aus Die Garantieleistung behalten wirunsausdr cklichvor DieGarantieerlischt wennd...

Page 21: ...of Malfunctions 24 18 Technical Data 25 19 Environmental protection 26 20 Important Note regarding Product Liability 26 Translation of the original operating instructions MANY THANKS FOR PLACING YOUR...

Page 22: ...all warnings and instructions for future reference The term power tool in the warnings refer to your mains operated corded power tool or battery operated cordless power tool 1 Safety at the workplace...

Page 23: ...nt and always wear safety goggles Wearing personal protective equipment such as dust mask non slip safety shoes safety helm or ear protection depending on the type of power tools reduces the risk of i...

Page 24: ...gin in power tools that have been maintained badly f Use the power tool accessories insert tools etc in accordance with these instructionsandinafashionspecifiedforthisspecialtooltype Taketheworking co...

Page 25: ...missing or damaged liquids can enter the device and increase the risk of an electric shock Check the nozzle seal before each use When working with theW 150 indoors as well as outdoors ensure that no...

Page 26: ...aints Flammable materials 7 Preparation of the Coating Material The enclosed spray attachment can be used to spray paints varnishes and glazes that are undiluted or slightly diluted Detailed informati...

Page 27: ...ground if you are using a different spray attachment to the included Standard small spray attachment to balance the container height Put the machine down only on a level clean surface Otherwise the ma...

Page 28: ...ce quality Move the spray gun evenly cross wise or up and down depending on the spray pattern setting An even movement of the spray gun results in an even surface quality Wipe off the nozzle and air c...

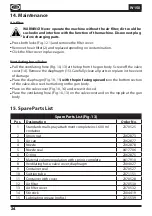
Page 29: ...nozzle 3 Clean the air cap nozzle seal 4 and nozzle with a brush and solvent or water 12 The unit may only be operated with an integer diaphragm Fig 10 15 If any paint has penetrated to the ventilati...

Page 30: ...10 15 with the pin facing upwards on the bottom section of the valve Also see the marking on the gun body Place on the valve cover Fig 10 14 and screw it closed Place the ventilating hose Fig 10 13 on...

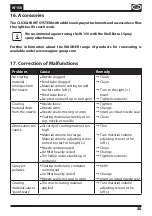
Page 31: ...er Coating material drips from the nozzle Nozzle loose Nozzle worn Nozzle seal is missing or worn Coating material assembly at air cap nozzle or needle Tighten Change Insert an intact nozzle seal Clea...

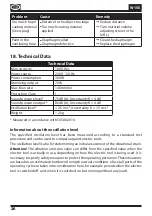
Page 32: ...ight 1 2 kg Measured in accordance with 50580 2014 Information about the oscillation level The specified oscillation level has been measured according to a standard test procedure and can be used to c...

Page 33: ...www wagner group com 3plus1 Registration is only possible if the buyer is in agreement with the data being stored that is entered during registration The guarantee covers and is restricted to free of...

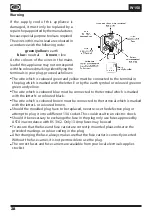
Page 34: ...be connected to the terminal which is marked with the letter N or coloured black The wire which is coloured brown must be connected to the terminal which is marked with the letter L or coloured brown...

Page 35: ...nge 38 16 Accessoires 39 17 Elimination des d fauts 39 18 Caract ristiques techniques 40 19 Protection de l environnement 41 20 Indication importante de responsabilit de produit 41 Traduction du mode...

Page 36: ...d utilisation et joignez le au produit si jamais vous c dez celui ci Le terme utilis dans la suite d outils lectriques se rapporte aux outils lectriques fonctionnant sur le secteur avec c ble d alime...

Page 37: ...yezattentif cequevousfaitesetfaitespreuvedebonsenslorsdel utilisation d un outil lectrique N utilisez pas l appareil si vous tesfatigu ou sous l influence de drogues de l alcool ou de m dicaments Un m...

Page 38: ...mp che le d marrage intempestif de l appareil d Rangezlesoutils lectriquesnonutilis shorsdeport edesenfants Nelaissez aucune personne utiliser l appareil si elle n est pas familiaris e avec celui ci o...

Page 39: ...pulv risateursnepeuventpas treutilis spourlapulv risationdesubstances inflammables Ne pas nettoyer le pistolet avec des solvants inflammables Attention aux dangers pouvant provenir du produit pulv ris...

Page 40: ...ER remplissent l ensemble des prescriptions de s curit 4 Description tendue de la fourniture Description Fig 1 1 Capot d air 2 Buse 3 Ecrou raccord 4 Fa ade amovible Standard small 5 G chette 6 Interr...

Page 41: ...qu e sur la plaque signal tique D visser le r servoir du pistolet pulv risateur Aligner le tuyau de mont e Fig 2 Si la position du tube plongeur est correcte le contenu du godet peut tre pulv ris prat...

Page 42: ...r glage de la g chette du pistolet rotation gauche moins de peinture rotation droite plus de peinture 11 Pulv risation La forme du jet d pend largement de ce que la surface traiter soit lisse et propr...

Page 43: ...rlepistolet Pousserl g rementlecrochet Fig 3 clic verslebas Fairetournerla partieavantetlapartiearri redupistoletl uneparrapport l autreetlesd sassembler 3 D visser le r servoir Vider les restes du pr...

Page 44: ...1 Pousser le joint d tanch it de la buse fig 11 4 sur l aiguille 18 la rainure fente devant tre tourn e vers vous 2 Enficher la buse fig 11 3 sur le corps de pistolet et trouver la position correcte p...

Page 45: ...ible Standard small cpl avec godet 600 ml 2370525 2 Ecrou raccord 2362873 3 Capot d air 2362877 4 Buse 2362878 5 Joint de buse 0417706 6 Joint torique 2362875 7 R glage du d bit de peinture avec resso...

Page 46: ...de r glage du d bit de peinture tourn e trop loin vers la droite Buse encrass e Filtre air fortement colmat Etablissement de pression dans le r servoir trop faible Le diluer Tourner la vis de r glage...

Page 47: ...ioneffectivedel outil lectrique enfonctiondelamani redontcelui ciestemploy Il est n cessaire de d terminer les pr cautions prendre pour prot ger l utilisateur celles ci reposent sur une estimation de...

Page 48: ...lisation ou la mise en service ainsi que des montages ou r parations effectu s et qui ne figurent pas dans nos instruc tions de service excluent toute responsabilit Il en va de m me pour des pi ces as...

Page 49: ...group com service Inhoudsopgave 1 Uitleg van de gebruikte symbolen 44 2 Algemene veiligheidsaanwijzingen 44 3 Veiligheidsaanwijzingen voor spuitpistolen 47 4 Beschrijving Leveringsomvang 48 5 Verwerkb...

Page 50: ...ernstige verwondingen optreden Bewaar de bedieningshandleiding zorgvuldig en houd deze bij het product als u dit eens zou doorgeven Met het hieronder gebruikte begrip elektrisch gereedschap wordt zow...

Page 51: ...risico van een elektrische schok 3 Veiligheid van personen a Wees alert let op wat u doet en gebruik uw gezond verstand bij het werken met elektrisch gereedschap Gebruik het apparaat niet wanneer u m...

Page 52: ...de kant legt Deze voorzorgsmaatregel voorkomt dat het apparaat onbedoeld wordt gestart d Bewaar elektrisch gereedschap wanneer het niet wordt gebruikt buiten bereik van kinderen Laat geen personen met...

Page 53: ...rzaaktdoorhetverspotenmateriaalenneemde aanwijzingen op het materiaalreservoir of van de fabrikant van het materiaal in acht Letop Draag adembescherming verfnevel en oplosmiddeldampen zijn schadelijk...

Page 54: ...veiligheidsvoorschriften is voldaan 4 Beschrijving Leveringsomvang Beschrijving Leveringsomvang Afb 1 1 Luchtkap 2 Spuitkop 3 Dopmoer 4 Standard small spuitopzetstuk 5 Trekker 6 AAN UIT schakelaar 7 S...

Page 55: ...het machineplaatje Container van het spuitpistool losschroeven Aanzuigstok uitrichten afb 2 Bij een juiste stand van de aanzuigstok kan de inhoud van het reservoir nagenoeg zonder restant worden versp...

Page 56: ...ateriaal instellen door de stelschroef op de trekker te verdraaien naar links draaien minder materiaal naar rechts draaien meer materiaal 11 Spuittechniek Het spuitbeeld wordt grotendeels bepaald door...

Page 57: ...iten of door de trekker in te drukken en de verf terug te laten lopen in de verfemmer 2 Pistool demonteren Haak afb 3 klik iets omlaag drukken Voorste en achterste pistooldeel tegen elkaar draaien en...

Page 58: ...een elektrische schok toenemen 1 Spuitkopafdichting afb 11 4 over de naald 18 schuiven de groef gleuf moet daarbij naar u wijzen 2 Breng de spuitkop afb 11 3 aan op het pistoollichaam en zoek de juis...

Page 59: ...Benaming Bestelnr 1 Standard small spuitopzet compl met reservoir 600 ml 2370525 2 Dopmoer 2362873 3 Luchtkap 2362877 4 Spuitkop 2362878 5 Spuitkopafdichting 0417706 6 O ring 2362875 7 Stelschroef mat...

Page 60: ...teriaal te groot Stelschroef materiaalhoeveelheid te ver naar rechts gedraaid Spuitkop verontreinigd Luchtfilter sterk vervuild Te lage drukopbouw in container Verdunnen Stelschroef materiaalhoeveelhe...

Page 61: ...angegeven waarde afwijken afhankelijk van de wijze waarop het elektrische gereedschap wordt gebruikt Het is noodzakelijk om veiligheidsmaatregelen ter bescherming van de bedienende persoon vast te leg...

Page 62: ...te wijten aan ondeskundig gebruik of ondeskundige inbedrijfname Degarantie vervalt bij zelfstandig uitgevoerde montages of reparaties die niet in onze bedieningshandleiding zijn vermeld De aan normale...

Page 63: ...ation of conformity is enclosed with the product If required it can be re ordered using order number 2371193 D claration de conformit UE Nous d clarons sous notre responsabilit que ce produit est en c...

Page 64: ...0 8060 M r T 36 22 407 321 F 36 22 407 852 E CORECO SK S R O Kr ovsk ulica 8 7133 927 01 a a T 42 1948882850 F 42 1313700077 PUT WAGNER SERVICE ul E Imieli 27 41 605 Swietochlowice T 48 32 346 37 00 F...

Reviews: