


D
54
W 990 Flexio
GB
54
W 990 Flexio
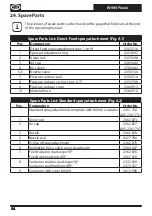
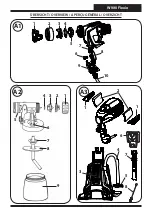
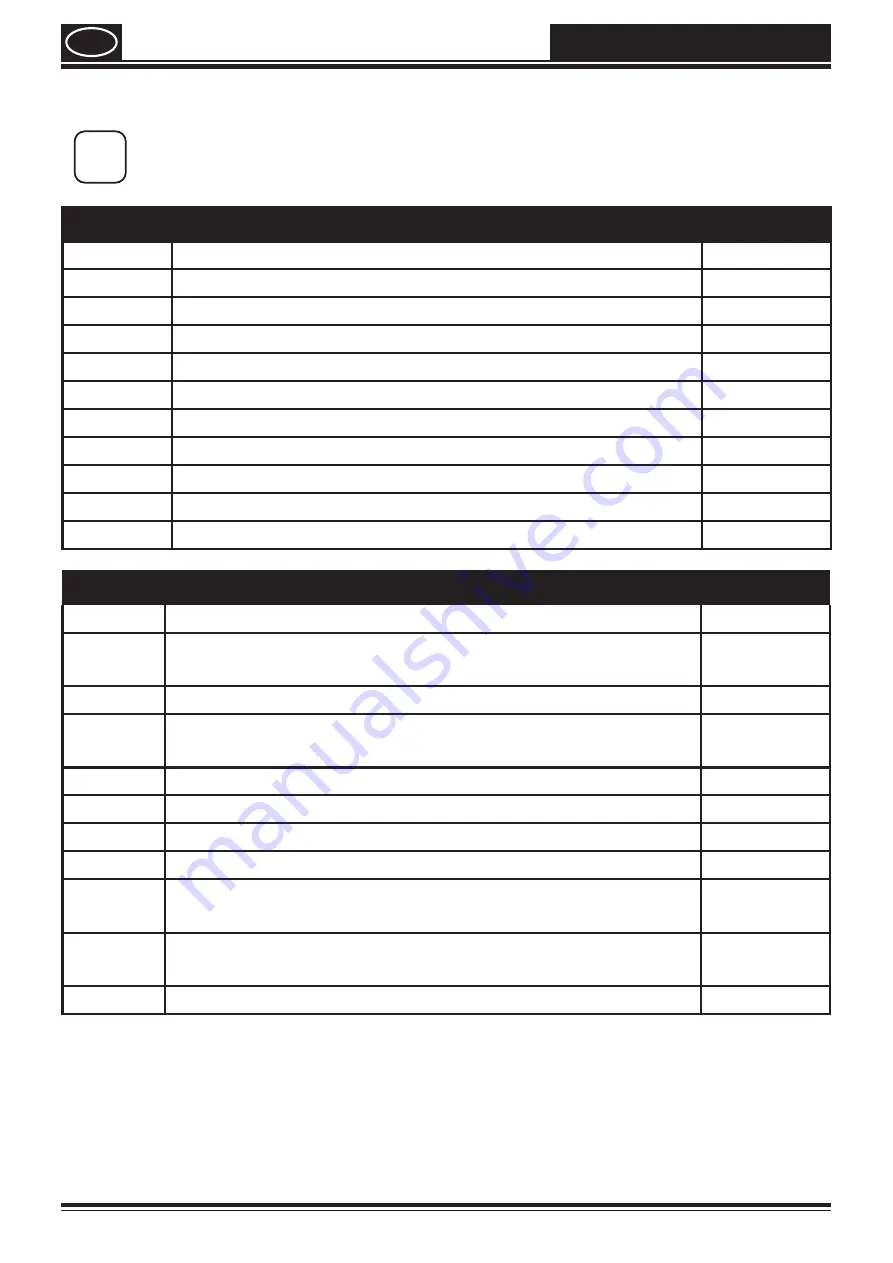
24. Spare Parts
i
The pictures of spare parts can be found on the page that folds out at the end
of the operating manual.
Spare Parts List: Direct Feed spray attachment (Fig. A1)
Pos.
Designation
Order No.
Direct Feed spray attachment (pos. 1 to 9)
2363 216
1
Spray jet adjustment ring
2353 697
2
Union nut
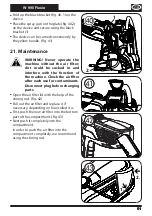
2353 698
3
Air cap
2365 440
4
Air screen
2365 442
5,6
Nozzle, valve
2356 146
7
Pressure reducer seal
2350 214
8
Pressure reducer cp. (incl. pos. 6, 7)
2353 700
9
Pressure reducer cover
2362 913
10
Material hose
2362 914
Spare Parts List: Standard spray attachment (Fig. A2)
Pos.
Designation
Order No.
Standard spray attachment complete with 800 ml container
2361 730
AUS 2361 731
1
Union nut
2362 873
2
Air cap
2362 877
AUS 2361 747
3
Nozzle
2362 878
4
Nozzle seal
0417 706
5
O-ring of spray attachment
2362 875
6
Ventilating hose, valve cover, diaphragm
2304 027
7
Feed tube (no marking or R)*
Feed tube (marking AR)*
2362 876
2367 410
8
Container seal (no marking or R)*
Container seal (marking AR)*
2323 039
2370 527
9
Container with cover 800 ml
0413 909


