background image

4

English

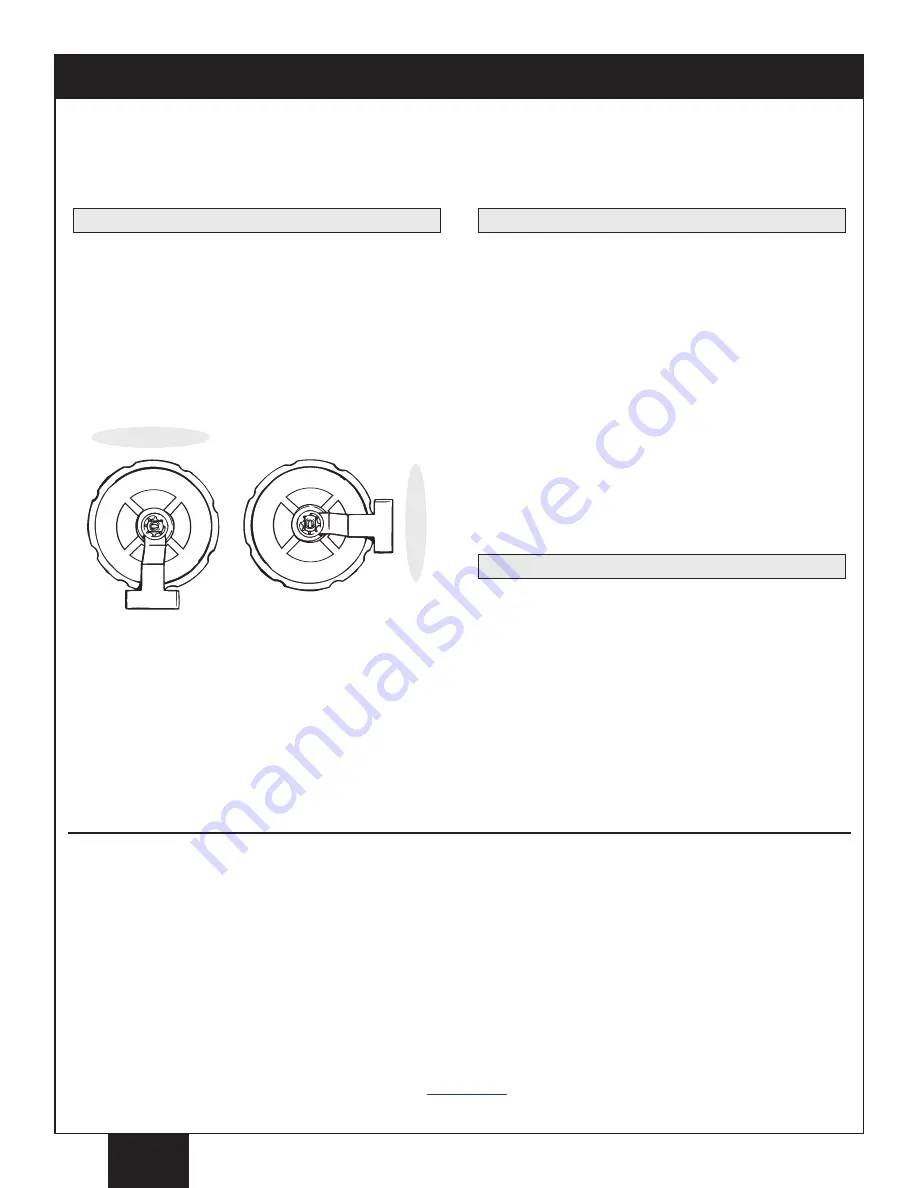
The wide angle tip produces a wide pattern that can be adjusted
horizontally or vertically.  

To adjust:

1. Make sure the sprayer is unplugged.  Loosen the wide angle

tip by turning the tip 

counterclockwise

1/4 turn.

2. Turn the adjusting arm so that it is pointing down for a

horizontal pattern 

(a)

. Turn the adjusting arm so that it is

pointing to the side for a vertical pattern 

(b)

.

3. Tighten the tip firmly by hand.

(a)

(b)

Wide Angle Tip (Wide Shot™)

The round tip produces a round pattern.  Use a round tip if the
surface you are spraying is too small for use with the wide angle tip.

A round tip is an option included with some models and is available
at your local retailer. Use the size that works best for the type of
material you are spraying.  The color of the tip center indicates its
size:

1.

Blue (light materials)

- .023 inch (0.6mm) opening.  This

size works best for oil-based materials.

2.

Pink (medium materials)

- .031 inch (0.8mm) opening.  This

all purpose size works best for latex materials.

3.

Green (heavy materials)

- .039 inch (1.0mm) opening.  This

size works best for hard to spray, coarse materials such as
thick latex.

The stain tip is an option included with some models.  It has a
specially designed opening for use with thin materials such as thin
stains, sealers and waterproofers, and can be adjusted to reduce
overspray.  If you did not receive a stain tip and will be spraying one
of these materials, the tip can be purchased at your local retailer.

The stain tip pattern is round with a fine spray.  To adjust the spray
pattern size and coarseness, turn the tip slightly counterclockwise to
narrow the pattern and make the spray more coarse.  Turn the tip
slightly clockwise to widen the pattern and make the spray more fine.

Stain Tip

Round Tip

IMPORTANT - 

Make sure to tighten all spray tips firmly by hand.  If the spray tip is not tightened firmly enough, the sprayer could

leak or the tip could be damaged.  Do not use a tool to tighten the spray tip.  If the tip is too tight, it may be damaged.  

• It is important to mix the material thoroughly before you begin.  Do not shake the material to mix it.  Always stir the material

gently but thoroughly before use.  

• Remove any skin that has formed on the top of the material.  Do not mix the skin into the material.  The skin can break up

and clog the sprayer. Older paint may need to be strained.

• The swirl valve that comes with your sprayer has a clear base.  It is to be used with latex and oil-based paints only.

• If you will be spraying lacquers, make sure to use the optional swirl valve designed for lacquers, available for purchase by

calling our toll free number.  It has a gray base (look in 

Accessories

for part number).

Selecting the Proper Tip:

Important Preparation Tips:

It is important that you use the proper spray tip based on your type of spraying job and the type of material you plan to spray..
Read below for details.

Important - Before You Begin

Summary of Contents for WideShot

Page 1: ...y Pattern 9 Priming with the Suction Extension 10 Overspray 10 How to Spray 11 Using the quick clean feature fluid container 12 Using the quick clean feature suction extension 13 Cleanup for oil based materials fluid container 14 Cleanup for oil based materials suction extension 15 Cleaning the Components Reassembly 16 Maintenance 17 Replacement Parts 17 Troubleshooting 18 Français 19 Español 37 P...

Page 2: ...oride and 1 1 1 trichloroethane They are not compatible with aluminum and may cause an explosion If you are unsure of a material s compatibility with aluminum contact your coating supplier HAZARD HAZARDOUS VAPORS Paints solvents insecticides and other materials can be harmful if inhaled or come in contact with the body Vapors can cause severe nausea fainting or poisoning PREVENTION Use a respirato...

Page 3: ... are in doubt as to whether the product is properly grounded Do not modify the plug provided If the plug will not fit the outlet have the proper outlet installed by a qualified electrician This product is for use on a nominal 120 volt circuit and has a grounding plug that looks like the plug illustrated below Make sure that the product is connected to an outlet having the same configuration as the...

Page 4: ...a stain tip and will be spraying one of these materials the tip can be purchased at your local retailer The stain tip pattern is round with a fine spray To adjust the spray pattern size and coarseness turn the tip slightly counterclockwise to narrow the pattern and make the spray more coarse Turn the tip slightly clockwise to widen the pattern and make the spray more fine Stain Tip Round Tip IMPOR...

Page 5: ...rn openings b in the pump housing 3 Fill the container with the material to be used a b 6 Line up the tab c on the pump housing with the notch d on the material container Twist the pump ring to thread the cup onto the pump Plug in the sprayer 5 Insert the suction set into the intake opening c d 7 Take cartridge and slide the rear of the piston into the spray gun Make sure the pegs e on the cartrid...

Page 6: ...tion hose set onto the intake and return ports of the dual hose fitting The the larger hose h goes onto the intake i port 5 Take cartridge and slide the rear of the piston into the spray gun Make sure the pegs f on the cartridge line up with the guides g at the bottom of the sprayer Press cartridge up until it locks into place i h 8 Submerge the suction set assembly into the material container and...

Page 7: ...f backpack lid Assemble backpack kit as shown and secure clip onto suction hose d When backpack kit is assembled follow steps 1 6 in Suction Extension Setup previous page to attach the kit to the sprayer c 6 Place lid on container and press firmly into place Secure with the tabs f 5 Pour material into back pack to fill line Do not fill above the indicated fill line e e f 7 Back pack can either be ...

Page 8: ...m to maximum flow NOTE Do not get the speed control wet or the sprayer could be damaged Be careful during use and cleanup Speed Control Flow Control Knob Lower speed levels give you greater control but require more time to cover an area Depending upon the thickness of the material or conditions the settings may need to be adjusted Refer to the chart on the right To adjust the speed setting press t...

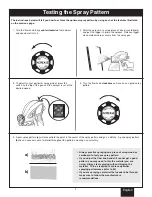
Page 9: ...spray pattern by using each of the features illustrated on the previous page 5 A poor spray pattern a will concentrate the paint in the center of the spray pattern and go on blotchy A good spray pattern b has an even amount of material throughout the pattern and will go on smoothly a b Always practice spraying on a piece of scrap wood or cardboard to test your spray pattern If you adjust the flow ...

Page 10: ...the sprayer tip This could take up to three minutes NOTE The suction set must remain completely submerged in the material If it is not completely submerged and air is sucked into the system the piston could seize If the piston seizes the sound the gun makes will change to a low hum and the gun will quickly become hot to the touch Never run the sprayer when the piston is seized Should this happen c...

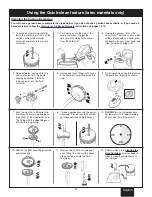
Page 11: ...of the spray tip turn off the sprayer immediately or the sprayer could be damaged The sprayer will leak from behind the spray tip if the swirl valve is not seated properly If you notice material leaking from this area Never tip the sprayer at more than a 45º angle when spraying overhead Material could get into the motor housing and cause an electric shock 3 Unplug the sprayer immediately Remove th...

Page 12: ...from the small container and properly dispose of the cleaning solution BE CAREFUL NOT TO LOSE ANY OF THE PARTS THAT ARE STILL IN THE SMALL CONTAINER 0 30 15 45 6 Depending upon the thickness of the material some residue may remain on the sprayer parts Remove any remaining residue with the cleaning brush and the appropriate cleaning solution 7 NOTE Make sure to completely remove all material from t...

Page 13: ...n spring spray tip and swirl valve from the pump housing assembly Place all removed parts into the fluid container 6 Fit the quick clean cap into place on the pump housing ring as shown 5 Unlock dual hose fitting with hoses still attached from pump assembly ring 7 Push the dual hose fitting a into the intake and return openings on the bottom of the quick clean cap The fitting with the ridge b goes...

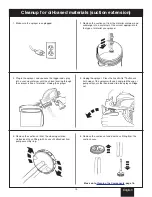
Page 14: ...ve on to Cleaning the Components page 16 3 Reattach the container and plug in the sprayer Squeeze the trigger until the solution comes though the sprayer for several seconds 4 Unplug the sprayer Press the Lock N Go buttons on both sides of the sprayer with one hand grab the cup or pump with your other hand and slide the spray cartridge out 5 Remove the container and properly dispose of the remaini...

Page 15: ...nd container until the solvent coming through the sprayer is free of material Unplug the sprayer 4 Unplug the sprayer Press the Lock N Go buttons on both sides of the sprayer with one hand grab the cup or pump with your other hand and slide the spray cartridge out 5 Remove the suction set from the cleaning solution Unlock dual hose fitting with hoses still attached from pump assembly ring 6 Remove...

Page 16: ...the pump 4 Take spray cartridge and slide the rear of the piston into the spray gun Make sure the pegs a on the cartridge line up with the guides b at the bottom of the sprayer Press cartridge up until it locks into place Pull on the container to make sure assembly is locked into place 3 NOTE Make sure to completely remove all material from the inside of the piston chamber by scrubbing with the br...

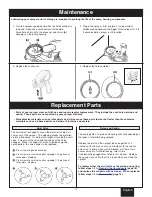
Page 17: ...gallons of latex paint Replace 3 Front view of a swirl valve after spraying 7 10 gallons of latex stain Replace Swirl Valve The average life of a piston and spring will vary depending on the types of material being sprayed Replace the piston if the sprayer takes longer than 15 seconds with the suction set or 3 minutes with the suction extension to prime when well lubricated or if there is an exces...

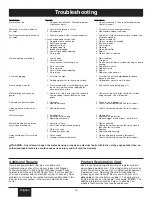
Page 18: ...an and oil or replace 1 Refill container 2 Thin paint 3 Clean and insert firmly in intake opening on pump housing 4 Replace swirl valve 5 Replace if worn 6 Adjust 7 Replace or clean and oil 1 Turn flow control knob clockwise to reduce pressure and flow 2 Hold sprayer closer to work surface 1 See section on spraying page 11 1 Use a small brush on drips that fall on surface being sprayed Use a drop ...

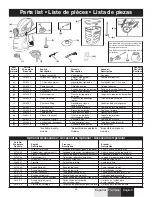
Page 19: ...e piezas a b c f h g m i k l j d e n see Optional Accessories for cartridge kits voir les Accessoires Optionnels pour des ensemble de cartouche vea los Accesorios Opcionales para los kits del cartucho o p 0272117 Lacquer swirl valve Soupape rotative pour produits de laques Válvula en espiral para lacas 0272904 Replacement swirl valves 2 Soupapes rotative de remplacement 2 Válvula en espiral de rep...

Page 20: ... APPLIQUE PAS AUX ACCESSOIRES Si un produit est défectueux au niveau des matériaux ou de la fabrication au cours de la durée applicable de la garantie le renvoyer avec une preuve d achat port payé à l un des centres de service autorisé par Wagner Une liste des adresses de ces centres accompagne tous les produits Le centre de service autorisé réparera ou remplacera le produit au choix de Wagner et ...

Reviews: