14
DATE & TIME SET PROCEDURE
It is important to set the Date & Time before using your blood
pressure monitor, so that a time stamp can be assigned to each
record that is stored in the memory.
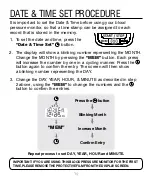
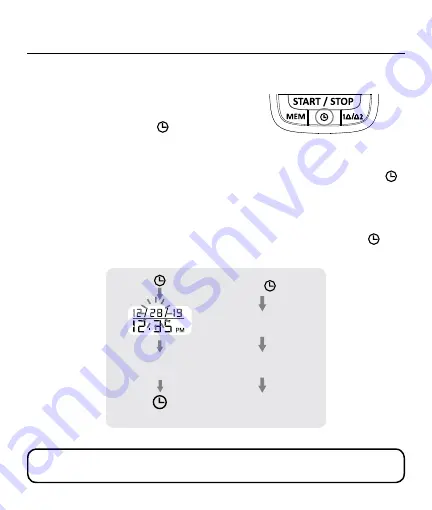
1. To set the date and time, press the
“Date & Time Set”
button.
2. The display will show a blinking number representing the MONTH.
Change the MONTH by pressing the
“MEM”
button. Each press
will increase the number by one in a cycling manner. Press the
button again to confirm the entry. The screen will then show
a blinking number representing the DAY.
3. Change the DAY, YEAR, HOUR, & MINUTE as described in step
2 above, using the
“MEM”
to change the numbers and the
button to confirm the entries.
SYS
DIA
mmHg
mmHg
Repeat process to set DAY, YEAR, HOUR and MINUTE.
IMPORTANT: IF YOU ARE USING THIS BLOOD PRESSURE MONITOR FOR THE FIRST
TIME, PLEASE REMOVE THE PROTECTIVE FILM FROM THE DISPLAY SCREEN.
Press the button
“MEM”
Blinking Month
Increase Month
Confirm Entry

