background image

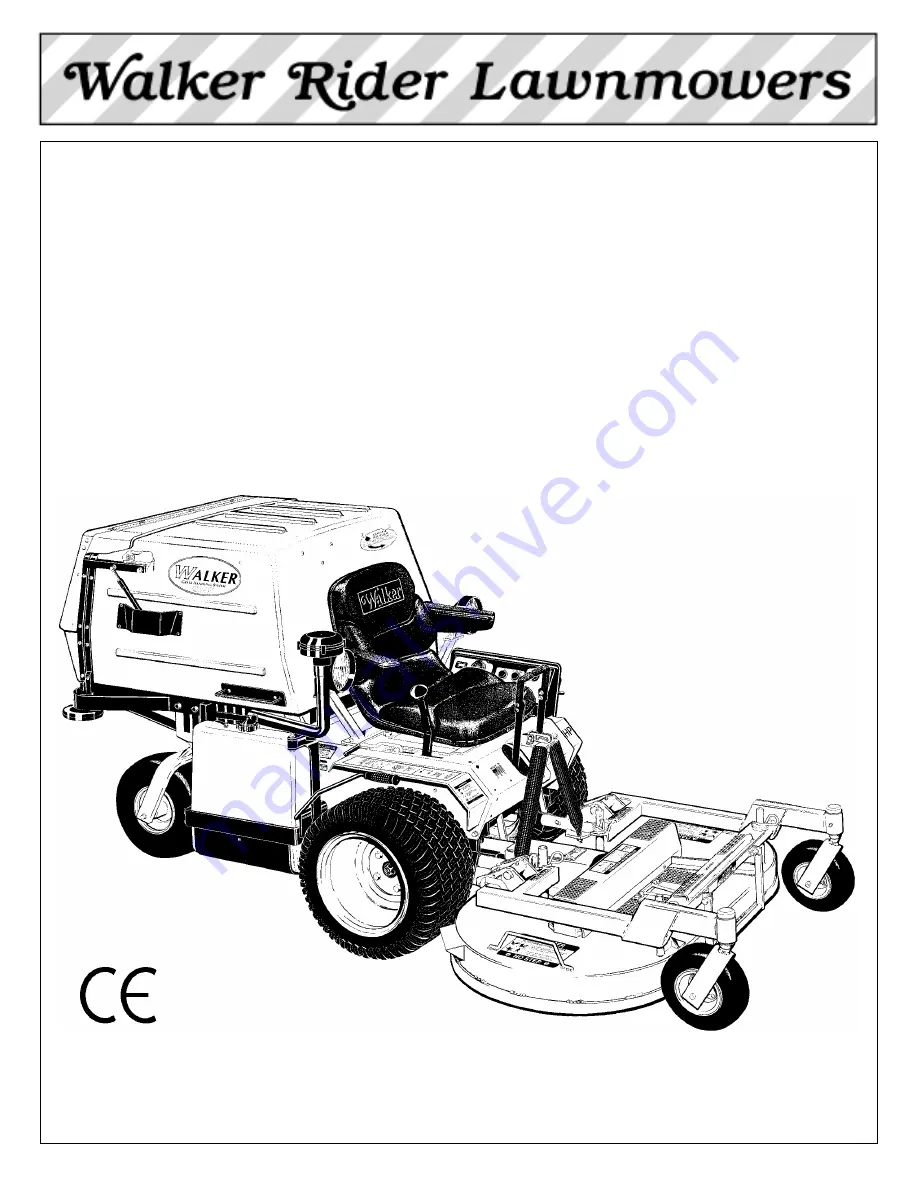
OWNER’S MANUAL

Safety, Assembly, Operating, and Maintenance Instructions

Model MT (20.0 HP)

Model MTL (25.0 HP)

Model MTEFI (26.0 HP)

(Covers 2004 Production)

Please Read and Save These Instructions

Effective Date: 01-01-04

For Safety, Read All Safety and Operation 

P/N 8000-9

Instructions Prior to Operating Machine 

Price $5.00

Summary of Contents for MT, MTL, MTEFI, MTLEFI

Page 1: ... Instructions Model MT 20 0 HP Model MTL 25 0 HP Model MTEFI 26 0 HP Covers 2004 Production Please Read and Save These Instructions Effective Date 01 01 04 For Safety Read All Safety and Operation P N 8000 9 Instructions Prior to Operating Machine Price 5 00 ...

Page 2: ...njury to the operator or others If anything in this manual is confusing or hard to understand please call our service department at 970 221 5614 for clarification before operating or servicing this mower This manual covers Model MT with the Kohler Command CH20 20 0 HP gasoline engine or op tional Kohler Command Pro CH26 26 0 HP Electronic Fuel Injection EFI gasoline engine or op tional Kohler Aegi...

Page 3: ...ing ______________________ 27 PREOPERATING CHECKLIST ____________ 28 Operating Instructions_____________ 31 CONTROL IDENTIFICATION LOCATION AND FUNCTION _____________ 31 Operating Controls ___________________ 31 Engine Choke Model MT and MTL only 31 Engine Throttle _____________________ 32 Forward Speed Control FSC _________ 32 Steering Levers _____________________ 32 Blade Clutch PTO ____________...

Page 4: ...re Pressure ________________________ 69 Wheel Bolt Torque ____________________ 69 Sharpen Mower Blades ________________ 69 Drive Belts __________________________ 70 Mower Deck Gearbox Oil Seals _________ 71 Spark Plugs _________________________ 71 Ignition Wires________________________ 71 Fuel Lines and Clamps ________________ 71 Radiator Hoses and Clamps MTL ______ 71 Engine Starter _____________...

Page 5: ... SYSTEM __________________ 92 Circuit Breakers ______________________ 92 Wiring Diagram Model MT_____________ 93 Wiring Diagram Model MTEFI __________ 94 Wiring Diagram Model MTL____________ 96 Warranty___________________________ 97 ...

Page 6: ...dual hydrostatic transmissions which drive the main wheels HYDROSTATIC TRANSMISSION transmits and controls power from the ground drive belt to the main drive wheel LEFT HAND LH refers to the left hand side of the tractor when the operator is seated facing forward in the tractor seat POWER TAKE OFF PTO transmits engine power to run the cutter blades and GHS blower POWERFIL spreads the mowed materia...

Page 7: ...r the service of these components during the limited war ranty period it is important to find a local authorized servicing agent of the component manufacturer Any unauthorized work done on these components dur ing the warranty period may void the warranty If you have any difficulty finding an authorized outlet or obtaining warranty service please contact our Ser vice Department for assistance Walk...

Page 8: ... Gap 030 in 76 mm 030 in 76 mm Crankcase Capacity CH20 2 1 qts 2 0 liters Crankcase Capacity CH26 2 1 qts 2 0 liters Crankcase Capacity LH685 2 0 qts 1 9 liters Crankcase Lubricant API SG SH SJ or higher Grade Oil Only with 10W 30 Viscosity above 0 F 18 C or 5W 20 or 5W 30 Viscosity below 32 F 0 C API SG SH SJ or higher Grade Oil Only with 10W 30 Viscosity above 0 F 18 C or 5W 20 or 5W 30 Viscosit...

Page 9: ...d Lever Control Individual Wheel Forward Speed Control Precision Friction Lock Lever Cruise Control with Neutral Park Position Precision Friction Lock Lever Cruise Control with Neutral Park Position Service Brake Dynamic Braking through Hydrostatic Transmission Dynamic Braking through Hydrostatic Transmission Parking Brake Mechanical Pin Lock in Transmission Gear Mechanical Pin Lock in Transmissio...

Page 10: ... 2900 RPM 16700 FPM 5090 m min 2900 RPM 16700 FPM 5090 m min TIRE SIZE Deck Caster Wheel 2 80 2 50 4 Pneumatic 4 Ply 2 80 2 50 4 Pneumatic 4 Ply Deck Caster Wheel Optional 8 25 x 2 75 Semi Pneumatic 8 25 x 2 75 Semi Pneumatic Drive 18 x 9 50 8 4 Ply 18 x 9 50 8 4 Ply Rear Dual 13 x 5 00 6 4 Ply 13 x 5 00 6 4 Ply TIRE PRESSURE Deck Caster Wheel 20 PSI 137 kPa 20 PSI 137 kPa Drive 15 PSI 103 kPa 15 ...

Page 11: ... in 122 cm Tilt Up deck 205 lb 93 kg Deck sizes range from 42 to 74 in 107 to 157 cm with corresponding deck weights ranging from 170 to 400 lb 77 to 136 kg Optional 9 5 Bushel Grass Catcher adds approx 5 lb 2 kg and 5 in 13 cm in Height DRIVE BELTS Engine PTO Walker P N 8230 Walker P N 8230 Jackshaft Drive Gates 3VX375 or Walker P N 6250 Gates 3VX375 or Walker P N 6250 Ground Drive Micro V Walker...

Page 12: ...t Driven by 12 Volt Electric Gearmotor Spreads Material throughout Interior of Catcher 25 Cycles Minute SEAT Contour Molded with Nylon Backed Vinyl Cover and Integral Foam Cushion Contour Molded with Nylon Backed Vinyl Cover and Integral Foam Cushion FRAME BODY CONSTRUCTION Frame All Welded Unitized Steel Chassis All Welded Unitized Steel Chassis Body 14 Gauge Steel 14 Gauge Steel Deck 11 Gauge St...

Page 13: ...Rod Adjustment Nut LH Deck Caster Wheels Tilt Up Deck Handle Catcher Lift Dump Handle Deck Support Pins and Height Adjustment Hitch Pins Catcher Door Safety Latch Spring Clip Footrests Counterweight Spring and Protective Cover Fuel Tank and Cap Tilt Up Latch Tilt Up Hook Deck Lift Handle Cutting Height Adjustment Turbine Precleaner Transmission Control Rod Adjustment Nut RH Deck Support Arms Front...

Page 14: ...oor Handle Dump Plate Catcher Door Fuel Filter Tailwheel Fork and Wheels Removable Grass Catcher Screen Not Visible Catcher Lift Dump Handle Gas Spring Cover Instrument Panel Box Shock Mounted Catcher Exhaust Deflector Oil Drain Plug Tailpipe Muffler Oil Filter Anti Scuff Roller Rear View and Left Side View ...

Page 15: ...on PTO Clutch Lever RH Transmission Lockout Lever PTO Gearbox Dipstick Jackshaft Positive Battery Cable Battery Donaldson Air Cleaner LH Transmission Lockout Lever LH Hydrostatic Transmission Precleaner Tube Fuel Tank Air Cleaner Cover Fuel Filter Fuel Pickup Line Neutral Safety Switch Negative Battery Cable Model MT 30 Amp Circuit Breaker Turbine Precleaner Fuel Pump Muffler Heat Shield Air Intak...

Page 16: ...Water Pump Radiator Oil Dipstick Oil Fill Radiator Cap Tailpipe Model MTL Low Idle Adjustment Screw Muffler Shield Air Restriction Indicator Radiator Guard Air Intake Plenum Air Cleaner Cover Overflow Hose Overflow Tank Donaldson Air Cleaner Muffler Throttle and Choke Linkage Top View Engine Compartment Model MTL ...

Page 17: ... Tube Fuel Tank Air Cleaner Cover Cylinder Head Temperature Switch Air Intake Hose Donaldson Air Cleaner Fuel Return Line Model MTEFI Fuel Pickup Line Muffler Muffler Grass Shield Air Intake Plenum Ignition Coil Rubber Bumper Catcher Support Fuel Pump Fuel Line to Engine High Pressure Top View Engine Compartment Model MTEFI ...

Page 18: ...act your authorized Walker Mower Dealer or call Walker Manufacturing Company at 970 221 5614 BEFORE OPERATING 1 Read and understand the contents of this Owner s Manual before starting and operat ing the machine Become thoroughly familiar with all machine controls and how to stop the machine and disengage the controls quickly Replacement Owner s Manuals are available by sending the Model and Serial...

Page 19: ... attempt to make any adjustments while theengineis running except where spe cifically instructed to do so 12 The electrical system battery contains sulfuric acid Avoid any contact with skin eyes and clothing Keep the battery and acid out of reach of children OPERATING 1 Operate the mower only in daylight or in good artificial light with good visibility of the area being mowed 2 Sit on the seat whe...

Page 20: ...k door OPEN Dan gerous projectiles may be thrown out of the dis charge chute or the back of the grass catcher 17 For GHS equipped models use care when closing the grass catcher door Keep fingers and hands away from the hinge and pinch points when the door is being closed Also keep fingers and hands clear of the door frame The door is held closed with springs and the door may slam shut with conside...

Page 21: ...may cause hazardous conditions 8 Never attempt to disconnect any safety devices or defeat the purpose of these safety devices 9 Do not change the engine governor settings or overspeed the engine The governor has been factory set for maximum safe engine operating speed 10 Use genuine factory replacement parts Substitute parts may result in product malfunc tion and possible injury to the operator an...

Page 22: ...ear of Grass Catcher Exhaust Screen 5869 Engine Shroud 5855 SAFETY CONTROL AND INSTRUCTION DECALS Safety Control and Instruction Decals are installed on the machine if any are missing illegible or damaged a replacement should be ordered and installed before putting the machine into operation The Decal Part Number is listed below and in the Parts Manual Each End of Mower Deck 5808 All Decks Except ...

Page 23: ... to Dipstick 7827 Gear Axle 5810 1 Deck Gearbox Cover 5807 3 On Engine 6810 Left Side of Operator Seat 8819 SAFETY CONTROL AND INSTRUCTION DECALS Safety Control and Instruction Decals are installed on the machine if any are missing illegible or damaged a replacement should be ordered and installed before putting the machine into operation The Decal Part Number is listed below and in the Parts Manu...

Page 24: ...ere damage to the machine A hazard may be cre ated by damage to critical working parts and safety systems Wet Battery Service If the battery has been shipped wet but the electro lyte level is low or the battery needs to be charged then 1 Fill each battery cell with drinking water to the bottom of the vent wells 2 Charge battery Refer to Battery Charging in this section Dry Battery Service CAUTION ...

Page 25: ...result in severe corrosion 3 Install battery Battery Installation IMPORTANT Make sure battery is securely mount ed in the frame A loose battery may cause damage to the case resulting in acid leakage and severe dam age to the machine A hazard may be created by damage to critical working parts and safety systems Install the battery in the mower as shown in Battery Installation photo Connect the posi...

Page 26: ...led make sure the spacer washers fit over the spacer tube and are not caught between the fork and the end of the tube The washers should move freely on the axle spacer tube 5 Grease the caster wheel bearings and caster pivot bearings one grease fitting for each wheel and each pivot Deck Discharge Chute Installation GHS Rear Discharge Models Only Mount the discharge chute hinge on top of the deck d...

Page 27: ...support arm 2 on the tractor Refer to Mower Deck Installation pho to on next page for location of deck support arm 2 Engage the deck carrier frame tube sockets on the tractor support arms refer to Discharge ChuteandPTOShaftGuardInstallationphoto forsocket location Slidethedeck ontothesup port arms all the way if SD equipped model approximately 3 in 76 mm if GHS equipped model NOTE When installing ...

Page 28: ...ad of lifting the front of deck and clip the counterweight springs to the receptacle on front of body Lower the front body to tension the springs Refer to Deck Counterweight Spring Instal lation Photo Mower Deck Installation PTO Shaft Connection 7 With the counterweight springs connected the weight on the deck caster wheels should be 15 to 25 Ib 7 to 11 kg Check this weight by lifting on the front...

Page 29: ... 3 Check the front to rear level Rotate the blades to point forward Measure the distance from blade tip to ground on the front and rear The rear of the blade should be 1 8 to 1 4 in 3 to 6 mm higher than the front of the blade shim the rear or front deck support pins equally to achieve at least 1 8 in 3 mm difference NOTE The mower deck and support frame are jig welded within normal tolerances ver...

Page 30: ...CK AND SERVICE ENGINE AIR CLEAN ER SYSTEM Check air restriction gauge to make sure there is no red indication showing Check condition cleanliness and security of the complete air cleaner system clean air filter every 100 hours For detailed procedures refer to CLEANING the Engine Air Cleaner System in Maintenance Instructions ADJUST CARBURETOR Initial Start up Only For Model MT and MTL refer to ADJ...

Page 31: ...HORN Turn the ignition key to the RUN position Voltmeter Oil Pressure Light and Warning Horn should all op erate indicating normal function CHECK TIRE PRESSURE Deck Caster Wheel 20 PSI 137 kPa Drive 15 PSI 103 kPa Rear 20 PSI 137 kPa CHECK AND CLEAN GRASS BUILDUP UN DERNEATH MOWER DECK and inside GHS blower if equipped Refer to CLEANING the GHS Blower in Mainte nance Instructions for blower cleani...

Page 32: ...ning is required refer to CHECKING SERVICING for Sharpen Mower Blades in Maintenance Instructions ADJUST MOWER CUTTING HEIGHT IF RE QUIRED Position the hitch pins in the four deck support pins Refer to the Cutting Height Adjustment decal on the deck gearbox cover PERFORM ANY ADDITIONAL PROCEDURES called for on the MAINTENANCE SCHEDULE CHART in Maintenance Instructions ...

Page 33: ...s up As soon as possible move the choke to the OFF position A warm engine requires little or no choke for starting IMPORTANT Make sure the choke is in the OFF position during normal engine operation running with the choke in the ON position CAN damage the engine CAUTION Before operating the mower become fa miliar with the location and function of all operator controls Knowing the location function...

Page 34: ...s The steering le vers operate only with a backward pulling movement of the lever which causes the drive wheel for that lever to first slow down stop and then reverse with a full backward lever stroke The levers are released to the FORWARD position for straight ahead ground travel NOTE Pushing forward on the steering levers will not cause any change in tractor motion there will be no steering leve...

Page 35: ...rd Speed Control also Establishes the Neutral Park Position of the Steering Levers FORWARD SPEED CONTROL LEVER FSC Full Forward Ground Speed Position Intermediate Ground Speed Position Neutral Park Position Disengaged Position Idle Position ON Position OFF Position CHOKE MT MTL Engaged Position Fast Throttle Position Engaged Position Disengaged Position MTL MTEFI MT MT MTEFI and MTL Operating Cont...

Page 36: ...ne without the engine running e g for ser vice Refer to TRANSMISSION LOCKOUT in this section for operating instructions Lockout Lever Location NOTE The transmission plunger on the side of the transmission case activated by the LOCKOUT LE VER must be completely released during operation of the mower otherwise operation of the transmis sion will be erratic Optional Cold Start Lever Jackshaft Drive B...

Page 37: ...rning Horn Warning Horn Ignition Switch Ignition Switch Light Switch Optional Light Switch Optional Voltmeter Over Temperature Warning Light Oil Pressure Warning Light Over Temperature Warning Light Water Temperature Warning Light Water Temperature Gauge Oil Pressure Warning Light Voltmeter Voltmeter Service Engine Soon Warning Light Hourmeter Hourmeter 7 AMP Circuit Breaker 7 AMP Circuit Breaker ...

Page 38: ...ling fins clogged air intake screen Low oil level in crankcase Stop the engine and correct the source of the prob lem before further operation IMPORTANT Continued operation of the engine with an illuminated over temperature warning light MAY cause severe engine damage if a high oil tem perature or head temperature condition exists Water Temperature Warning Light Model MTL The water temperature war...

Page 39: ...unds to alert the operator that an unsafe engine condition is being indicated when engine temperature is too high or engine oil pressure is too low If the horn sounds check the indicator lights and correct the problem before fur ther operation Circuit Breakers Depending on model either one or two manual reset circuit breakers are located on the instrument panel Each has a button that pops out if t...

Page 40: ...anking Turn the key to the OFF position and allow a 60 second cool down period between starting attempts Failure to follow these guidelines can damage the starter motor and shorten battery life Consult your Walker dealer or Authorized Kohler dealer for additional help 3 After the engine starts make sure the oil pres sure light goes off If not stop the engine imme diately and find the cause of the ...

Page 41: ...omfortable handling the ma chine BEFORE ATTEMPTING TO MOW DANGER Keep feet on footrests at all times when the machine is moving Never operate the tractor without a deck or implement in stalled Beginning Recommendations are Learn operation of the mower in an open area away from buildings fences and ob structions Learn operation on flat ground BEFORE operating on slopes Start maneuvering the mower w...

Page 42: ...rastically short en drive belt life Use only moderate engine speed when engaging the blade clutch 2 Pull the blade clutch lever SLOWLY up to en gage the mower blades IMPORTANT DO NOT engage the blade clutch when transporting the mower across drives side walks loose materials etc DO NOT engage the blade clutch with the PTO shaft disconnected the mower deck removed from tractor Pull Steering Levers ...

Page 43: ... creeping This is due to a small amount of slip page in the hydrostatic transmissions especially when transmission fluid is warm NOTE The emergency stop procedure is ex actly the same procedure as used to normally stop and park the machine Engaged Position Disengaged Position WARNING A brake stops the cutter blades and blow er on GHS equipped models from free wheeling within five 5 seconds after d...

Page 44: ...mission lockout lever on both the RH and LH transmissions and secure into place with the locking cam 3 The mower will freewheel with the levers in the LOCKOUT position The levers must be in the highest position to completely unlock the trans missions Lockout Lever Freewheel Position 4 After moving the mower release the locking cam placing the lever DOWN in the normal OP ERATING position Make sure ...

Page 45: ...Assembly Instructions Use an alternating stripe mowing pattern for best appearance and vary the direction of the stripe each time the grass is mowed to avoid wear patterns in the grass Avoid damage to the grass by slipping and skid ding of the drive tires Use smooth control move ments of the steering levers since the hydrostatic transmissions are power boosted controls and jerk ing the levers can ...

Page 46: ...body should never be tilted for ward with the deck in the tilt up position This can cause the deck to unhook from the tractor and fall with considerable force potentially causing deck or tractor damage and or bodily injury When transporting a tractor with the deck in the tilt up position on a truck or trailer the deck should be secured to the vehicle with a strap or rope stop vertical movement Thi...

Page 47: ...scharge Mower Deck Deck Discharge Chute Blower Body Chute Assembly Grass Catcher Catcher Door Spring Catcher Door Exhaust Deflector Exhaust Screen Removable Catcher Door Safety Latch Grass Pak Vane Switch Full Signal Horn Actuator Rod Powerfil Drive Motor Dump Handle Powerfil Delivery Spout Shear Pin Shear Bolt Catcher Delivery Chute ...

Page 48: ...ear This will avoid bulldozing leaves particularly when the leaves are piled in a thick layer To make this ad justment the hitch pins in the two 2 front deck support pins are repositioned 2 to 3 notches higher while leaving the rear pins in their original position NOTE When a side discharge or mulching mow er deck is installed on the GHS model a blower intake cover should be installed in the blowe...

Page 49: ...and free of grass and dirt buildup While some degree of material buildup can be tolerated a point is finally reached where the flow of air and grass clippings is restricted NOTE One condition that quickly causes a buildup of material in the deck housing is mowing grass and or weeds which are juicy The material collects under the deck with sticky green juice Clo ver and weeds are especially a probl...

Page 50: ...when the catcher is almost full The full signal function may be checked by turning the ignition switch ON engaging the blade clutch engine not running opening the catcher back door and triggering the Grass Pak vane by hand as it oscillates The horn should sound as the switch is moved in both directions The full signal horn is designed to operate sound when the grass catcher is almost full The timi...

Page 51: ...nd releasing the safety latch on the door hinge mechanism with the right hand The safety latch is released by pressing in on the top of the latch Then smoothly close the door working against the spring pressure that holds the door closed DO NOT let the door slam shut by releasing the door before it is closed Catcher Door Safety Latch Using the Dump Bag 1 Open the back door by lifting on the door h...

Page 52: ...opens and closes during the dump cycle Hold the toggle switch UP or DOWN to RAISE or LOWER the catcher When the catcher reaches the full raised or lowered position the power ram clutch will make a ratcheting sound Release the toggle switch as soon as this sound is heard DO NOT op erate the ram with the clutch ratcheting for an extended time as this will cause extra wear on the clutch mechanism NOT...

Page 53: ...ump Components Grass Catcher Cable Guide Catcher Door Gas Spring Catcher Door Cable Rod Guide Cable Assembly Fork Lift Channel Door Actuator Arm Gas Spring Rubber Bumper Power Dump Ram Actuator Dog Leg Assembly Actuator Mount Assembly ...

Page 54: ...ling Fins MT MTEFI x 64 Change Engine Crankcase Oil MT MTEFI x 55 Check Wheel Bolt Torque 75 to 85 ft lb x 69 Change Engine Oil Filter MT MTEFI x 55 Change Engine Crankcase Oil MTL x 55 Change Engine Oil Filter MTL x 55 Check Radiator Hoses and Clamps MTL x 71 Check Fuel Lines and Clamps x 71 Check Regap Spark Plugs x 71 Replace Air Filter Element safety filter Vacuator Valve x 62 Replace Fuel Fil...

Page 55: ...hylene glycol and distilled water IMPORTANT Solution must be pre mixed before putting it in the engine adding pure antifreeze into the radiator may cause damage to the engine by causing overheating Maintain proper fluid levels in the radiator and overflow tank Operate the engine at full speed when mowing This will allow the engine to produce full horsepower and move more cooling air through the ra...

Page 56: ... BEFORE EACH USE 1 Park the mower on a level surface with the en gine stopped Also make sure the engine is cool and oil has had time to drain into the sump allow at least five 5 minutes after stopping the engine IMPORTANT NEVER check or add oil with the engine running 2 Before removing the dipstick clean the area around the dipstick to keep any dirt or debris out of the engine 3 Remove the dipstic...

Page 57: ...ill the crankcase through the oil filler tube dip stick opening with new clean oil Use only crankcase lubricants recommended by the en gine manufacturer Refer to Specifications in this manual or the engine owner s manual Use the recommended oil viscosity for the expected ambient temperature Oil with the correct vis cosity will aid starting in cold weather and assure proper lubrication in hot weath...

Page 58: ...e Ends Oil 2 22 Clutch Actuator Push Rod Grease 2 23 PTO Clutch Lever Pivot Grease 1 24 Belt Tightener Pivot Grease 1 PTO Clutch 25 Brake Actuator Rod and Brake Oil 3 Band Pivot Pins Clevis 26 Brake Actuator Pivot Grease 1 27 Catcher Hinge Point Oil 2 28 Rear Wheel Bearings Grease 2 29 Engine Oil Oil 1 30 Choke Control Cable Ends Oil 2 Models MT and MTL only 31 Belt Tightener Pivot Grease 1 Blower...

Page 59: ...nance Instructions LUBRICATION 57 Chassis and Deck Lubrication Points 2 2 3 1 1 5 4 4 7 7 8 8 6 6 6 6 10 11 9 13 13 12 15 16 14 14 18 19 19 17 20 36 22 22 21 24 25 23 27 27 26 29 30 30 35 28 32 33 31 34 34 20 ...

Page 60: ... add SAE E P Extreme Pressure 90W oil until the oil level is up to sub merges the horizontal shaft in the gearbox shaft parallel to cover plate NOTE In case the gearboxes are completely drained of oil approximately 5 fl oz 15 cl of oil per gearbox is required to refill the gear drive assembly NOTE Since the gearboxes are connected as a unit by connector tubes it is necessary to add oil slowly Allo...

Page 61: ... dipstick standpipe If the oil level is low check the gearbox for any indi cation of an oil leak If an oil leak is noted the gear box will need to be removed and rebuilt Dipstick Location Tractor PTO Gearbox Changing Gearbox Oil The tractor PTO gearbox is oil filled and vented No scheduled oil change is required However chang ing the oil after the first 100 hour break in period will extend gearbox...

Page 62: ... fluid refer to Specifications for the proper fluid As soon as there is fluid leaking from around the air bleed plug tighten the plug and fill the reservoir to the COLD level mark Wipe any excess oil off of the transmission housing IMPORTANT DO NOT overfill the transmission reservoir This will result in oil leaking out of the res ervoir cap vent when the transmission warms up It is preferable to a...

Page 63: ... bleed plug fill the reser voir with fluid allowing a small amount to leak out of the air bleed plug hole 7 Install the air bleed plug and fill the reservoir to the COLD level line CLEANING Engine Air Cleaner System There are two main components in the engine air cleaner system a turbine precleaner and a Donald son Radialseal air cleaner Each component is checked cleaned and maintained on a differ...

Page 64: ...ue to improper filter installation Intake design internal baffling and a Vacuator valve provide dust separation and auto matic precleaning action Daily or frequent servic ing of the air cleaner is not required Use the air restriction gauge on the air cleaner outlet to indicate when the air filter needs servicing a red flag will appear when the filter is overly restricting airflow into the engine I...

Page 65: ... the radial sealing surface inside of the open end of the filter Replace the filter if any cracks tears or other damage to the sealing surface are noted 7 Use a clean damp cloth and wipe the interior of the air cleaner canister clean Use special care to clean both the inside and outside surfaces of the outlet tube IMPORTANT Any dust left on the inside of the outlet tubewillgointotheengine and caus...

Page 66: ...y conditions Remove the two 2 cooling fin access panels in the engine shroud and clean the cooling fins and external surfaces using compressed air Make sure to reinstall the access panels before op erating the engine Engine Air Intake Screen and Cooling Fin Access Panels Cooling System Airflow Engine Cooling System MTL Radiator Screen and Cooling Fins To prevent the engine from overheating and pos...

Page 67: ... in the engine Adding pure antifreeze into the radiator may cause damage to the engine from overheating IMPORTANT Maintain proper coolant level in the radiator and coolant recovery tank The coolant lev el should be maintained between FULL and LOW marks on the coolant recovery tank Recheck the coolant level after the first time the engine has been operated after filling the coolant system it would ...

Page 68: ...t of the blower wheel IMPORTANT With the belt removed the blow er wheel must spin freely Any binding or drag ging of the wheel is an indication of dirt buildup This buildup must be cleaned to avoid abrasive wear of the blower blades ex cessive power loss and eventual loss of blower performance clogging 2 Use a pressure washer or water spray and di rect the spray inside the blower housing against t...

Page 69: ...moving the transmission from the machine An additional procedure in maintaining transmission cooling is to inspect the cooling fans Replace the fan s if blades are missing or damaged Hydrostatic Transmission Cooling Fins CHECKING SERVICING Engine Cooling System MTL Coolant Level Model MTL Overflow Tank Check the coolant level in the coolant recovery tank and maintain the coolant level between the ...

Page 70: ...reated by damage to critical working parts and safety systems Electrolyte Level The battery electrolyte level should be checked af ter every 25 hours of operation To check electro lyte level 1 Remove battery cell filler caps 2 Check the electrolyte level If the level is below the bottom of the vent well fill with drinking wa ter to the bottom of the vent wells 1 4 to 1 2 in 6 to 13 mm above the pl...

Page 71: ...f operation or more often when mowing abrasive type grass or operating on sandy soils Replace blades if worn bent cracked or otherwise damaged refer to REPLACING RE PAIRINGthe Mower Bladesinthis section Use the following procedure to check and sharpen blades NOTE Keep blades sharp cutting with dull blades not only yields a poor mowing job but slows the cutting speed of the mower and causes extra w...

Page 72: ...gnetic Wall Mounted Balancer 7 Mount the blade with wing tips pointing up into the housing Reinstall the blade washer lock washer and nut Tighten the nut to 60 ft lb 81 3 N m NOTE When reinstalling blades on GHS models remember the blades turn toward each other counter rotate and the RH and LH blade cannot be switched Check for proper blade rotation before in stalling blades on the deck Refer to B...

Page 73: ...er or Authorized Kohler engine service outlet Every year inspect the fuel supply line from the tank to engine for deterioration or damage Also inspect the fuel line clamps for tightness Good preventive maintenance calls for complete replacement of fuel lines and clamps every two 2 years Radiator Hoses and Clamps MTL Inspect the radiator hoses every 200 hours for de terioration or damage Also check...

Page 74: ...els Jackshaft Drive Belt Engine PTO Drive Belt 3 Groove Power Band GHS Blower Drive Belt GHS Model Only Hydrostatic Ground Drive Belt The belts may be removed and replaced using the procedures described on the following pages DANGER To prevent accidental starting of the en gine when replacing parts or repairing the machine remove the key from the ignition switch and disconnect the spark plug wires...

Page 75: ...o lift the clutch idler away from the belt d Next remove the belt from the engine pul ley and then the PTO drive pulley 2 Install the PTO drive belt by reversing the re moval procedure IMPORTANT Make sure the belt is installed inside the four 4 belt guide pins Refer to ADJUSTMENTS of Blade Clutch PTO in this section to check and make the fol lowing adjustments a Clutch engagement for proper belt t...

Page 76: ...ngaged Jackshaft Drive Belt Disengaged Idler Pulley Engine Pulley Tension Spring Jackshaft Drive Belt Push Idler Pulley Down to Relax Belt Jackshaft b Relax the belt by depressing the spring loaded idler arm c Roll the belt off the jackshaft pulley and remove 2 Reverse the removal procedure to replace the jackshaft drive belt Idler Arm Jackshaft Drive Belt Tension Spring Engine Pulley Jackshaft ...

Page 77: ... off the blower pulley and remove Blower Drive Pulley Depress Idler Pulley Down to Relax Belt Belt Tightener Idler Pulley Disengaged Blower Pulley GHS Blower Drive Belt Belt Tightener Idler Pulley Engaged GHS Blower Drive Belt Assembly Disengaged Blower Drive Belt Spring Removal 2 Reverse the procedure to install the GHS blow er drive belt GHS Blower Drive Belt Assembly Engaged ...

Page 78: ...x belt b Slide belt off pulleys then release the idler Hydrostatic Ground Drive Belt Idler Pulley Belt Tightener Arm Jackshaft Transmission Drive Pulley Spring Hydrostatic Ground Drive Belt Assembly Disengaged 2 Reverse the procedure to install the hydrostatic ground drive belt Belt Tightener Arm Idler Pulley Hydrostatic Ground Drive Belt Spring Hydrostatic Ground Drive Belt Assembly Engaged ...

Page 79: ...blade is keyed to the blade hub by two 2 shear bolts 10 24 x 5 8 in stainless steel ma chine screws These bolts are designed to shear and protect the blade drive gearbox from damage if the blade encounters a shock load Cutting Blade Shear Bolts NOTE Tightening the 5 8 18 blade mounting nut to 60 ft lb 81 3 N m is also important for proper shock load protection It is important to not over tighten t...

Page 80: ...box Replacement in this section Mower Blades Mower blades are removed and remounted as de scribed in Sharpen Mower Blades instructions During the course of sharpening and inspecting mower blades if there are any of the following con ditions of wear or damage blades should be re placed for reasons of safety and performance of the machine An excessive amount of the flat section of the blade has been...

Page 81: ...ut with solvent before reassembly 5 Drain and properly dispose of oil 6 Remove the four 4 bolts mounting the gearbox to the connector tube and slide the gearbox off the splined drive shaft coupling 7 Install the new gearbox on the spline coupling of the drive shaft Establish correct timing of the blade drive gearboxes by setting flats on the output shaft at 90 degrees when connecting the gearbox e...

Page 82: ...using to the frame d Lower the blower assembly straight down out of the chassis frame and remove Blower Wheel Removal When required replace the blower wheel using the following procedure 1 Loosen blower pulley set screws and remove the pulley using a wheel puller 2 Remove the locking collar from the back bear ing closest to the pulley by loosening the set screw and rotating the collar counterclock...

Page 83: ...aring race and the housing 4 Install the locking collar on the rear bearing and install the blower pulley to complete the blower assembly Torque the blower pulley set screws to 250 in lb 28 3 N m GHS Blower Assembly Installation Reinstall the blower assembly into the mower using the reverse procedures of GHS Blower Assembly Removal Wheel Puller Hooked to Lugs on Bearing Housing Blower Pulley 5 16 ...

Page 84: ...at the Forward Speed Control FSC and PTO disengaged and panel horn works but the starter is not engaging Tail Wheel Bearing Preload Preload the tail wheel bearings by tightening the ax le nut until the wheel begins to tighten as it turns not spin freely then loosen the nut 1 2 to 1 turn The wheel should spin freely without excessive end play Lock the axle nut with the set screw in the nut Steering...

Page 85: ...TO Clutch Disen gaged illustrations Adjust the bolt head clearance 1 4 in to 3 8 in 6 35 mm to 9 53 mm first clutch engaged then adjust uncompressed spring length clutch disen gaged The spring must be adjusted to an uncom pressed overall length of 2 1 8 in 54 mm If adjustments are needed more frequently than every 100 hours to maintain the linkage dimensions it may suggest problems with pulley wea...

Page 86: ...blade brake is activated by the brake actuator rod linkage to the clutch idler pulley mechanism The brake is designed to stop the blades within five 5 seconds after disengaging the clutch WARNING It is important to check and maintain blade brake action for safe operation of the machine PTO Clutch Disengaged Spring Overall Length 2 1 8 in 54 mm Adjustment Nut Spring Uncompressed Blade Clutch Idler ...

Page 87: ...mm pulley travel from clutch engaged to clutch disengaged To check and adjust the pulley travel first engage the clutch then measure the dis tance the pulley moves down as the clutch is disen gaged and the stop block contacts the frame NOTE The importance of this adjustment is if the pulley travel is excessive and the belt develops too much slack the belt will derail when disengaged Clutch Idler P...

Page 88: ... for efficient oper ation and life of the transmission These stops are properly adjusted at the factory and should only re quire readjustment if the transmission or related control linkage is removed or changed NOTE It would not be unusual for a new machine after initial 5 or 10 hours of operation to begin to not travel straight this is due to the break in of the transmissions In this case proceed...

Page 89: ...stment 3 If drive wheels are moving stop the engine and adjust the FSC neutral stop by adjusting the FSC actuator clevis see Neutral Function Ad justment photo for clevis location If the drive wheels are moving backward remove the cotter pin and clevis pin and screw the clevis forward If the drive wheels are moving forward screw the clevis backward Restart the engine and check for wheel movement s...

Page 90: ... LH wheel is moving too fast tighten the LH adjustment nut Straight Ground Travel Adjustment Forward Speed Control Friction Lock The FSC friction lock is adjusted to hold the select ed forward speed when the steering levers are moved and yet the friction is not too heavy to make moving the control difficult too much friction The procedure for checking and adjusting the FSC friction lock is as foll...

Page 91: ... requirements of mod ern carburetors refer to the Kohler Service Manual or contact an authorized Kohler engine dealer for carburetor adjustments and service not described in this section Since the carburetor main jet is non adjustable for operation above 5000 ft 1 524 m above sea level it may be necessary to change the carburetor main jet for best fuel economy and power Contact an au thorized Kohl...

Page 92: ... engine miss or backfire hard to start rough running stalls at low idle speed NOTE Due to the technical requirements of mod ern carburetors refer to the Kohler Service Manual or contact an authorized Kohler engine dealer for carburetor adjustments and service not described in this section Low Idle Speed RPM Adjustment 1 Place the throttle control into the idle or slow position Set the low idle spe...

Page 93: ...he delivery chute to clog The vertical po sition can be adjusted by bending the mounting bracket for the Grass Pak switch 1 Position the discharge chute so that it is point ing straight back a Turn the ignition switch ON and move the blade clutch to the ENGAGED position engine not running b Open the catcher back door and monitor the spout position as it oscillates and move the blade clutch to the ...

Page 94: ...inated En gine Service Light on the control panel means that a fault has been detected in the electrical fuel system Contact an authorized Kohler Service Dealer to di agnose the fault IMPORTANT Disconnect both battery cables be fore unplugging any wiring connectors or making re pairs on the electrical system IMPORTANT Disconnect the battery cables before unplugging and removing the instrument pane...

Page 95: ...ER HEAD TEMP SWITCH R GRASS PAK SWITCH R HORN HOUR LIGHTS METER PRESSURE OIL OVER RELAY B RELAY A PTO PTO INTERLOCK SWITCH TEMP LIGHT LIGHT VOLTAGE METER BATTERY CHASSIS GROUND MODULE TIME SEAT SWITCH FSC NEUTRAL SWITCH INTERLOCK RELAY C DELAY 30 AMP CIRCUIT BREAKER OPTIONAL LIGHT OPTIONAL LIGHT 85 86 87A 30 30 87A 86 85 87 30 85 7 AMP BREAKER HORN CIRCUIT M B A S1 S2 G 86 _ BLK BLK BLU YEL WHT PU...

Page 96: ...O GROUND CIRCUIT S2 START ACCESSORY CIRCUIT S1 START CIRCUIT 30 87 OPEN IGNITION FUEL RELAY OPEN OPEN DELAY RELAY 30 87A 30 87A OPEN OPEN OPEN WALKER MODEL MT EFI Beginning S N 2001 49448 START TIME DELAY RELAY START SOLENOID RELAY START PTO ON RELAY A OFF START RUN RELAY B OFF OPEN START RUN RELAY C OFF 30 87A RUN LOW RUN HIGH RELAY D OFF 30 87 J17 J17 RED WHT BLK BLK BRN GRN GRN WHT BLK WHT WHT ...

Page 97: ...1 M G LIGHTS PTO FSC NEUTRAL SWITCH INTERLOCK PTO SWITCH INTERLOCK SEAT SWITCH 7 AMP CIRCUIT BREAKER 30 AMP FUSE J17 J17 REGULATOR BLU BLK RED YEL BLK WHT GRA RED YEL BRN BRN ORG RED RED YEL YEL BLK PUR PUR RED BRN WHT BLU BLU GRN RED RED RED ORG GRA BLK BLK BLK BLK RED RED YEL BLK PUR PUR GRA BLK YEL WHT PUR GRN BLU BLU GRN GRA GRA GRA BLK RED YEL WHT PUR BLK ORG ORG BLK RED BLK BLK PUR PUR GRN P...

Page 98: ...G POWERFIL MOTOR BLK RED YEL BLU WHT WHT BLK GRN GRN BLU BLU PUR PUR ORG BLU WATER TEMP SWITCH 1 4 BLU BLK GRN GRN 87 86 85 87A 30 GRA BLU BLU RESISTOR BRN ORG WHT WHT ORG WHT ORG FAN RELAY D BLK SWITCH ENGINE WATER TEMP MAGNETO REGULATOR GAUGE SENDER STARTER STARTER SOLENOID OIL PRESSURE BLK RED BLK SWITCH GRASS PAK HORN BLU BLK GRA PUR BLK WHT BLK WHT PUR PUR PUR RELAY C RELAY B RELAY A GRA PUR ...

Page 99: ... in the Owner s Manual for operation and maintenance B The customer shall pay any charges for making service calls and or for transporting the mower to and from the place where the inspection and or warranty work is performed 3 HOW TO OBTAIN SERVICE UNDER THIS WARRANTY Warranty service can be arranged by contacting the dealer where you purchased the mower or by contacting Walker Man ufacturing Com...

Page 100: ...ondition Clear Temperature 50 F o 10 C o Wind Speed 5 mph 8 kmh Humidity 52 Barometric Pressure 24 9 HG 759 mmHg Vibration Model MTEFI Vibration Level Vibration levels at the operators handles were measured in the vertical lateral and longitudinal directions using calibrated vibra tion test equipment Tests were performed on 26 June 02 under the conditions listed 0 8g General Condition Clear Temper...

Reviews: