background image

12

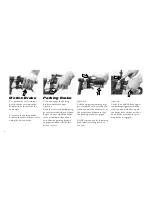
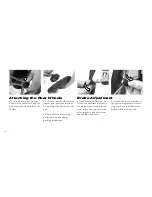
1. Press the steel button at the 
center of the rear wheel, and the 
wheel can be detached from the 
Walker.

1. If the brakes function poorly, 
loosen the adjustment screw on 
each brake lever (counterclock-
wise) and lock it in position by 
screwing the lock-nut towards 
the handle (clockwise).

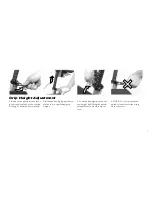
2. To attach the rear wheel to the 
frame again, press the steel but-
ton and slide the wheel onto the 
axle.

3. Check that the wheel is pro-
perly attached by pulling/
pushing it sideways.

Contact Trionic, your retailer, or 
the person responsible for servi-
cing your Trionic Walker, if the 
brakes still function poorly.

Attaching the Rear Wheels

Brake Adjustment

Summary of Contents for Walker 12er

Page 1: ...1 User Manual English...

Page 2: ...whole range of benefits that will improve your access to different environme nts and hopefully it will help increase your quality of life User Manual Please read the User Manual carefully before use...

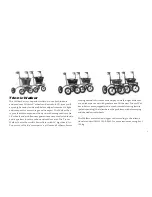
Page 3: ...s perfect for every urban and outdoor area The Tronic Walker 14er is the world s first rollator with 14 big wheels At Trionic we call it the terminator as it leaves all other rollators trailing behin...

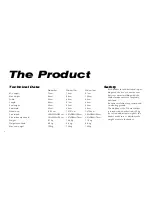
Page 4: ...distribute the weight evenly in the basket Technical Data Walker 9er Walker 12er Walker 14er Min height 74 cm 76 cm 81 cm Max height 94 cm 96 cm 100 cm Width 66 cm 69 cm 69 cm Length 68 cm 81 cm 85 c...

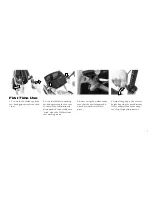
Page 5: ...s of the seat distinctly downwards You should hear a click when the Walker locks into walking mode First Time Use 3 Before using the walker make sure that the unfolding mecha nism has locked securely...

Page 6: ...lever at the same time Make sure that the parking brake is engaged and that the Walker does not move Motion Brake Parking Brake Option 2 Pull the upper red parking trig ger rearwards with your thumb w...

Page 7: ...twards horizontally Grip Height Adjustment 2 Slide the hand grip up down wards to your preferred grip height 3 Lock the hand grip at the cho sen height by folding the quick release lever to its closed...

Page 8: ...position and an optimal support 1 Loosen the screw on the rear end of the grip with a 4 mm allen key 2 Turn rotate the grip to your chosen angle and lock it in place by tightening the screw again 1 G...

Page 9: ...pressing the two rear corners of the seat distinctly downwards You should hear a click when the Walker locks into walking mode Unfolding the Walker 3 Before using the Walker make sure that the unfold...

Page 10: ...ding it out wards 2 Unscrew the nut on the inside of the fork a bit so that the wheel can be detached from the fork 3 Remove the front wheel from the fork Detaching the Front Wheels 4 NOTE Do not oper...

Page 11: ...uick release gets correctly tensioned when closed 3 Close the quick release on the front wheel by folding it inwards Make sure that the quick release lever is correctly closed prefe rably in a positio...

Page 12: ...in position by screwing the lock nut towards the handle clockwise 2 To attach the rear wheel to the frame again press the steel but ton and slide the wheel onto the axle 3 Check that the wheel is pro...

Page 13: ...r or service representative autho rized by Trionic Do not use a defect Walker Service Instructions In order to maintain function and safety make sure the following is carried out regularly Clean the W...

Page 14: ...___________________________ Date Stamp Signature CE Trionic Sverige AB ensures that the above mentioned product meets the relevant legislation requirements 1993 584 concerning medical products as well...

Page 15: ...rts can be recycled The product s aluminium components are separated from the remaining parts when sorted for recycling The parts are sorted into metal plastic and mixed materials The greater part of...

Page 16: ...rige AB Seminariegatan 29 C SE 752 28 Uppsala SWEDEN Web trionicwalker co uk Shop www trionic biz E mail info trionic se Tel 46 0 8 522 100 50 Fax 46 0 8 522 100 59 Corp ID 556698 1527 VAT Reg No SE55...

Reviews: