6
3684A050 Installation Instructions
4.
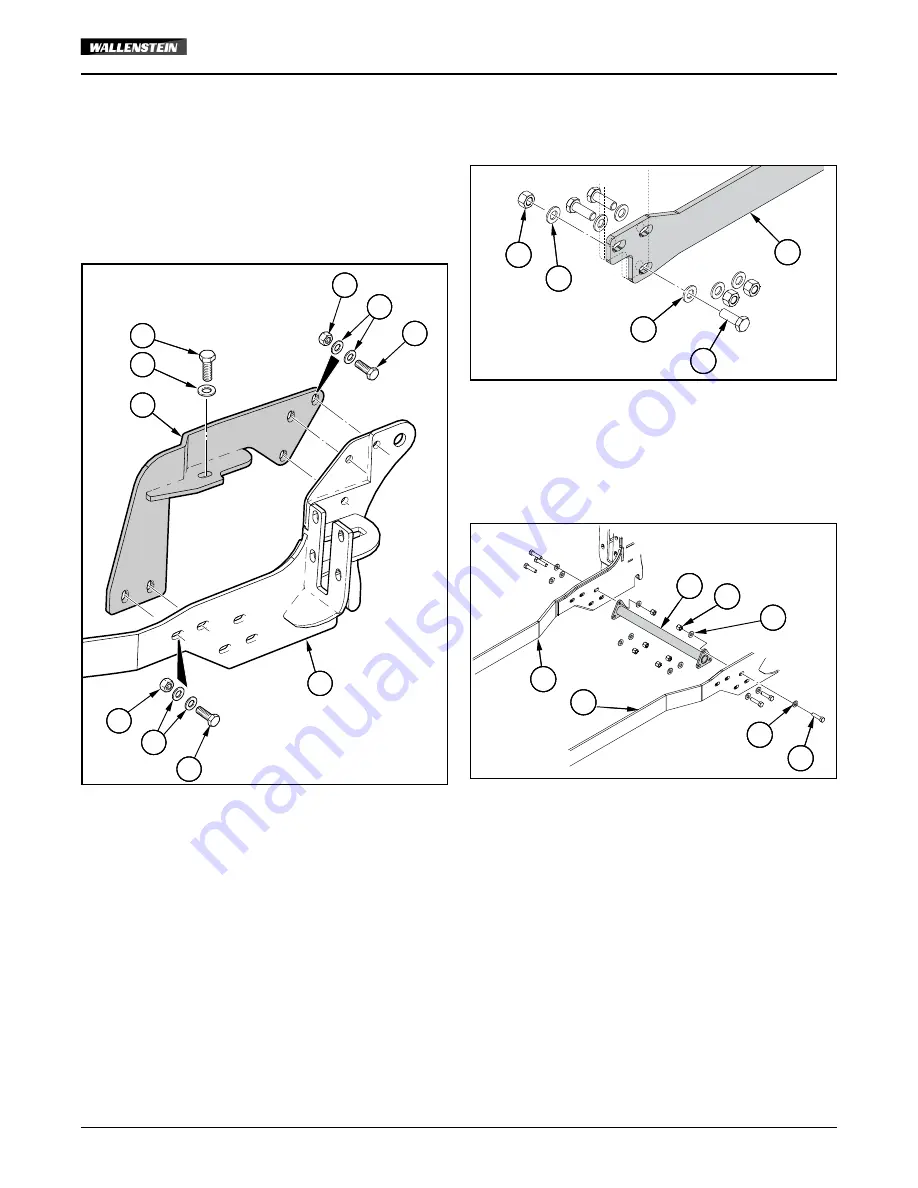
Place (
3684W052
) Top Axle Connector (5) over the
axle and bolt it to (
3684W051
) Load Rail, LH (3) using
(
Z71520
) 1/2" NC X 2" Lg hex bolts (12), (
Z72251
) 1/2" NC
hex lock nuts (14), and (
Z73151
) 1/2" washers (16). Hand
tighten only. Make sure the Top Axle Connector (5) sits flat
on top of the ROPS mount.
5.
Install (
Z77682
) M14 x 1.5 x 40 mm hex bolt (19) and
(
Z77381
) M14 washer through Top Axle Connector (5) into
the ROPS mount, where the bolt was removed in Step 2.
5
18
19
3
14
16
12 X3
X3
X3
14
16
12
2X
2X
2X
6.
Connect (
3684W051
) Load Rail, LH (3) to the tractor
mount using (
Z77682
) M14 x 1.4 x 40 mm hex bolts (19),
(
Z77381
) M14 washers (18), and (
Z77283
) M14 x 1.5 hex
lock nuts (17). Hand tighten only.
3
17
3
17
3X
3X
18
18
3X
19
19
3X
18
18
7.
Repeat Steps 2–7 for the right-hand side of the tractor.
Hand-tighten only for now.
8.
Install (
3684W053
) Cross Brace (7) under the tractor
between the two Load Rails (3 and 4). Use (
Z71520
)
1/2" NC x 2" Lg hex bolts (12), (
Z73151
) 1/2" washers
(16), and (
Z72251
) 1/2" NC hex lock nuts (14).
4
7
16
3
4
7
16
3
12
12
3X
3X
16
16
X3
X3
14
9.
Torque all fasteners on the sub frame. Refer to the Bolt
Torque specification table on the last page.


