Attach to a Tractor
BX52R, BX72R, BX102R
Tractor Wood Chipper
24
15.
Make sure the shaft can telescope freely before installing. If
it does not, separate the two parts and inspect for burrs or
cuttings on the shaft ends.
IMPORTANT! The two PTO shaft halves should overlap
inside at least 6" (150 mm).
5.2.1 Alternate Method
This method can be used if the two ends of the PTO shaft
cannot be put close enough together to measure.
1.
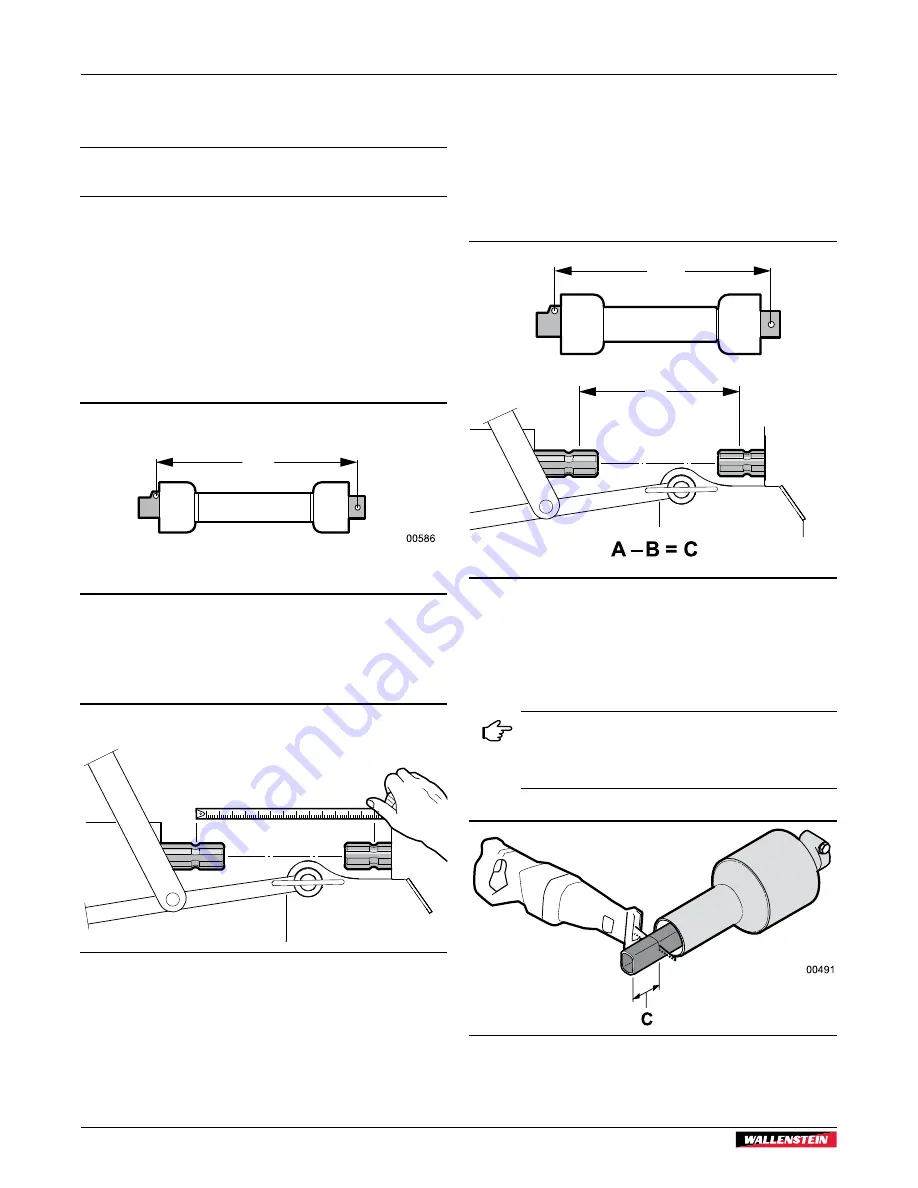
Install the attachment on the tractor. Lift the attachment up
so that the tractor output is level with implement input shaft.
2.
Take the PTO shaft that came with your machine, fully
collapse it, and measure the distance between the locking
yokes. Call this measurement
A
.
A
Fig. 17 –
Measurement A
3.
Measure the distance between the grooves for the locking
collars on each input. Subtract 2 inches (50 mm) from this
measurement. Call this measurement
B
.
L
– 2" (50 mm) =
B
00944
L = ?
Fig. 18 –
Measurement B
4.
If the collapsed length
A
is longer than measurement
B
from
Step 3, the PTO shaft must be shortened.
5.
Subtract
B
from the uncut PTO shaft measurement
A
.
(A – B)
The result is how much
BOTH
halves of the PTO shaft need to
be shortened. Call this value
C
.
A – B = C
00945
A
B
(L - 2 inches)
(L - 50 mm)
Fig. 19 –
Value C = Cut Length
6.
Pull the PTO shaft apart, and then measure and cut the
length
C
from both the outer plastic covers and the inner
metal tubes.
Use the cut off piece of outer shielding to mark
the inner tube. Leave the steel center tubes longer
than the plastic outer tubes, otherwise they can be
harder to put back together.
Fig. 20 –
Cut off the Length
C
from both PTO Shaft Halves


