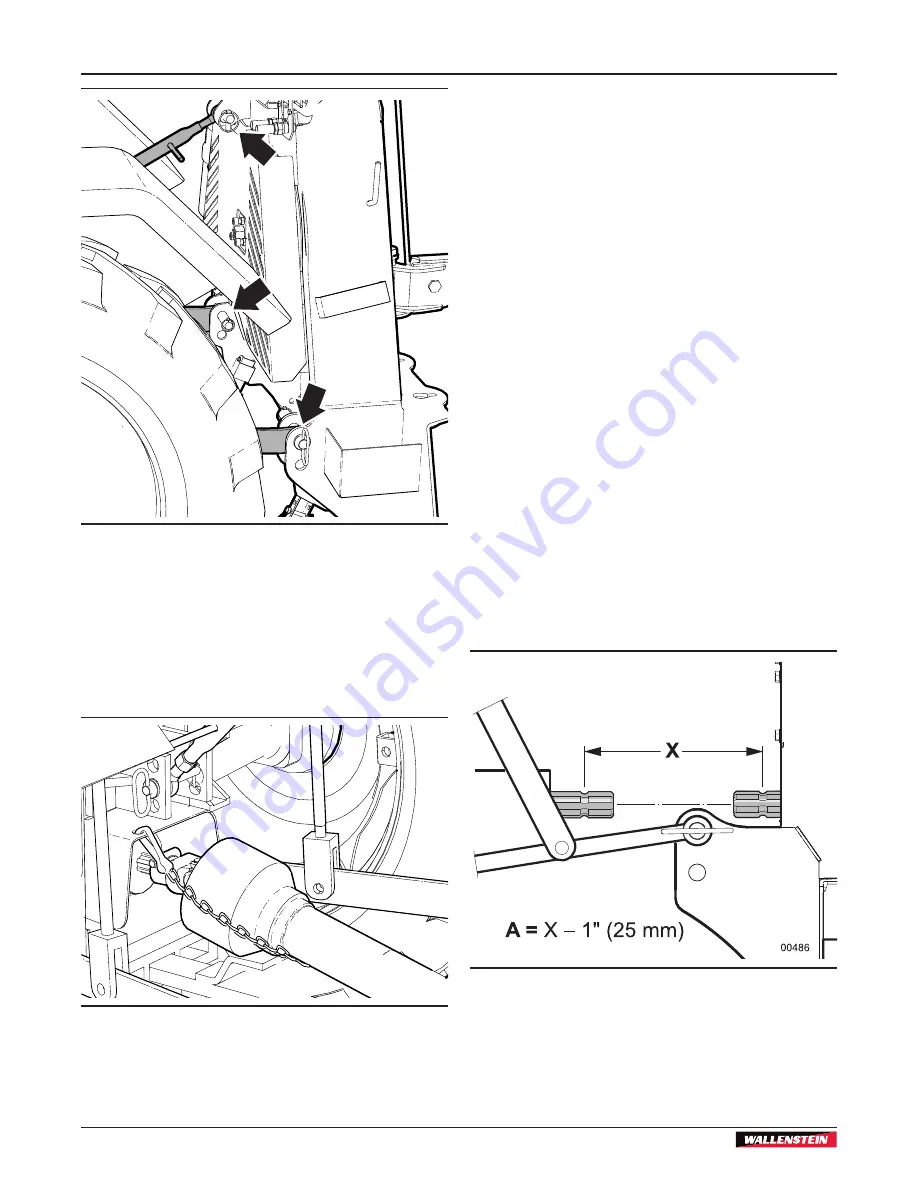
Attaching Winch to Tractor
FX66, FX85/R, FX110/R, FX140/R
PTO Skidding Winch
22
00583
Fig. 8 –
Winch Attached
9.
Slide the collar back on the PTO shaft yoke. Align
the splines and slide the yoke on the tractor PTO.
10.
Release the collar and make sure the locking pin
clicks into position.
11.
Attach the shield anchor safety chain to an
adjacent frame member. The chain keeps the
integral journal shield from spinning.
00584
Fig. 9 –
PTO Shaft Installed
12.
Raise winch support legs to the storage position.
Insert snap lock pins.
13.
Start the tractor and slowly raise the machine
up through its working range to make sure the
telescoping portion of the PTO shaft does not
bottom out.
To detach winch from the tractor, reverse the above
steps.
4.1 Determine Proper PTO Shaft
Length
The PTO shaft that came with your machine may need
to be shortened. A longer shaft is supplied because
tractor lift arms vary in length.
It is very important that the PTO shaft is free to
telescope, and not bottom out when going through its
working range. It should never completely collapse in
use. If the shaft bottoms out, the bearings on both ends
can be overloaded and could fail causing damage or
injury.
1.
Remove the PTO shaft and mount the machine on
the tractor three-point hitch.
2.
Start the tractor and raise the three-point hitch up
off the ground until the machine's input shaft is
level with the tractor PTO output shaft.
3.
Measure the distance between the locking grooves
on the tractor PTO shaft and the attachment input
shaft (X) as shown.
Fig. 10 –
Measurement A
4.
Subtract 1" (25 mm) from this measurement. The
result is the required length of your PTO Shaft.
Call this value
A
.
Summary of Contents for FX110R
Page 49: ......
Page 50: ...www wallensteinequipment com ...


