19/88
WALLMEK
i Kungälv AB - Special tools for auto repairs
www.wallmek.se • info@wallmek.se • Tel. +46(0)303 58580 • Bultgatan 18, 442 20 Kungälv, Sweden
Warning
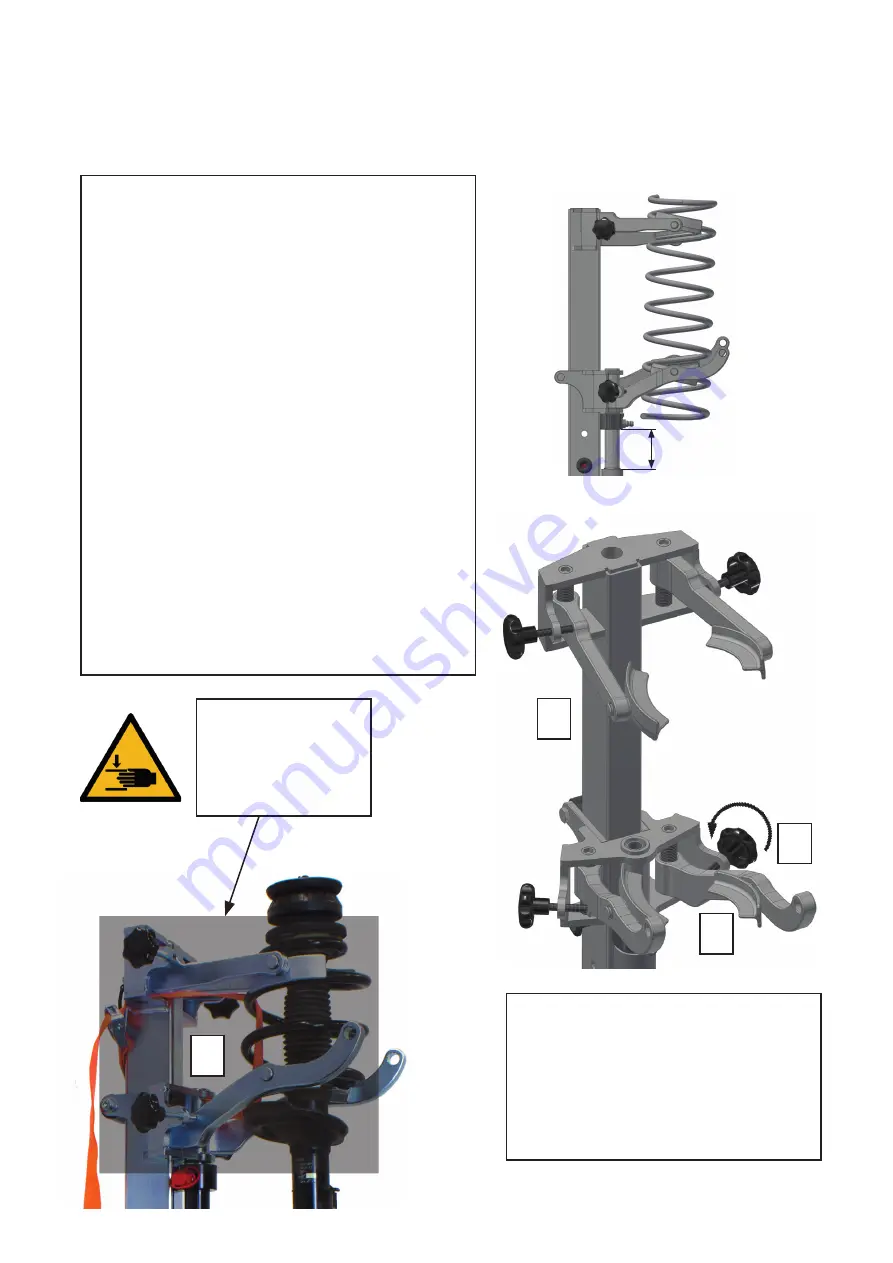
Risk of crushing
within the
marked area
To facilitate assembly, the arms
should be left in at the set height
and pulled only to one side
(loosen the adjuster screws) so
the old spring can be removed and
a new one fitted.
Pressing the spring strut when dismantling
When starting the plunger must always be
extended about 10 cm so it can be backed
up if the pretension on the spring presses
against the tool.
Fit the top unit (1) on the stand. The claws
on the lower lift unit are moved to the inner
(2) holes. The arms in the lower position.
Hang the spring on the lower claws. Adjust
the position of the claws. The spring strut
must sit perpendicular. Secure with the
adjuster screws (3). The height position
of the top unit may need to be adjusted,
depending on the length of the spring.
Adjust and position the upper claws and
secure with the adjuster screws. Thread
the safety strap (4) through the spring and
the arm units as illustrated. Press until the
upper bearing can be released.
4
1
3
2
min 10 cm


