26
27
5. Operation of the device
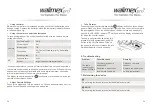
Inserting Batteries
Open the battery compartment cover
10
on the back of the transmitter, and insert
two AAA 1.5V LR03 alkaline batteries as shown.
The Low Battery Indicator
The low battery indicator
4
will blink when
the batteries are low. Please replace
the batteries.
Replacing Batteries
When replacing batteries:
• Check that the TIMER ACTIVE
5
and RELEASE
8
indicators are not
displayed.
• Turn the camera off and disconnect the trigger.
• Remove the batteries.
• Wait until the control panel has gone out and insert new batteries.
When the Trigger is not in use
The Trigger is not equipped with an off switch. To reduce the drain on the bat-
teries when the Trigger is not in use, end shooting and check that the TIMER
ACTIVE
5
, SET
7
, RELEASE
8
indicators are not displayed. The drain
on the batteries increases when these indicators are fl ashing.
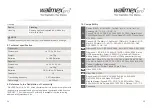
Lighting/Lock Button
Press the lighting/lock button
7
briefl y to activate the control panel backlight.
The backlight will remain lit for about six seconds; pressing the arrow button
8
while the backlight is on the timer is extended for another six seconds.
To lock all controls except the shutter
release
9
and lighting/lock buttons, press
the illuminator lock button until the lock icon (L)
is displayed in the control panel. To the release
the lock, please press the lighting/lock button
until the lock icon is no longer displayed.
Connecting the trigger
1. Turn the camera off .
2. Check that the TIMER ACTIVE
5
and RELEASE
8
ndicators are not
displayed.
3. Remove the remote cord socket terminal cover from the camera. By
connecting the camera shutter, the camera will fi rmly be connected to the
receiver with the shutter plug
A
.
Disconnecting the trigger
After checking that the TIMER ACTIVE
5
and RELEASE
8
indicators are
not displayed, turn the camera off and disconnect the trigger. Replace the
remote cord socket terminal cover.
Using the trigger
The Trigger functions as:
• An automatic timer:
An automatic timer: Choose the delay (time before shooting starts), exposure
time, interval and number of shots for timed interval photography. Shutter
speed can be selected with the camera if desired.
• A manual release:
Take photographs manually using the shutter-release button on the trigger.
Photographs can be taken manually even when the timer is running.


