1.5) DELIVERY
Upon delivery of the boiler, check the nameplate to be
sure that you have received the model with the correct
rating and proper voltage.
The following items are supplied with the unit:
- A pressure relief valve, adjusted to 30 psi;
- A drain valve;
- A
½
"
NPT to
⅛
"
NPT reducer for the installation of an air
purge valve;
- Modulating outdoor sensor.
1.6) INSTALLATION
WARNING
The installation of this unit must be performed by
a qualified technician and it must conform to the
standards and regulations in force as well as the
Canadian Installation Code for Hydronic Heating
Systems CSA B214-01.
1.6.1) Positioning and clearances
The unit must be installed in an area that is dry, non-
corrosive, without excessive dust, well ventilated and where
the ambient temperature does not exceed 27°C (80°F).
The boiler can be installed directly on a wall, by way of the
mounting plate, supplied with the unit. Ensure that it is
installed level and that the clearances indicated below are
respected (Table 1).
TABLE 1
MINIMUM CLEARANCE
LOCATION
CLEARANCE
Access side to elements
0.41 m (16")
Other side
15.24 cm (6")
Above
15.24 cm (6")
Front
0.61 m (24")
Back 0"
1.7) DISTRIBUTION
SYSTEM
The proper functioning of your heating system is directly
related to the quality of the plumbing installation. Therefore,
the entire installation must be performed by qualified
technicians.
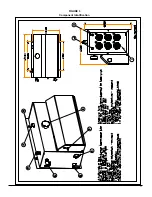
See Figure 3, p. 11 for the functions of the various boiler
connections.
The heating system must be set-up to operate at a maximum
pressure of 28 psi and the operating temperature may range
from 32
˚
C to 99°C (90
˚
F to 210°F).
Freeze protection (when required)
WARNING
Only propylene glycol may be used in this
hydronic heating system, to prevent freezing.
It is recommended to add a maximum of 50% of
propylene glycol mixture to ensure proper
operation.
Do not use automotive anti-freeze, ethylene glycol
or any undiluted anti-freeze.
If the above recommendations are not followed,
severe personal injury, death or substantial
property and/or equipment damage can result.
All installations must include the following items:
a. 1 pressure regulator, adjusted to 12 psi, installed
between the boiler and the main water supply in the
building;
b. 1 expansion tank, pre-pressurized to 12 psi and of
appropriate size;
c. 1 or more automatic air purge valves;
d. 1 or more circulating pumps of appropriate capacity.
CAUTION
To avoid water damage and/or scalding due to relief
valve operation, a discharge line must be connected to
the valve outlet and run to a drainage area. The
discharge line shall be installed in such a way that it
will allow for the complete drainage of the valve and
the discharge line.
1.8)
INSTALLATION OF THE BOILER
At the time of installation, the following steps should be
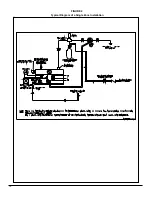
followed. Refer to Figures 3 and 4, p. 11 and 12 for
additional information.
1.
Choose an appropriate location. Mount the boiler
securely on the wall, with the help of the mounting plate.
Ensure that it is level and that the minimum clearances
are observed;
2.
Install the drain valve and the safety valve as indicated
in Figure 3;
3.
An air vent can be installed on the unit. In such case,
use the ½" NPT to
⅛
" NPT reducer, which is provided;
4.
Install the water supply and and return piping with the 1"
NPT fitting;
5.
The heating supply line must include:
a. 1 circulator along with 2 maintenance valves;
b. 1 automatic pressure reducing valve adjusted to
12 psi, with a shut-off valve on the return water
line;
c. 1 expansion tank;
d. 1 automatic vent.
4
Summary of Contents for HYDRA Series
Page 11: ...FIGURE 3 Identification des composantes 11...
Page 12: ...FIGURE 4 Sch ma type d une installation une zone 12...
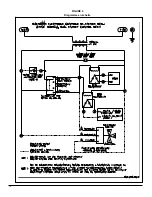
Page 13: ...FIGURE 5 Diagramme lectrique 13...
Page 14: ...FIGURE 6 Diagramme en chelle 14...
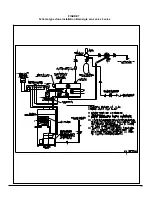
Page 15: ...FIGURE 7 Sch ma type d une installation Bi nergie sans valve 3 voies 15...
Page 16: ...FIGURE 8 Sch ma type d une installation Bi nergie avec valve 3 voies 16...
Page 17: ...17 COMPOSANTES ET PI CES DE REMPLACEMENT...
Page 18: ...LISTE DE PI CES HYDRA B50080 Rev B 18...
Page 30: ...FIGURE 3 Component Identification 11...
Page 31: ...FIGURE 4 Typical Diagram of a Single Zone Installation 12...
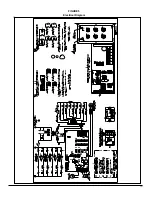
Page 32: ...FIGURE 5 Electrical Diagram 13...
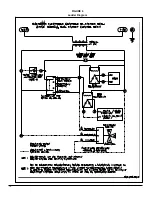
Page 33: ...FIGURE 6 Ladder Diagram 14...
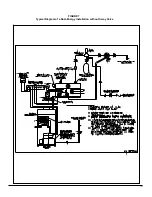
Page 34: ...FIGURE 7 Typical Diagram of a Dual Energy Installation without 3 way Valve 15...
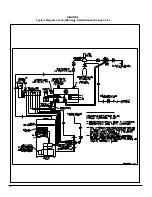
Page 35: ...FIGURE 8 Typical Diagram of a Dual Energy Installation with 3 way Valve 16...
Page 36: ...17 COMPONENTS AND REPLACEMENT PARTS...

