background image

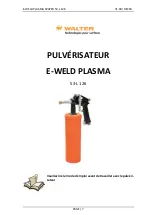
E-WELD PLASMA SPAYER 53-L 126                                                                       V1.00/ DEC18 

PAGE | 6 

9.


Troubleshooting 
In  all  cases  of  malfunction,  first  check  whether  sufficient  compressed  air  is 
available, if the liquid is still processable, if the expiry date has expired or  if the 
liquid may have dried. 


Spray unclean 
Possible cause: Setting options not optimally adjusted. 
Solution: Adjust the 3 knobs. 


No liquid is coming out 
Possible cause: Riser and / or spray nozzle clogged. 
Solution: Clean clogged components. Let them soak in water. Try to spray 
water. 


Air leak  from the spray nozzle 
Possible cause: Valve pin jammed. 
Solution: Apply oil to the valve pin and to the compressed air inlet. Press 
the trigger several times. 


Liquid dripping from the spray nozzle 
Possible cause: nozzle needle jammed. 
Solution: Clean the nozzle needle, apply oil to the nozzle needle and / or 
reduce  the  pressure  on  the  nozzle  needle  seal  with  a  9mm  open-end 
wrench. In order to ensure the sprayer to work at its best, a clamping 
effect on the nozzle needle seal must be applied. Press the trigger several 
times. 


10.


 Warranty Conditions 
 
Should any malfunction occur within three (3) months from the date of original 
purchase, please contact Walter Surface Technologies. If an examination shows 
that the malfunction was caused by defective material or faulty workmanship, 
WALTER will repair (or at our option, replace the unit) without charge. 
 
This warranty does not apply when; normal maintenance is required, repairs or 
replacements  have  been  made  or  were  attempted  by  anyone  other  than 
WALTER authorized service personnel, and does not cover any damage caused 
by  accidents,  modifications,  use  of  improper  accessories,  abuse  or  misuse, 
which also includes overloading the tool beyond its rated capacity as well as its 
continued use after partial failure. No other warranty, written or verbal, is au-
thorized. 


Summary of Contents for 53-L 126

Page 1: ...Please read the operating instructions first before working with the sprayer These operating and maintenance instructions contain important information that is required for the safe and trouble free o...

Page 2: ...pressure 2 7 bar 30 to 100 psi Maximum pressure 7 bar 100 psi Total volume 1 400 ml 34 fl oz Connecting Thread Compressed air connection Quick Coupling Dimension of sprayer 391 x 205 x 95 mm 15 4 x 8...

Page 3: ...nterest the following infor mation The operator must ensure proper operation Do not bring the compressed air and or liquid into contact with the skin or the eyes Never direct spray to animals humans o...

Page 4: ...ions Screw in the appropriate compressed air connection and tighten firmly using a 13 mm open end or open end wrench If necessary glue it in place Screw the pressure gauge included witht he product in...

Page 5: ...s direc ted Warning Never operate the trigger when container is under pressure but not connected to the compressed air source This allows the liquid to flow into the air channels and render the tool u...

Page 6: ...and or reduce the pressure on the nozzle needle seal with a 9mm open end wrench In order to ensure the sprayer to work at its best a clamping effect on the nozzle needle seal must be applied Press the...

Page 7: ...E WELD PLASMA SPAYER 53 L 126 V1 00 DEC18 PAGE 7 PULV RISATEUR E WELD PLASMA 53 L 126 Veuillez lire le mode d emploi avant de travailler avec le pulv ri sateur...

Page 8: ...ns 10 7 Maintenance 11 8 Stockage 11 9 D pannage 11 10 Conditions de garanties 12 1 Donn es techniques Description 53L126 Pression de travail 2 7 bar 30 100 psi Pression maximale 7 bar 100 psi Volume...

Page 9: ...nt et observez dans votre propre int r t les informations suivantes L op rateur doit s assurer du bon fonctionnement Ne mettez pas l air comprim et ou le liquide en contact avec la peau ou les yeux Ne...

Page 10: ...nt tre limi n s dans le respect de l environnement 6 Instructions Vissez le raccord d air comprim appropri et serrez fermement l aide d une cl de 13 mm Si n cessaire collez le en place Visser le manom...

Page 11: ...a source d air comprim Cela permet au liquide de s couler dans les canaux d air et de rendre l outil inutilisable 7 Maintenance Nettoyez le dispositif air comprim apr s chaque utilisation Nous recomma...

Page 12: ...a buse l aide d une cl de 9 mm Pour que le pulv risa teur fonctionne au mieux vous devez appliquer un effet de serrage sur le joint de l aiguille de la buse Appuyez plusieurs fois sur la g chette 10 C...

Reviews: