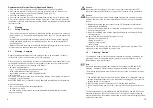
Replacement of Material Control Nozzle and Needle
1. Remove the air control head (see
5.5 Replacement of Air Control Head
)
2. Unscrew the material nozzle (pos. 3) from the gun body (pos. 6). Remove the
sealing washer (pos.4) and the air distribution ring in (pos. 5).
3. Unscrew the drawbar (pos. 24).
4. Unscrew the cap (pos. 23) and the threaded bushing (pos. 22) from the gun body.
5. Pull off the material control needle with the Parts (pos. 17-20) from the gun body.
Installation of the new nozzle insert assembly and the remaining parts is performed in
the reverse order.
6
Cleaning
6.1
Safety Warnings
• Prior to any servicing and repair work: Make sure that the spray gun is in unpressu-
rized condition, i.e. all air and material inputs must be shut off - if not, imminent risk
of injury.
• No open fires, naked light and smoking allowed in the work area. When spraying
readily flammable media such as cleaning solutions, there is an increased risk of
fire and explosion.
• Observe the safety warnings issued by the manufacturer. Aggressive and corrosive
media represents risks and hazards to personal health.
6.2
Cleaning - Complete
Regular cleaning and lubrication of the spray gun has to be performed, in order to
increase the service life and the function of the spray gun.
Clean the gun only with cleaning solutions recommended by the manufacturer of the
spraying material used at the time. It is important to make sure that cleaning soluti-
ons do not contain any of the following constituents:
• halogenated hydrocarbons
(e.g. 1,1,1-trichloroethane, methylene chloride, etc.)
• acids and acidiferous cleaning solutions
• regenerated solvents (so-called cleaning dilutions)
• paint removers.
The above constituents cause chemical reactions with the electroplated components
resulting in corrosion damage.
WALTHER PILOT is not responsible for any damages resulting from such treatment.
Clean the spray gun
• prior to each change of the spraying medium
• at least once a week
• as often as may be required by the spraying medium handled and the resultant
degree of fouling.
Caution
Never immerse the spray gun in solvent or any other cleaning solution. The
functional reliability and efficiency of the gun can otherwise not be guaranteed.
Caution
Do not use any hard, pointed or sharp-edged objects when cleaning the spray
gun. Any damage of the precision-made parts are likely to affect your spraying
results.
1. Dismantle the spray gun in accordance with
5.5 Replacement of Material
Control Nozzle and Needle.
2. Use a soft brush together with a compatible cleaning sulotion to clean the air
control head and nozzle.
3. Clean the remaining parts and the spray gun body with a suitable cloth and
cleaning solution.
4. Apply a thin film of the appropriate grease to the:
• sealing collar of the piston
• O-ring of the piston
• material control needle
• needle spring
Make sure to use a non-acidic, non-resinogenic grease and a soft brush. The
spray gun is then reassembled in reverse order.
6.3
Cleaning - Routine
The spray gun need not necessarily be dismantled for cleaning if and when the
spraying medium is changed in regular intervals or upon termination of work
(depending on the material used).
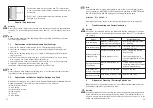
Note
Clean and lubricate the spray gun frequently in accordance with Chapter
6.2
Cleaning - Complete
. This will ensure functional reliability of the spray gun.
The following requirements must be met before the routine cleaning work can be
performed:
1. The material tank must be claen and then be filled with a compatible cleaning
aolution. Material pressure has to be available at the spray gun. The cleaning
solution should not be sprayed.
2. Take the spray gun into operation (see
5.2 Starting the Spray Gun
).
3. Do not stop the spray gun until clear cleaning solution emerges from the nozz-
le.
The material supply of the PILOT WA 450, WA 451, WA 452 and WA 453 can be
manually released so that it is not necessary to operate the complete spraying
system. All pressures should then be removed from the complete spraying system
until the next operation.
l
l
9
10
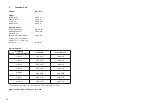
Summary of Contents for 20 545
Page 3: ...PILOT WA 450...


