background image

1. Pull back the draw bar of the spray gun. The material inlet

is now open and both material duct and material nozzle will 
be cleaned.

2. Do not let go of the drawbar until clear cleaning solution 

emerges from the nozzle.

7

Repairs / Replacements

Warning

Prior to any repairs / replacements: Make sure that the spray gun is in unpressurized
condition, i.e. all air and material inputs must be shut off - if not, imminent risk of inju-
ry.

Note

Please use the drawing at the beginning of these operating instructions to perform
the following procedures. 

7.1

Replacement of defective Needle Seal Packings

1. Remove the material control needle (see 

5.5 Retooling the Spray Gun

).

2. Unscrew the sealing screw in (pos. 14) with the O-ring and the packing screw

(pos. 13).

3. Remove the packing spring in (pos. 11) (replace, if damaged) and the pressure

ring in (pos. 10).

4. Pull out the needle seal packing in (pos. 9) with an auxilliary tool. Use a strong

wire on which one end is bent making a small hook. 

5. Lubricate the new needle seal packing with non-acidic, non-resinogenic grease.
6. Install the new needle seal packing in the gun body.
Installation of the remaining parts is performed in reverse order.

Note

Never reinstall a used needle seal packing (pos. 9) as otherwise the functional seal-
ing reliability of the spray gun will suffer.

7.2

Replacement of Nozzles, Needles, Springs and Seals

Dismantle the spray gun in accordance with Chapter

Replacement of Material Control

Nozzle and Needle

, if the following components have to be replaced:

• Material Control Nozzle
• Piston spring
• Material control needle*
• Needle spring*
• Cup seal*
• Piston O-ring*

Note

Parts marked with * must be lubricated with non-acidic, non-resinogenic grease
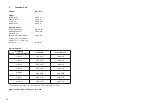
prior to installation. WALTHER PILOT repair kits are available for PILOT WA 450,
WA 451, WA 452 and WA 453 spray guns including all wearing parts:

Article No.: V 16 545 06 . . 3    

Wearing parts are also shown in the listing of replacement parts (in bold face).

8

Troubleshooting and Corrective Action

Warning

Prior to any servicing and repair work: Make sure that the spray gun is in unpres-
surized condition, i.e. all air and material inputs must be shut off - if not, imminent
risk of injury.

9

Disposal of Cleaning / Servicing Substances

Disposal of any such substances must be in accordance with all applicable local
and national regulations, directives and laws.

Warning

Pay special attention to all processing specifications and safety warnings issued
by the manufacturers of spraying and cleaning media. The improper disposal of
any toxic waste material represents a serious threat to the environment, i.e. to the
health of mankind and animal life.
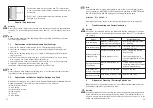
Fault

Cause

Corrective Action

Gun is dripping

Material control nozzle or
needle fouled or damaged

- Removing, cleaning, if need

be - replacing

Gun fails to open

Control air pressure too low - Increaese control air pressure

to at least 4.5 bar

Material leaks from  
leakage boring

Needle seal packing leaks

Packing gland too loose

- see 7.1 Replacing Needle

Seal Packing

- Tighten packing screw in

(pos.22) slightly with a screw-
driver

Spray jet pulsating  
or unsteady 

Level in material tank too
low

- Top-up material level (see

operating instructions of plant
systems manufacturer)

Gun keeps blo- 
wing in off-position

Cup seal po. 18 damaged

- Replace cup seal

Spray jet one-side

Horn boring soiled at air cap - Remove and clean

l

l

l

11

12

Summary of Contents for 20 545

Page 1: ...teme Airless Ger te und Fl ssigkeitspumpen Materialumlaufsysteme Kombinierte Spritz und Trockenboxen Absaugsysteme mit Trockenabscheidung Absaugsysteme mit Na abscheidung Pulverspr hst nde Trockner Zu...

Page 2: ...Inbetriebnahme ist so lange untersagt bis die Konformit t des Endproduktes mit der Richtlinie 98 9 EG festgestellt ist i V Declaration of CE Conformity We the manufacturers of the equipment hereby dec...

Page 3: ...PILOT WA 450...

Page 4: ...mplett 25 V 66 101 53 322 Steuerluftanschlu 26 V 66 101 53 015 Zerst uberluftanschlu 2x 27 V 66 100 06 255 Materialanschlu 28 V 20 510 21 003 Befestigungsbolzen 29 V 20 545 20 003 Schraube 2x PILOT WA...

Page 5: ...0 sind keine handge f hrten Spritzpistolen und m ssen deshalb an einer geeigneten Halterung befe stigt werden Die bestimmungsgem e Verwendung schlie t auch ein da alle Hinweise und Angaben der vorlieg...

Page 6: ...nfeder verschlie t die Materialzufuhr zur Materiald se Anschlie end wird die Zerst uberluft ber das 3 2 Wege Ventil abgeschaltet Die Modelle PILOT WA 452 und WA 453 sind reine Niederdruck Spritzpistol...

Page 7: ...Im Arbeitsbereich ist Feuer offenes Licht und Rauchen verboten Beim Verspritzen leicht entz ndbarer Materialien z B Lacke Kleber besteht erh hte Explosions und Brandgefahr 5 2 Inbetrieb und Au erbetr...

Page 8: ...eiten hinaus ver ndern wollen mu die Spritzpistole umger stet werden siehe 5 5 Spritzpistole umr sten WALTHER bietet dazu eine Vielzahl unterschiedlicher Luftkopf Materiald se Nadel Kombinationen an M...

Page 9: ...Spritzpistole vor jedem Farb bzw Materialwechsel mindestens einmal w chentlich materialabh ngig und je nach Verschmutzungsgrad mehrfach w chentlich Achtung Legen Sie die Spritzpistole nie in L semitte...

Page 10: ...tauscht werden m ssen Materiald se Druckfeder des Kolbens Materialnadel Nadelfeder Manschette des Kolbens O Ring des Kolbens Hinweis Die mit gekennzeichneten Bauteile m ssen vor dem Einbau in den Pist...

Page 11: ...x 6 bar Schalldruckpegel gemessen in ca 1 m Abstand zur Spritzpistole 83 dB A Luftverbr uche Bei einem Eingangsdruck von 4 5 bar betr gt der Spritzdruck 0 7 bar Technische nderungen vorbehalten Zerst...

Page 12: ...ompl 25 V 66 101 53 322 Control air inlet 26 V 66 101 53 015 Atomizing air inlet 2x 27 V 66 100 06 255 Material inlet 28 V 20 510 21 003 Mounting pin 29 V 20 545 20 003 Screw 2x PILOT WA 451 Circulati...

Page 13: ...in a suitable gun mounting device The term normal use also implies that any and all safety warnings operational handling details etc as stated in these operating instructions must be carefully read un...

Page 14: ...2 way valve The models PILOT WA 452 and WA 453 are solely low pressure spray guns and operate with a spraying pressure of 0 7 bar using an inlet pressure of 4 5 bar 3 Generally Applicable Safety Preca...

Page 15: ...ohibited in the working area Spraying of readily flammable media such as paints and adhesive compounds is always accompanied by the risk of fire and explosion 5 2 Starting Stopping Requirements The fo...

Page 16: ...nd the adjustments outlined so far you must retool the spray gun See 5 5 Retooling of Spray Gun WALTHER offers a great variety of air control head material control nozzle needle combinations for this...

Page 17: ...ing medium at least once a week as often as may be required by the spraying medium handled and the resultant degree of fouling Caution Never immerse the spray gun in solvent or any other cleaning solu...

Page 18: ...dle spring Cup seal Piston O ring Note Parts marked with must be lubricated with non acidic non resinogenic grease prior to installation WALTHER PILOT repair kits are available for PILOT WA 450 WA 451...

Page 19: ...6 bar Sound Level measured at a distance of 1 m from the spray gun 83 dB A Air consumption The spraying pressure is 0 7 bar with an air input pressure of 4 5 bar Right to effect technical changes rese...

Reviews: