31
30
6.1
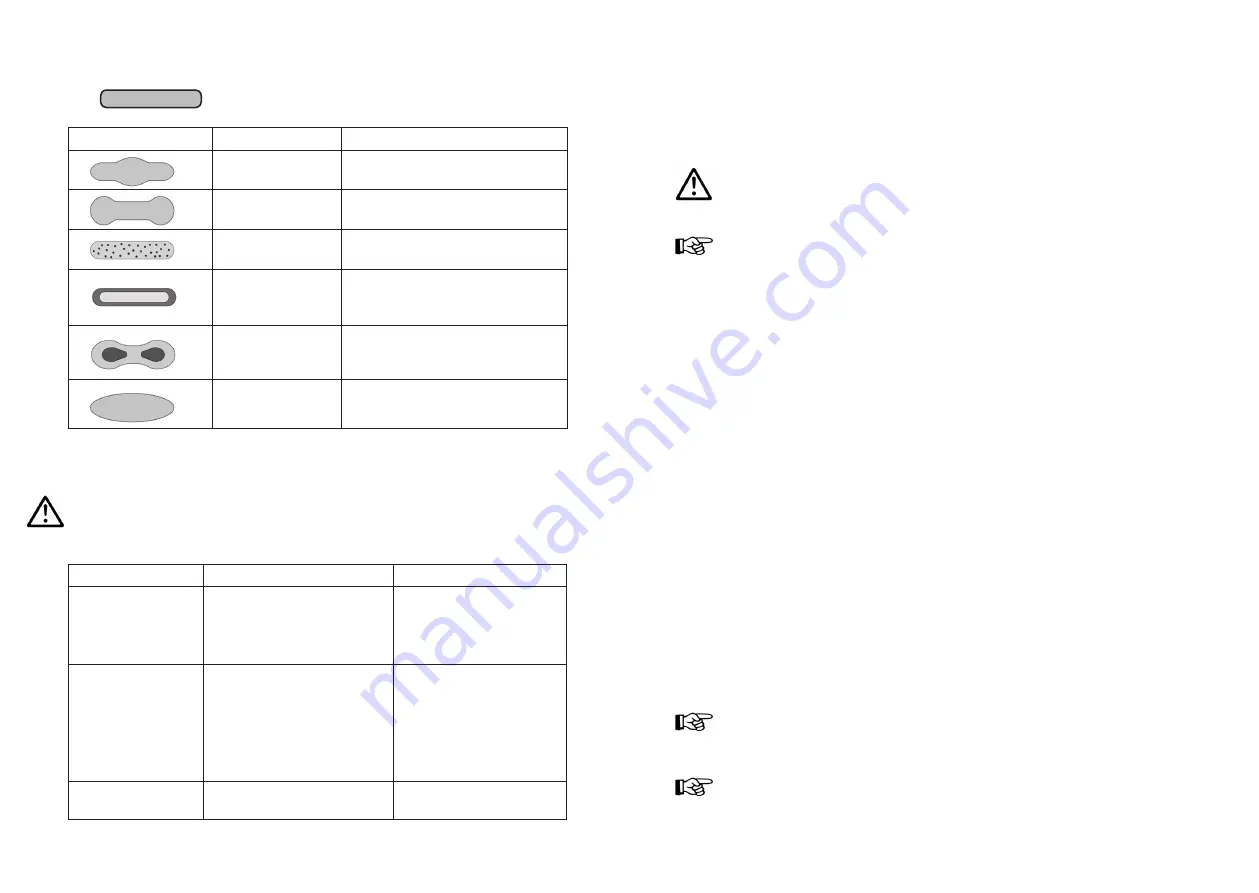
Correcting spray pattern flaws
Spray pattern test
Fault
Necessary adjustment
Swollen centre
• Spray jet should be flatter
Swollen ends
• Spray jet should be rounder
Coarse pearl effect • Increase atomising air pressure
Unduly thin paint
layer in centre
• Decrease atomising air pressure
Split centre
• Increase nozzle diameter
• Reduce atomising air pressure
• Increase material pressure
Split centre
• Decrease material pressure
• Increase atomising air pressure
7
Troubleshooting and fault rectification
Warning
Prior to any seervicing and repair work: Make sure that the spray gun is in unpres-
surized condition, i.e. air input must be shut off - if not, imminent risk of injury.
Fault
Cause
Remedy
Gun is dripping
Material needle or nozzle
soiled or damaged
Spring bushing (N° 18) tur-
ned too far to the back
• Clean or replace
• Adjust by turning clock-
wise
Pulsating or unstea-
dy jet
Not enough material in mate-
rial tank
Cup is tilted too much during
spraying operation
Material nozzle loose or
damaged
• Top-up material level
• Keep it level
• Fasten or replace
Gun keeps blowing
in off-position
Valve cone (N° 15) or
valve stem (N° 14) damaged
• Replace
desireable spray-painting result
8
Conversion and repair
If a jet contour other than those already described is desired, the spray gun has to
be re-tooled. Air cap, material nozzle and needle packing together form a unit - the
nozzle insert assembly. Always change the complete insert assembly to maintain the
desired spray finish quality.
Warning
Prior to any repairs/replacements: Make sure that the spray gun is in unpressurized
condition, i.e. air must be shut off - if not, imminent Risk of Injury.
Note
In order to perform the following procedures, please refer to the exploded diagram at
the beginning of these operating instructions.
Replacement of the material nozzle
and
the air cap
1. Unscrew the air cap nut (N° 1).
2. Remove the air cap (N° 2).
3. Unscrew the nozzle (N° 3) (ws 12) from the gun body (N° 4).
When mounting the nozzle, the material needle should be in a flashed condition.
Reassemble in reverse order.
Replacement of the material needle
1. Unscrew the spring bushing (N° 18).
2. Remove the needle spring (N° 17).
3. Pull the material needle (N° 16) out of the gun body.
Reassemble in reverse order.
For correct initial air adjustment the needle has to be set at 53 mm (Gravity-feed cup)
and 72,5 mm
(Material Connection) measured from the tip to the driving gland.
Replacement of the needle seal
1. Disassemble the needle as described above.
2. Remove the needle packing gland (N° 6).
3. Unscrew the lever shank screw (N° 19) and the lever screw (N° 21) and remove
the trigger (N° 20).
4. Remove the needle seal (N° 5) (Use a thin wire, one end of which is bent into a
hook, for this purpose).
Reassemble in reverse order.
Note
Never reinstall a used needle seal, as otherwise the functional sealing reliability of
the spray gun will not be guaranteed.
Note
All sliding and moveable parts (except the material needle!) must be lubricated with
a non-acidic, non-resinogenic grease prior to installation.


