942-101 Switch Machine © 2017 Wm K Walthers Inc Milwaukee WI 53218 Printed in China 10
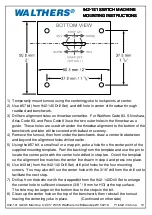
1) Temporarily mount turnout using the centering yoke to lock points at center.
2) Use #57 bit (from 942-140 Drill Set) and drill hole in center of throwbar through
roadbed and benchwork.
3) Drill two alignment holes on throwbar centerline. For Walthers Code 83, Shinohara,
Atlas Code 83, and Peco Code 83 use the two outer holes in the throwbar as a
guide. These holes are used to transfer the throwbar alignment to the bottom of the
benchwork and later will be covered with ballast or scenery.
4) Remove the turnout, then from under the benchwork, draw a center line between
and beyond the alignment holes drilled earlier.
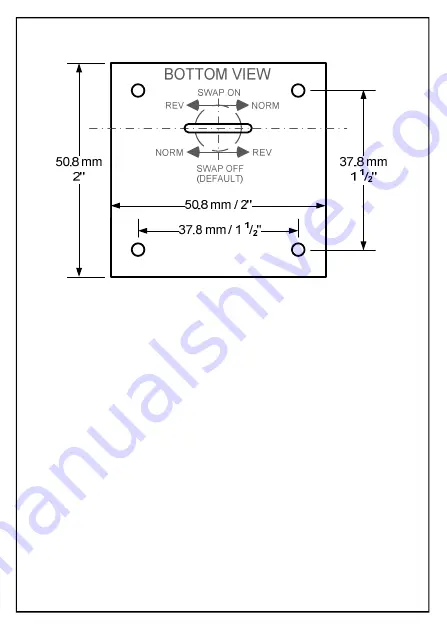
5) Using the #57 bit, a small nail or a map pin, poke a hole thru the center point of the
supplied mounting template. Peel the backing from the template and use the pin to
locate the center point with the center hole drilled in step two. Orient the template
so the alignment line matches the center line drawn in step 4 and press into place.
6) Use #43 bit (from the 942-140 Drill Set) drill pilot holes for the four mounting
screws. You may also drill out the center hole with the 3/16” drill from the drill set to
facilitate the next step.
7) Drill up from the bottom with the stepped bit from the 942-140 Drill Set to enlarge
the center hole to sufficient clearance (3/8 ” / 9 mm for HO) at the top surface.
The hole may be larger on the bottom due to the steps in the bit.
8) Clean up the center hole on the top of the benchwork, then reinstall the turnout
leaving the centering yoke in place. (Continued on other side)
942
942
942
942----101 SWITCH MACHINE
101 SWITCH MACHINE
101 SWITCH MACHINE
101 SWITCH MACHINE
MOUNTING INSTRUCTIONS
MOUNTING INSTRUCTIONS
MOUNTING INSTRUCTIONS
MOUNTING INSTRUCTIONS
WALTHERS
®
!!!!


