


WWW.
WAMBAM
FENCE.COM
6
ASSEMBLY
INSTRUCTIONS
AG14005
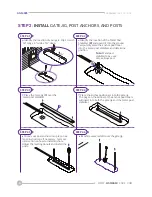
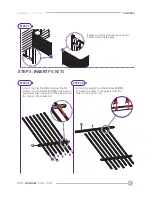
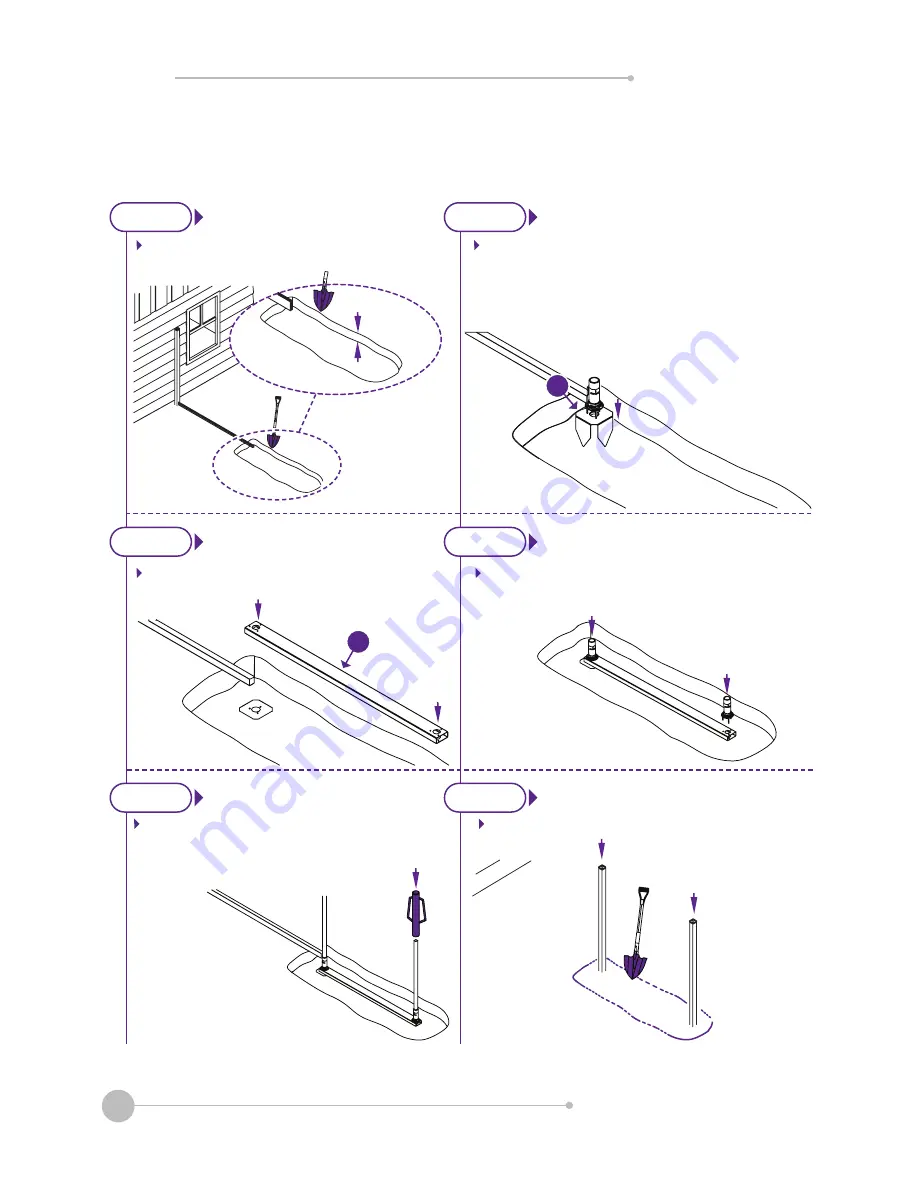
STEP 2:
INSTALL
GATE JIG, POST ANCHORS, AND POSTS
STEP 2.1
STEP 2.2
Identify the location of your gate. Dig a trench
60” long x 6” wide x 5½” deep.
Identify the location of the Metal Post
Stabilizer
(B)
and pound it into the ground.
Temporarily place the anchor positioner
into the metal post stabilizer and determine
position.
Place the Gate Jig
(C)
over the
metal post stabilizer.
Place the anchor positioners into the gate jig.
The pegs on the bottom of the anchor positioners
will insert into both the gate jig and the metal post
stabilizer.
Backfill excavated dirt over the gate jig.
Pound your post anchors into place. See
fence instructions, if necessary, for more
information on how to install anchors.
Adjust the leveling donuts and install the
posts.
Note:
Metal post
stabilizer to be used
only on hinge post.
5½”
B
C
STEP 2.3
STEP 2.5
STEP 2.6
STEP 2.4


