background image

19

GB

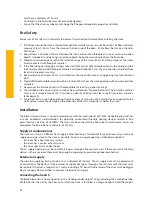
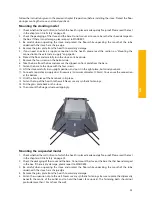
Slide the valve in the flue gas pipe 

 open. Slide the 

air valve 

 to its maximum position. Open the door 

and put some balls of paper or some firelighters inside 

the stove and place some wood kindling on top. Light 

the kindling and leave the door ajar to let in extra air 

and, if necessary, slide the ashpan 

 and the shaking 

grate 

 a bit open. Once the stove is burning, which 

is after about five minutes, you may close the door 

and the ashpan again. Do not place more than three 

logs in the stove at a time. Be sure there is always 

enough ventilation when the stove is burning. If you 

want to temper the fire, you must first close the valve 

in the flue tube and then close the air supply and the 

shaking grate.

Avoid finger marks

Do not touch the glass of the stove with your fingers. Finger marks will burn into the glass and cannot 

be removed later.

It is prohibited to light the stove with liquids like petrol or spirits.

Do not have the cooker hood on in the room where you operate your stove. Never touch the varnished 

parts when you heat your stove.

Lighting the stove for the first time

Discolouration of walls, ceilings and grates

The walls, ceilings and grates may show some discolouration after lighting your hearth. This is caused 

by the dust particles that burn in the convection cover. This is a natural process for which WANDERS 

cannot be held responsible. To minimize discolouring we refer to the advice given for atmospheric 

hearths. Your installer can give you more information about this.

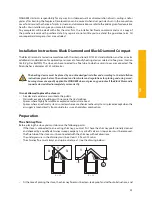
When you light the Black Diamond for the first time, the hearth must still ‘anneal’ and temper itself. The unit 

has a heat resistant lacquer which must burn in the stove at temperatures above 400 °Celsius. This will happen 

during the first few times of lighting the stove and temperatures rise to 600 °C. Though this may give an 

unpleasant smell, it is otherwise harmless. It is advisable to keep the stove burning with limited fuel for at 

least 6 hours when lighting the stove for the first 4 or 5 times. Air the room well when the stove is burning. 

Make sure that any cooking hood is not turned on when the stove is burning; a cooking hood extracts the 

combustion air that the stove needs.

Some deposit may form on the glass panes of the stove when you ‘anneal’ your hearth. You can easily remove 

this deposit with a damp cloth after the stove has cooled down. You can also use some cleansing agent for 

ceramic rings. Please make sure you do not leave any finger marks on the clean glass. Finger marks burn into 

the glass and cannot be removed later.

Newly-built house or recently renovated? 

It is advisable to wait six weeks before lighting the stove in a newly-built house that has recently been completed, or in 

a space that has recently been renovated drastically. The walls and ceilings still contain gases, softeners and moisture 

from plasterwork or paint. The warm air-streams may discolour the dust particles in the space which may stick to 

walls and ceilings. Even the moisture in the walls and ceilings will become warm and may cause yellow stains.


!

!

!

Summary of Contents for BLACK DIAMOND

Page 1: ...nd Compact 01072011 INK 00 7918 NL GB FR DE Handleiding en installatievoorschriften 2 Users guide and installation manual 16 Mode d emploi et instructions d installation 30 Bedienungsanleitung und Ins...

Page 2: ...oor de ingebruikname van uw houtkachel deze handleiding zorgvuldig te lezen en hem vervolgens goed te bewaren Uw installateur kan deze handleiding nodig hebben voor het jaarlijkse onderhoud van uw Bla...

Page 3: ...Installatie 10 Verbrandingslucht toevoer 10 Externe luchttoevoer 11 Aansluiten van de haard 11 Montage staande versie 11 Montage hangende versie 12 Montage aansluiting externe luchttoevoer 12 Reparat...

Page 4: ...arop de haard moet worden aangesloten Aansluiten van houtkachels door onbevoegden is verboden Wij kunnen u in dat geval geen garantie geven op de juiste werking van de Black Diamond Houd bij de instal...

Page 5: ...rkleuring te minimaliseren verwijzen wij naar het advies dat gegeven wordt in de sfeerhaardenbranche Uw installateur kan u daarover informeren Wanneer u de Black Diamond voor de eerste keer gebruikt m...

Page 6: ...ocent Droog hout geeft een mooi vlambeeld en weinig tot geen rook Tijdens het branden hoort u het hout knapperen Nat hout geeft een sissend geluid veel rook en een minimaal vlambeeld Het vermindert he...

Page 7: ...ontroleren of het schoorsteenkanaal over de gehele lengte een diameter heeft van minimaal 150 millimeter en of het kanaal schoon glad en lekdicht is Schoorsteen met een goede trek Warme lucht wil opst...

Page 8: ...e deur 30 cm uit de haard 5 Plaats geen brandbare materialen bijvoorbeeld gordijnen houten voorwerpen kasten schilderijen vlakbij de kachel of het rookkanaal Houd minimaal een afstand van 80 centimete...

Page 9: ...mag alleen geplaatst en aangesloten worden door een erkend installateur en volgens de onderstaande installatievoorschriften Daarnaast gelden de nationale en lokale wet en regelgeving voorplaatsingenge...

Page 10: ...n50centimeter zitten in alle richtingen 6 Scherm alle brandbare materialen af die zich binnen een straal van 80 centimeter van de kachelopeningen bevinden Doe dit met niet brandbare materialen 7 Bekle...

Page 11: ...pakkingsdoos van de haard en die van de voet Monteer geen kachel of voet die beschadigd uit een doos komt Meldt eventuele schade bij WANDERS 3 Wees voorzichtig bij het uitpakken van de haard en besche...

Page 12: ...ten op de figuur in de vorige alinea 3 Hang de haard in de beugel denk aan uw rug Om gewicht te besparen kunt u het glas en de stookplaat verwijderen zie hoofdstuk reparaties op pagina 13 4 Indien ach...

Page 13: ...ng deze geheel Vervang het gebroken glas let op scherpe randen Monteer alles weer terug Vervangen van de voorruit Verwijder de glasplaat en schroef de twee beugels los Pak de gebogen voorruit door het...

Page 14: ...gashoeveelheid 8 4 g s Rookgastemperatuur 290 0 C Voordruk 0 12 mBar Rendement 78 9 CO op 13 O2 0 07 Fijnstof 26 mg m3 Keuringsinstituut 1625 1625 Keuringsnorm EN13240 EN13240 Keuringsrapportnummer RR...

Page 15: ...ige matten verstikt matten verstikt matten verstikt g kromme 2 schilfers g kromme 1 schilfers g kromme 2 platen g kromme 1 platen g kromme 2 enkel 100 120 140 160 720 740 760 Zoek in deze tabel het is...

Page 16: ...t way to burn your stove 20 Chimney and flue 21 Maintenance 21 Small maintenance 21 When the stove is not used 22 Yearly maintenance 22 Safety 22 Guarantee 22 Installation Instructions Black Diamond a...

Page 17: ...sign you can view the Black Diamond from all corners of the room When designing this fireplace we took particular care regarding the ease of use the operational safety and the design The Black Diamond...

Page 18: ...ght advice about the flue tube to which the stove must be connected Connecting wood burning stoves by unqualified persons is prohibited in which case we cannot give any guarantee about proper function...

Page 19: ...ng we refer to the advice given for atmospheric hearths Your installer can give you more information about this When you light the Black Diamond for the first time the hearth must still anneal and tem...

Page 20: ...smoke and the fire will crackle when burning Wet wood makes a hissing sound gives much smoke and only small flames which will considerably dampen the pleasure of burning your stove and the heat outpu...

Page 21: ...ustion Before starting the installation of the stove your installer or a qualified chimney sweep must check whether the chimney flue has a diameter of at least 150 millimetres over the entire length a...

Page 22: ...ce on all sides from the door 5 Do not place any combustible materials such as curtains wooden objects cupboards paintings close to the fireplace or the flue tube A minimum distance of 80 cm measured...

Page 23: ...ller and according to the installation instructions given below The national and local rules and regulations for placing and using wood burning stoves are equally applicable WANDERS does not give any...

Page 24: ...insulation materials table page 29 9 Avoid heat transmission when placing the stove Heat transmission of a burning stove can penetrate the wall and even cause fire damage on the other side of the wall...

Page 25: ...the stove with the four screws 10 Lift the stove carefully in an upright position and put it in the right place but mind your back 11 Connect a separate air supply duct if necessary minimum diameter...

Page 26: ...tinue with point 7 of the previous paragraph Mounting the suspending model 1 2 3 4 5 6 A A B B C C D D RUWHEID VOLGENS NEN 3634 TOLERANTIES 0 5MM TENZIJ ANDERS AANGEGEVEN WANDERS BV AMTWEG 4 7077AL NE...

Page 27: ...entirely Replace the broken glass Watch out for sharp edges Reassemble everything Replacing the front glass Remove the glass plate and unscrew the two clips Then take the arched front glass by moving...

Page 28: ...ue gas temperature 290 0 C Pre pressure 0 12 mBar Efficiency 78 9 CO at 13 O2 0 07 Particulate matter 26 mg m3 Certificate institute 1625 1625 Test standard EN13240 EN13240 Test report number RRF 400...

Page 29: ...all Table for insulation material Only use products in the shaded area Insulation Packed Thermal conduction Maximum Density appliance temp nr article nr form nr packed nr C nr kg m 10 11 12 13 01 02 0...

Page 30: ...33 Combustible 34 La fa on optimale de chauffer le po le 35 Chemin e et conduit de chemin e 35 Entretien 36 Petit entretien 36 Mise hors service 36 Entretien annuel 36 S curit 36 Garantie 37 Instruct...

Page 31: ...nt Nous vous f licitons pour l acquisition de votre nouveau po le bois de WANDERS C est une source de chaleur confortable qui vous donnera beaucoup de plaisir pendant de longues ann es Par son design...

Page 32: ...raccordement des po les bois par une personne non agr e est fortement d conseill Dans ce cas nous ne garantissons pas le bon fonctionnement du Black Diamond L installation devra r pondre galement aux...

Page 33: ...s peuvent changer de couleur C est que des grains de poussi re br lent dans le manteau de convection Il s agit d un processus naturel dont WANDERS ne saurait assumer la responsabilit Pour r duire au m...

Page 34: ...o lequede3 4kgdecombustible la fois Utilisez toujours du bois propre coup et bien sec Consultez le tableau qui pr c de pour les dur es de s chage recommand es Le bois humide ne br le pas bien et entra...

Page 35: ...eu d un coup l aide de l eau mais laissez le feu s teindre Sinon les mat riaux l int rieur du po le peuvent subir des d formations ou des fissures par les grands carts de temp rature survenus brusquem...

Page 36: ...es portes et des ch ssis ne sont pas us s S curit Un po le bois de WANDERS c est toujours une source de chaleur confortable et s re Ce qui est primordial pour assurer la s curit contre l incendie ce s...

Page 37: ...ns le manteau de convection Pour r duire au maximum les fissures au pl trage et les d colorations ventuelles veuillez vous reporter aux consignes g n ralement donn es dans le commerce sur les po les d...

Page 38: ...c t de la porte 30 cm depuis le po le 2 Respectez un cartement de 80 centim tres au minimum entre le po le et les objets combustibles tels que les rideaux des objets de bois armoires et tableaux et de...

Page 39: ...terne voyez la page 41 Raccordement du po le Le Black Diamond est un po le bois de type lourd La version verticale en ce compris le conduit d vacuation de fum e de 2 m tres p se 150 kilos Assurez vous...

Page 40: ...arriv e d air voir l alin a suivant 7 Pendez le po le dans les triers Pensez votre dos Pour diminuer le poids vous pouvez momentan ment 1 1 2 2 3 3 4 4 5 5 6 6 A A B B C C D D RUWHEID VOLGENS NEN 3634...

Page 41: ...itre R parations en page 41 4 En cas de raccordement l arri re glissez le tuyau d arriv e d air externe dans le trou et glissez le bo tier d air externe entre les l vres 5 En cas de raccordement par d...

Page 42: ...issant descendre l g rement Attention le verre est coupant Enlevez les bandes de joints V rifiez si la bande c ramique est enti re et bien fix e la porte Sinon recollez la avec un kit de silicones neu...

Page 43: ...t gaz de fum e 8 4 g s Temp rature gaz de fum e 290 0 C Pression pr liminaire 0 12 mBar Rendement 78 9 CO 13 O2 0 07 Particules fines 26 mg m3 Institut d inspection 1625 1625 Norme d inspection EN1324...

Page 44: ...NB seul le mat riau indiqu dans la zone grise est admis Isolation Emballage Conduction thermique Temp e de serv Densit la plus lev e no article no forme no emballage no C no kg m 10 11 12 13 01 02 03...

Page 45: ...ial 49 Die optimale Art zu Heizen 50 Schornstein und Rauchkanal 50 Wartung 51 Kleine Wartung 51 Au er Gebrauchnahme 51 J hrliche Wartung 51 Sicherheit 51 Garantie 52 Montagevorschriften Black Diamond...

Page 46: ...chriften sowie auch die technischen Angaben dieses Black Diamond Ofens Diese sind vor Allem f r den Installateur wichtig Vor Gebrauch Ihres Holzofens bitten wir Sie die Gebrauchsanweisung sorgf ltig z...

Page 47: ...erkannter Installateur kann Ihnen auch den korrekten Rat geben ber den Rauchabzugskanal an welchen der Ofen angeschlossen werden muss Der Anschluss der Holz fen durch Unbefugte ist verboten In dem Fal...

Page 48: ...zen Verf rbung von W nden Decken und Roste Durch Heizen des Ofens k nnen W nde Decken und Roste sich verf rben Das kommt daher dass Staubteilchen im Konvektionsmantel verbrennen Das ist ein nat rliche...

Page 49: ...olz beheizt werden Legen Sie nie mehr als 3 4 Kg Heizmaterial in den Ofen Ben tzen Sie immer sauberes gehacktes Holz das gen gend trocken ist Die Trocknungszeiten sehen Sie in der Tabelle oben Feuchte...

Page 50: ...Wasser sondern lassen es von selbst ausgehen Die Materiale im Ofen k n nen sich sonst durch den pl tzlichen Temperaturunterschied verformen oder rei en Wenn Sie das Feuer drosseln wollen m ssen Sie er...

Page 51: ...chtungen von T ren und Glasscheiben auf Verschlei erscheinungen pr fen Sicherheit Mit einem Holzofen von WANDERS haben Sie eine bequeme und sichere W rmequelle im Haus Der Brandschutz f ngt schon bei...

Page 52: ...ungen zu minimalisieren verweisen Sie auf den Rat der von der Branche f r Kamin fen gegeben wird Ihr Installateur kann Sie dar ber informieren Reklamationen werden erst dann behandelt wenn die Verkauf...

Page 53: ...iten 30 cm ab der Au enseite des Ofens 2 Halten Sie mindestens 80 cm Abstand zwischen Ofen und brennbaren Materialen ein Denken Sie dabei an Gardinen Gegenst nde aus Holz Schr nke und Gem lde und Glas...

Page 54: ...Ofen montiert wird das Gewicht problemlos tragen kann Bevor Sie den Ofen montieren befolgen Sie erst die Anweisungen aus dem vorigen Kapitel Vorbereitung Sch tzen Sie Ihren R cken und den Fu boden w h...

Page 55: ...ie dazu den Anschluss an der Unterseite des Ofens Anleitung zur Montage der externen Luftzufuhr lesen Sie im n chsten Paragraphen 1 1 2 2 3 3 4 4 5 5 6 6 A A B B C C D D RUWHEID VOLGENS NEN 3634 TOLER...

Page 56: ...en siehe Kapitel Reparaturen auf Seite 56 4 Bei Anschluss an der R ckseite das Rohr f r externe Luftzufuhr in die ffnung schieben und das K stchen des externen L ftung Anschlusses in die M ndung schie...

Page 57: ...unten kippen Vorsicht das Glas ist scharf Entfernen Sie die Glasstreifen Kontrollieren Sie ob der keramische Streifen noch ganz ist und gut am Ofen festsitzt Gegebenenfalls kle ben Sie diesen wieder...

Page 58: ...emperatur 290 0 C Mindestf rderdruck bei NWL 0 12 mBar Wirkungsgrad 78 9 CO auf 13 O2 0 07 Feinstaub 26 mg m3 Pr fstelle 1625 1625 Pr fnorm EN13240 EN13240 Pr fungsgutachten Nummer RRF 400 169 Richtwe...

Page 59: ...en Gebiet steht ist erlaubt Isolation Verpackt W rmeleitung H chste Dichte Gebrauchstemp nr artikel nr form nr verpackt nr C nr kg m 10 11 12 13 01 02 03 04 05 06 07 08 09 10 99 01 02 10 11 20 21 99 1...

Page 60: ...ING NUMMER FORMAAT WIJZ AMERIKAANSE PROJECTIE RobG 21 07 2010 BLACK DIAMOND NIEUWE VERSIE GDI 2000 A3 230 00 305 50 159 00 600 25 152 75152 75 105 00 761 25 164 53 10 00 1 1 2 2 3 3 4 4 5 5 6 6 A A B...

Page 61: ...516 54 885 27 664 50 632 50 432 00 771 85 171 00 150 00 468 50 3 4 8 6 8 461 44 309 00 152 98 540 00 407 54 521 00 505 50 512 51 Black Diamond Compact 1 2 3 4 5 6 B B C C D D 305 50 189 00 230 00 10...

Page 62: ...HDI 2061 HDI 2035 INK 00 0110 GIE 00 2334 GIE 00 2335 HDI 0035 HDI 2027 HDI 2056 SDI 2008 SDI 2003 HDI 2027 HDI 0053 HDI 0055 HDI 2023 DRA 00 1573 DRA 00 1572 DRA 00 1576 SDI 2010 HDI 0040 HDI 0041 S...

Page 63: ...HDI 4093 INK 00 2050 HDI 4054 GLA 00 0926 INK 00 0112 HDI 2035 BEV 01 7025 HDI 0070 DRA 00 2503 DRA 00 1550 HDI 2050 DRA 00 1584 HDI 2056 HDI 2027 INK 00 6846 HDI 4061 GLA 00 0925 SDI 4002 HDI 2025 HD...

Page 64: ...n cover To minimize the chance of cracks in stucco and discolouration we refer to the advice given for decorative hearths Your installer can give you more information Any complaints will be dealt with...

Reviews: