22
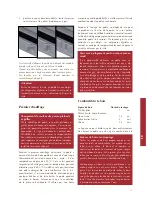
Mounting the Square:
1. Check the packing. If you detect any visible dam-
age, please notify the supplier.
2. Take the stove from the box.
3. Remove the flue collar from the stove by unscrew-
ing the 4 bolts.
4. Place the insert at it’s final position. Make sure that
it is positioned right beneath the chimney. If the
fans are installed please make sure the wire does
not crack or break during installation.
5. Connect the flue collar to the flue system with the
upper sections fitting into the lower sections.
6. Place the baffle plate into the stove.
7. Your stove is ready for use.
WANDERS recommends adding extra air inlets with all
built in stoves
Repairs
Replacing the glass in the door:
To replace the glass you’ll have to unscrew the frame
surrounding the door. This frame is fastened with 4
screws, 2 on top and 2 underneath.
Removing the inside panels:
To remove the inside panels you’ll have to remove the
bottom plate first. Now you can take the left, right and
back plate out of the stove.
Summary of Contents for SQUARE 60 G
Page 13: ...13 GB User s Guide and Installation Manual Square GB...
Page 25: ...25 FR Mode d emploi et instructions d installation Square FR...
Page 38: ...38 Gebrauchsanweisung und Installationsvor schriften Square Holzofen DE...
Page 52: ...52 Square 60 Corner Right...
Page 54: ...54 Square 60 Corner Trilateral...
Page 56: ...56 Square 68 Front...
Page 58: ...58 Square 68 Corner Left...
Page 60: ...60 Square 75...


