7
user instructions
WAN_SYMAX_EN_v.1.1_112016
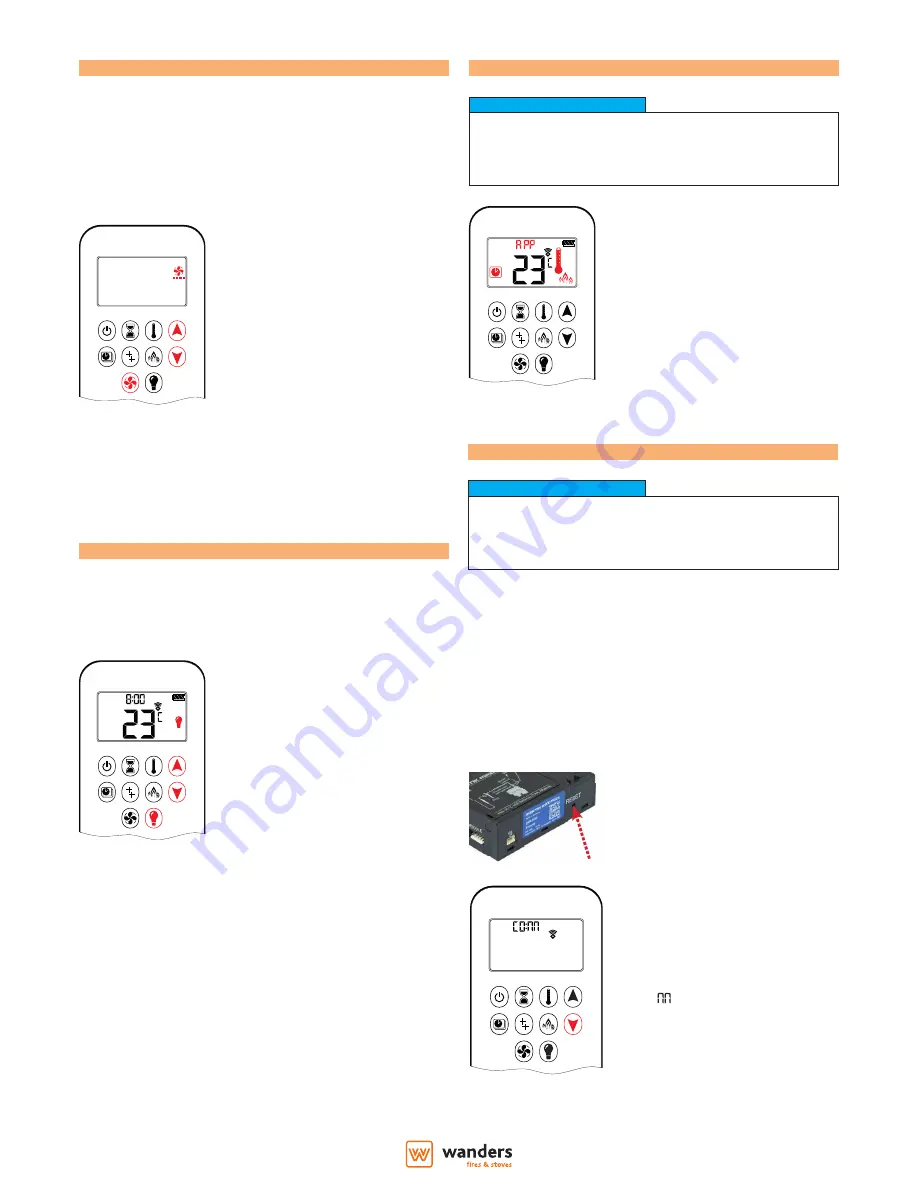
Circulating fan operation
SETTING:
1. Press the
C
button and hold until the
R
symbol flashes.
2. Press
A
to increase the speed and
press
B
to decrease the fan speed.
3. To confirm the setting either press the
C
button or wait.
R
will be displayed.
OFF:
Press the
B
untill all 4 speed level bars
disappear.
AM
NOTE:
If the circulation fan was not switched off after its last use, it starts
automatically 4 minutes after ignition at maximum speed and goes to
the last set level after 10 seconds.
The fan stops 10 minutes after the gas is OFF or at its pilot fl ame.
NOTE:
Wanders fi res & stoves does not deliver circulating fans for
this system. Your installer can install this additional feature by
connecting the optional module (INK.3255).
NOTE:
The circulating fan has 4 speed levels from low (1 bar) to high (4 bars).
Light/dimmer operation
ON:
Press the
D
button.
Q
symbol will appear.
The light is on at a preset level.
OFF:
Press the
D
button.
Q
will disappear.
SETTING:
1. Press
D
untill
Q
flashes.
2. To adjust light between 20 .... 100%
press
A
or
B
.
3. To confirm the setting either press
the
D
button or wait.
Q
is displayed.
AM
NOTE:
The light works independently of the pilot fl ame. If you want the
light on but don't want the fl ames, press the
D
button.
NOTE:
Wanders fi res & stoves does not deliver lighting for this system.
Your installer can install this additional feature by connecting the
optional module (INK.3255).
App control via WiFi (optional)
Before the App can be used the WiFi box must be wired and
plugged into the mains according to the App setup diagram.
One also needs to complete the App setup.
NOTICE
If Thermostatic (
M
), Program (
K
) or
the Ecowave mode (
N
) is activated,
the corresponding symbol and
APP
is
displayed on the handset.
The modes can be operated according to
the descriptions on the previous pages.
NOTE:
In the Manual Mode "
APP
" is not displayed
on the handset.
1 2
ON
AM
PM
OFF
Synchronization receiver/handset
This is a one time setting only. It is not required after changing
the batteries in the handset or receiver. The synchronization
process has been done during production of your appliance.
NOTICE
NOTE:
Both the receiver and the handset transmit and receive signals (bi-
directional). Handset and receiver sync status information every 10
seconds during the fi rst 2 minutes. Afterward every 4 - 6 minutes
up to 1 hour. Touching a handset button causes an immediate
synchronization.
NOTE:
When the RF receiver is placed in the appliance, the surrounding
metal can reduce the reception considerably.
AM
1. Insert batteries or connect the AC
mains power. Don't use the batteries
when the AC is connected.
2. Place the ON/OFF switch (if
equipped) in the ON position.
3. The receiver has to learn the handset
code. Press and hold the receivers
RESET button until you hear two (2)
beeps. After the second, longer beep,
release the RESET button. Within the
subsequent 20 seconds press the
B
button on the handset. Two short
beeps will confirm the code is set.
"
CO
" is displayed on the handset
confirming the synchronization
is in process. After a succesful
synchronization the current state of
the gas appliance is displayed on the
handset.


