background image

Operation 

[B867400_1] - EN / 20.07.11 

Page 7 of 16 

Subject to change without notice 

3


Operation 

3.1


Operation with the crank 

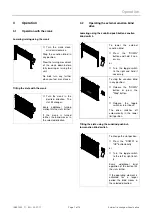
Lowering/raising using the crank 


Turn the crank clock-
wise/anti-clockwise. 

Stop the venetian blind in 
any position: 

Slow the turning movement 
of the crank down before 
fully lowering or raising the 
unit. 

Do 

not

 turn any further 

when you feel a resistance. 


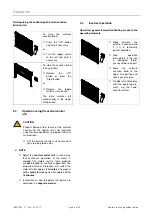
Tilting the slats with the crank 


Turn the crank in the 
desired direction. The 
slat tilt changes. 

Every additional turning 
motion tilts the slats further. 

If the crank is turned 
further, the blind moves in 
the selected direction. 


3.2


Operating the external venetian blind 
drive 

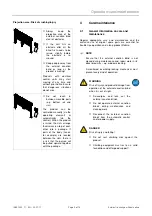
Lowering using the sunblind push button/venetian 
blind switch 


To lower the external 
venetian blind: 


Press the "DOWN" 
button and hold if nec-
essary. 

or 


Turn the toggle switch 
to the right and hold if 
necessary. 


To stop the venetian blind 
in any position: 


Release the "DOWN" 
button or press the 
"Stop" button. 

or 


Release the toggle 
switch or turn it back. 

The drive switches off 
automatically in the lower 
limit position. 


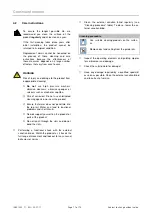
Tilting the slats using the sunblind push but-
ton/venetian blind switch 


To change the slat position: 


Press the "DOWN" or 
"UP" button briefly. 

or 


Turn the toggle switch 
to the left or right brief-
ly. 

Every additional brief 
operation of the button tilts 
the slats further. 

If the operating element is 
activated for a longer 
period, the blind moves in 
the selected direction. 


Summary of Contents for C 80 A8

Page 1: ...WAREMA metal system venetian blinds Type C E 80 90 93 A8 Instructions for use and maintenance To be handed over to the operator Valid from 20 July 2010 Document number B867400_1 EN...

Page 2: ...ormation 5 2 1 Parts description 5 2 2 Technical data accessories 5 2 3 Intended use 5 2 4 Wind speed limits 6 2 5 CE conformity 6 3 Operation 7 3 1 Operation with the crank 7 3 2 Operating the extern...

Page 3: ...eration Ot ealt with Page 3 of 16 the ese t in e to A of in ully ou he nd ate tain nte tem ther Pe No na as app pro sol WA ref use 1 3 Sa app S ermissible act o other altera nce work are t described i...

Page 4: ...venetian blinds to the upper limit position and take them out of service We recommend the use of an ice monitoring system Raise the external venetian blinds to the upper limit position and take out o...

Page 5: ...for their intended use to provide privacy and protect against summer heat and glare Inappropriate use may result in significant danger The metal system venetian blinds are raised and lowered by a lif...

Page 6: ...mounting ven due to the 5 CE co E conformity rresponding ndition and en e obliged to aintenance Name Year of Head office Standa Produc tended use Wind class oise emission Specification stands cann ar...

Page 7: ...g the external venetian blind drive Lowering using the sunblind push button venetian blind switch To lower the external venetian blind Press the DOWN button and hold if nec essary or Turn the toggle s...

Page 8: ...al control unit to manual if you are going to be away NOTE Adjust the central control unit in such a way that continuous operation of the motor is avoided The motors used in these products are not int...

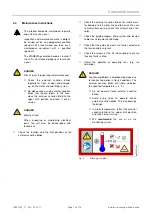
Page 9: ...xample are located between the slats there is a risk that the person will be pulled upward together with the package 4 Care maintenance 4 1 General information on care and maintenance Regular appropri...

Page 10: ...orrosion Do not use chlorinated cleaning agents on or near the product Ensure that water does not penetrate into the top rail Water can lead to functional problems and short circuits Do not support yo...

Page 11: ...de energised and locked out Check the function and the limit positions of the external venetian blinds Check the external venetian blinds for visible wear for damage to the motor line and to ensure t...

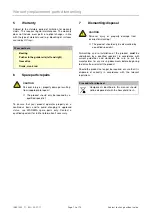
Page 12: ...product operates properly on a continuous basis and to avoid changing its approved status use WAREMA spare parts only Contact a qualified specialist for further information if necessary 7 Dismantling...

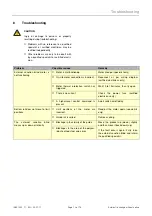
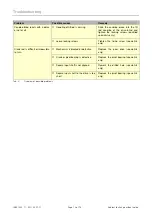
Page 13: ...t as per wiring diagram certified electricians only Motor thermal protection switch has triggered Wait 10 to 15 minutes then try again There is no current Check the power fuse certified electricians o...

Page 14: ...crews qualified specialists only Loose locking screws Tighten the fixing screw specialists only Crank rod is difficult or impossible to turn Mechanism is blocked or defective Replace the gear drive sp...

Page 15: ...B867400_1 EN 20 07 11 Page 15 of 16 Subject to change without notice...

Page 16: ...WAREMA Renkhoff SE Hans Wilhelm Renkhoff Stra e 2 97828 Marktheidenfeld Germany www warema de info warema de...

Reviews: