2024730_d•en•2020-01-01
We reserve the right to make technical modifications
2
Install the device in a position in which the wind wheel
is as close as possible to horizontal (housing inclina-
tion of 15°). When installing the device on sloped
areas, the sensor can be positioned horizontally using
When selecting the installation location, ensure that the
solar panel is sufficiently supplied with sunlight. For
example, an overhanging roof may shade the panel at
certain times of the day. Also avoid installing it on the
north face of buildings.
Before installing the device, consider that trees, bushes
or parts of the building may shade the photo sensor
during the course of the day. In this case, the sensor
cannot deliver exact measuring values and the results
will be incorrect. Therefore, select the installation loca-
tion carefully.
When selecting an installation location, ensure that the
photo sensor is exposed to the same brightness condi-
tions as the sun shading system being controlled. This
means that you need to position the photodiodes ac-
cording to the building facades being shaded. Ideally,
the weather station is oriented in the same direction as
the sun shading product being controlled.
Install the device in the vicinity of the sun shading
product although not in places where the sun shading
system affects the wind currents; otherwise, the sensor
will not provide the correct wind evaluation.
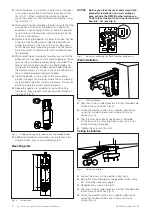
Separate spacers are included for wall and ceiling
installation. They prevent cracking and deformation of
the plastic (Fig. 2).
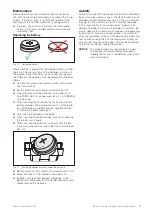
Fig. 2
Clipping the separate spacers into the threaded hole
Additional installation information can be found in the
documentation of your sun shading system.
Mounting plate
0
13,75
4,5
9,0
207,5
199
4,5
9,0
56
4,5
9,0
134,5
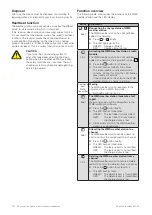
Fig. 3
Dimensions
OTICE
N
Before you close the cover and screw it into
place after installation on a wall, ceiling or
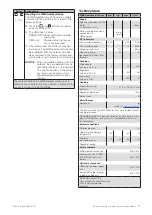
pole, activate the WMS Weather station eco.
To do this set the switch on the printed circuit
board to "on" (see Fig. 4)
off
on
off
on
Fig. 4
Switch for activating the WMS Weather station eco
Wall installation
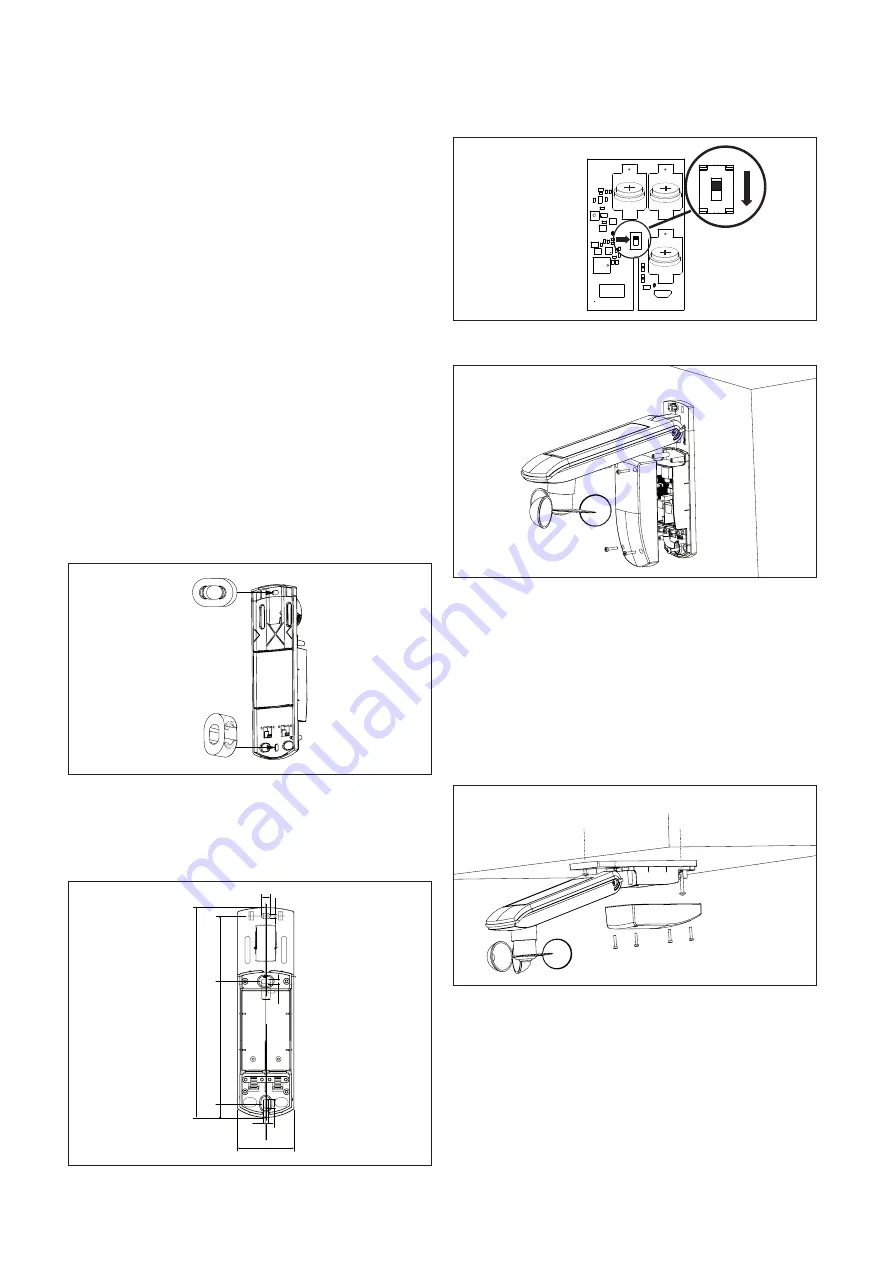
Fig. 5
Wall installation
Clip one of the included spacers into the threaded hole
(horizontally or vertically, Fig. 2).
Attach the weather station to a suitable substructure
using the included screws and screw anchors as
shown (Fig. 5).
The line must be correctly positioned in the guide
on the back of the mounting plate to ensure it is not
pinched during installation.
Tighten the screw on the joint.
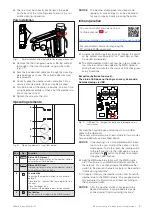
Ceiling installation
Fig. 6
Ceiling installation
Loosen the screw on the weather station joint.
Swing the mounting plate of the weather station up by
90° (or by the necessary angle).
Retighten the screw on the joint.
Clip one of the included spacers into the threaded hole
(horizontally or vertically, Fig. 2).
Attach the weather station to a suitable substructure
using the included screws and screw anchors as
shown (Fig. 6).


