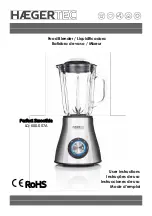
MX Blender
Maintenance Guide
Daily Maintenance
At the end of every service, inspect
the blade inside the jar and the drive
coupling to ensure they are both in
proper working condition. The blade
should be free from nicks or blunt
edges, and the coupling should have pronounced edges to the gripping
teeth inside it (see coupling image below). If either of these parts needs
maintenance, use the following steps to replace them.
Drive Coupling Replacement
Removing the jar while the blade is still spinning will wear down the drive coupling more quickly.
The more worn the drive coupling gets, the more difficult it will be to remove and replace.
Unplug your blender. With the blender base on its side, use a ¼-inch flat screwdriver
to insert into the hole on bottom of the base to hold the motor shaft in place.
With your other hand, or the help of a
colleague, insert the drive coupling
removal tool into the drive coupling and
turn counterclockwise to loosen. Discard
old drive coupling and replace with a
new one. The new coupling can be
placed in position and spun clockwise
by hand. The coupling will self-tighten
the first time the blender is run.
To ensure optimal blending performance, it is essential to monitor the
drive coupling and blade/blending assembly for damage on a daily
basis. These parts should be replaced every 3 to 6 months – depending
on usage (higher volume locations may need to replace these parts
more frequently). Properly scheduled maintenance will keep your
blenders operating efficiently.
DRIVE COUPLING
CAC160
Good Coupling
Drive Coupling
Removal Process
Drive
Coupling
Removal
Tool
REMOVAL TOOL
CAC161
Good Blade
Bad Blade


