Page
87
CONNECT 1
ST
EXTENSION AND AIR HOSE
4.
Ensure the locking band is open by sliding the clamp to the O (Open) position.
Lubricate and fit the first extension or terminal depending on installation
requirements. Close the locking band, then slide the clamp to the C (Closed)
position, ensuring the flue is secure.
5.
Fit the air inlet spigot and gasket to the burner. Attach the flexible air hose to
the burner and starter assembly and secure with the jubilee clips (E) at both ends.
MEASURE AND CUT TERMINAL
6.
Fit the flashing and assemble the flue up through the roof, lubricating all seals
and securing all locking bands after installation. Measure the excess length, X,
noting carefully the correct measurement locations.
7.
Remove the terminal, cut X mm from the outer pipe of the terminal (C) then X
mm from the inner pipe. Refit the terminal and secure in place with the bracket
(D).
Summary of Contents for Agentis Series
Page 2: ......
Page 30: ...Page 29 4 5 Components 4 5 1 B Series Boilerhouse Casing Key Components...
Page 31: ...Page 30 4 5 2 I Series Internal Casing 21 26 33 Models 44 Models...
Page 32: ...Page 31 4 5 3 I Series Internal Key Components 21 26 33 Models 44 Models...
Page 33: ...Page 32 4 5 4 I Series Internal Pump Group 21 26 33 Models 44 Models...
Page 35: ...Page 34 4 5 7 E Series External Casing 21 26 33 Models 44 Models...
Page 36: ...Page 35 4 5 8 E Series External Key Components 21 26 33 Models 44 Models...
Page 37: ...Page 36 4 5 9 E Series External Pump Group 21 26 33 Models 44 Models...
Page 39: ...Page 38 4 5 12 Combination Boiler Pipe Layout...
Page 41: ...Page 40 5 1 2 I Series Internal I21 I26 I33 5 1 3 I Series Internal I44...
Page 43: ...Page 42 5 1 6 E Series External Base Tray E21 E26 E33 5 1 7 E Series External E44...
Page 45: ...Page 44 5 1 10 E Series External Combination Boiler Base Tray E21C E26C E33C...
Page 61: ...Page 60 6 3 3 External 230V Two Channel Programmer Room Thermostat Optional Outdoor sensor...
Page 62: ...Page 61 6 3 4 Internal Two Channel Programmer and Room Thermostat Optional Outdoor Sensor...
Page 73: ...Page 72 6 6 9 Honeywell Y Plan Independent CH DHW Fully Pumped Only 2 CHANNEL TIMECLOCK...
Page 74: ...Page 73 6 6 10 Honeywell S Plan Independent CH DHW Fully Pumped Only 2 CHANNEL TIMECLOCK...
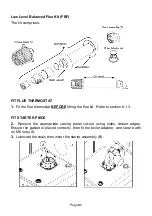
Page 93: ...Page 92 Kabin Pak External Plume Management Kit KPMK The kit comprises...
Page 107: ...Page 106 11 4 Burner Start Up Cycle Lock out is indicated by a lamp on the control box...
Page 122: ...Page 121 14 SPARES 14 1 RDB 2 2 BX Spares...
Page 124: ...Page 123 14 2 RDB 3 2 BX Spares...
Page 134: ...Page 133 Intentionally left blank...
Page 135: ......


