32
STEP 11 – Empty the Ash Pan
•
Empty the ash pan. The contents of the ash pan can be discarded with garden waste or
in line with local waste disposal regulations.
STEP 12 - Re-Install the Ash Pan
•
Ensure the combustion door is fully opened to make room to re-install the ash pan.
•
Re-Install the ash pan into the ash pan area of the heat exchanger ensuring no ash has
fallen below or behind it.
STEP 13 – Re-Install the Combustion Pot
•
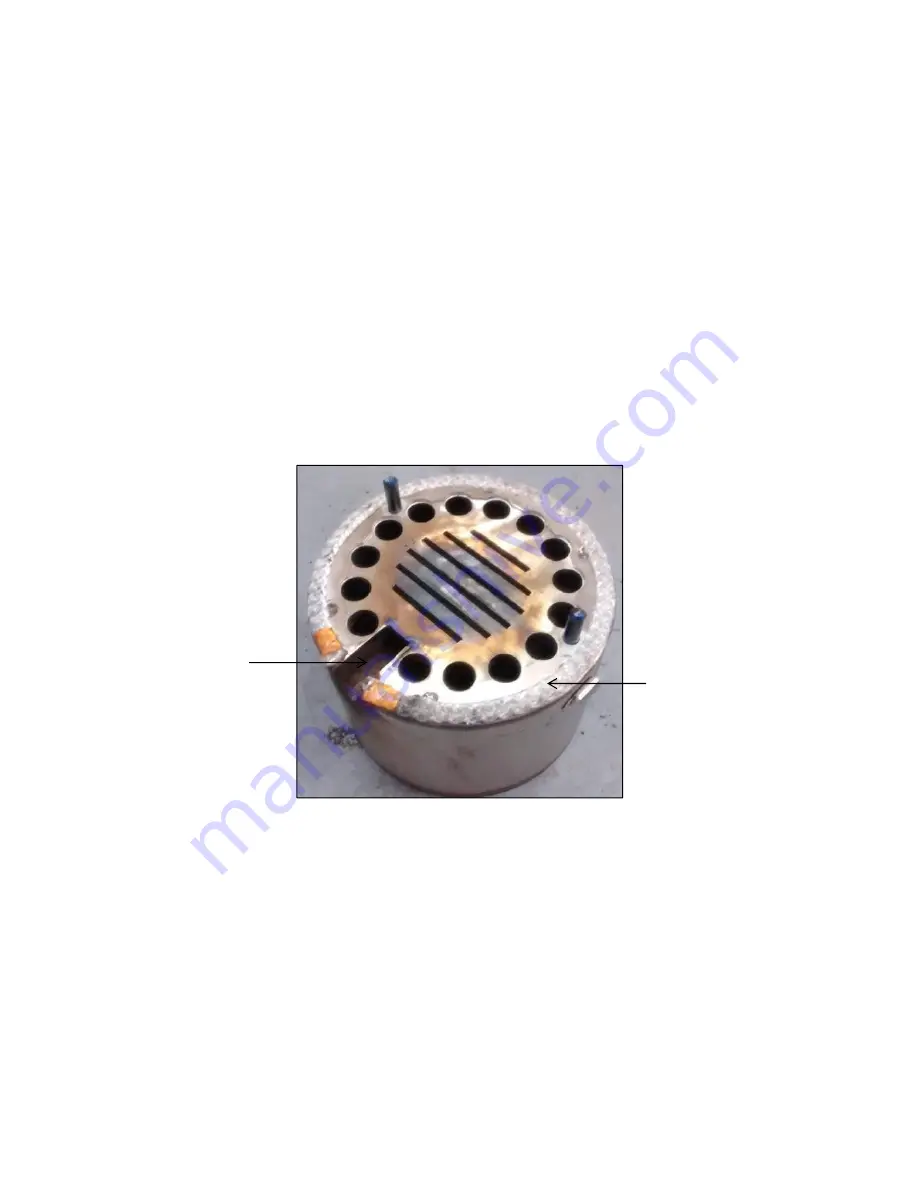
Check that the seal on the bottom of the combustion pot is in place and in good condition
(Refer to Figure 45). If this seal is removed or has become worn or damaged it should be
replaced by a Warmflow engineer or other trained and competent engineer. This seal is
critical for efficient operation of the appliance.
•
Locate the combustion pot on the combustion shelf in the same position it was in prior to
being removed during STEP 7. The igniter cut-out should be orientated over the igniter
assembly, and the slots in the base of the combustion pot should be aligned with the
corresponding cleaning knives of the cleaning mechanism.
•
Take care not to damage the cleaning knives when re-installing the combustion pot.
•
Fasten the two toggle latches on both sides of the combustion pot.
Figure 45: Seal on Combustion Pot
Combustion
Pot Seal
(White)
Igniter
Cut-out


