23 April 2018
Due to continued product improvement, Warmington Ind LTD reserves the right to change product specifications without prior notifi-
All Dimension are in mm
…….
Copyright on all products and Specifications ©
16
IMPORTANT NOTES:
* Inlet Pressure not to exceed 4.0KPa
GAS SPECIFICATIONS Tested to current gas standards
NOTE : All Test Pressures are tested by a Independent Test Lab
MODLE
SG 700
SG 780
SG 900
SG 1100
LPG
Nominal Pressure kPa
2.75 kPa
2.75 kPa
2.75 kPa
2.75 kPa
Nominal Injector Size mm
2 X 1.1mm
2 X 1.2mm
2 X 1.3mm
2 X 1.4mm
Burner Pressure High kPa
2.5
2.5
2.5
2.5
Burner Pressure Low kPa
0.75
0.75
0.75
0.75
MJ/h
29
38
42
50
Falme Effect Output Only
Effect
Effect
Effect
Effect
Supply Pipe Size dia
—
min
3/8”
3/8”
1/2”
1/2”
Natural Gas
Nominal Pressure kPa
1.5 kPa
1.5 kPa
1.5 kPa
1.5 kPa
Nominal Injector Size mm
2 X 1.8mm
2 X 2mm
2 X 2.2mm
2 X 2.4mm
Burner Pressure High kPa
1
1
1
1
Burner Pressure Low kPa
0.3
0.3
0.3
0.3
MJ/h
35
41
48
60
Flame Effect Output Only
Effect
Effect
Effect
Effect
Supply Pipe Size dia
—
min
3/8”
1/2”
1/2”
1/2”
Lab. Test No
GL 923
GL 900
GL 834
GL 876
Lab. Test Dates
20/04/2010
26/02/10
26/06/09
24/12/09
ESS Declaration No:
1149420106
1149520106
1149720106
1149820106
OPERATION OF YOUR WARMINGTON GAS NOUVEAU FIRE (SG ONLY)
Your Fire must be Installed and Tested by a suitably qualified Gasfitter prior to use.
To light:
Open Burner Grate Front Cover by pulling it towards yourself.
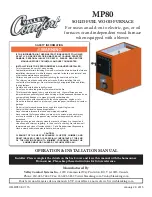
Depress the Manual Ignition Switch and hold in the
'PILOT'
position for 3-5 seconds. (This may take some time for the Gas to come through to the
Pilot-3 Flame)
Strike the Manual Ignition Switch by turning to the
'STAR'
position, maintaining the Switch in a Depressed State ; (repeat steps 2 & 3 if necessary).
Once the Pilot Flame is lit, hold this position for 3-5 seconds, release from the depressed state before setting the flame control to full, it may take 3-5
seconds for the Burner to Light .
If a Solenoid is fitted to a SG Burner the Pilot Flame should stay on at all times with the Manual Ignition
Switch set to the desired High or Low Flame setting, unless you turn it Off/On at the Ignition Switch
manually. Once the Ignition Switch is set you can turn the Solenoid Off/On at your wall switch to allow
gas into the Burner.
Once the Flame Bed is established, set the Flame Control to the desired level & close cover.
To shut down:
Open Burner Grate Front Cover by pulling it towards yourself.
Turn Manual Ignition Switch to
'PILOT'
. Flame bed will extinguish.
Pilot light may be extinguished by switching Manual Ignition Switch to
'OFF'
before closing cover.


