8
CUSTOMER SUPPORT TEAM:
+44 (0) 333 220 6056
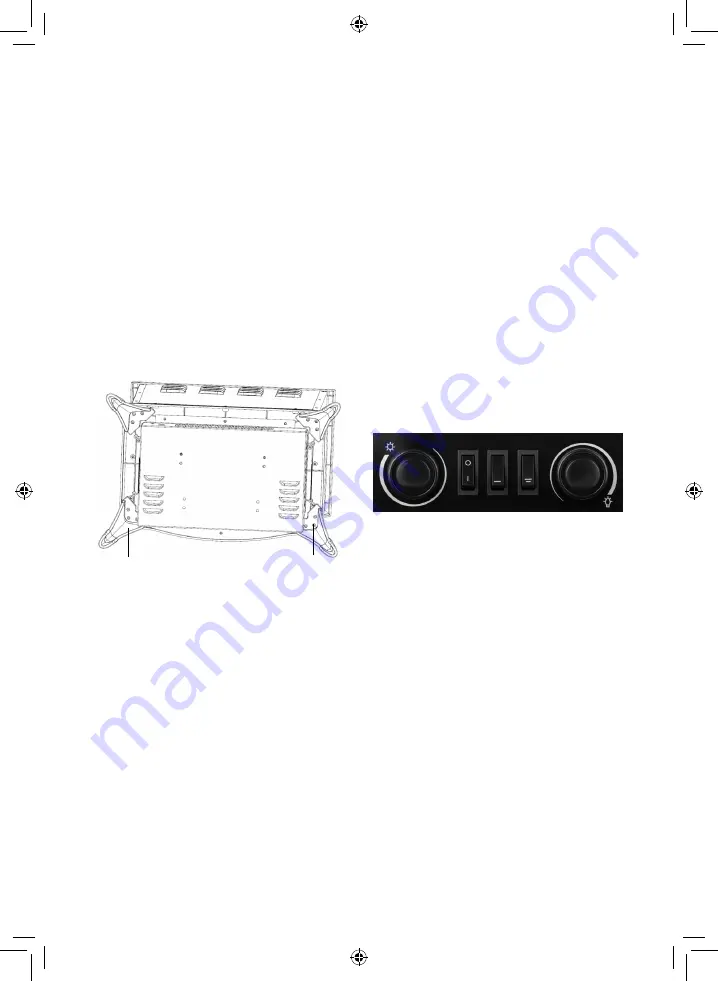
ATTACHING THE LEGS
1. Turn product on its side to start attaching
legs.
2. Place a leg on each corner and use 3
screws for each leg.
3. Tighten the screws clockwise until tight on
each leg.
4. Turn the unit back up to standing position
making sure it is stable.
5. Place the unit in the required location and
plug in, it is now ready for use.
NOTE:
The drawing below is for illustration
purposes only, your product may be slightly
different in looks but the operations are the
same.
CONTROL PANEL
Thermostat control dial
– Adjust to maintain
room temperature
Power/Flame switch
– Switches both Flame
effect and Power On/Off
1000W Heat Selection
– Press “-” for 1000W
2000W Heat Selection
– Press “-” and “=” at
the same time for 2000W heating. The higher
heating selection cannot be activated without
first activating the 1000W setting.
Flame Dimmer Control
– Adjust to set the
flame intensity
USING YOUR APPLIANCE
1. Plug the heater into the mains socket and
switch the socket on.
2. The heater switches are located on the
front of the unit behind the drop down
panel.
3. Switch the fire on by pushing the ON/OFF
switch to the ‘I’ position.
4. To select the heat level, you can choose
between two settings: 1000W or 2000W
5. Push switch ‘I’ to the ON position for
1000W
6. Push both switches ‘I’ and ‘II’ to the ON
position for 2000W.
7. To turn off, push all the switches to the
OFF positions.
Legs
Fitting Screws
Summary of Contents for WL46018
Page 11: ...11 www warmlite co NOTES...


