
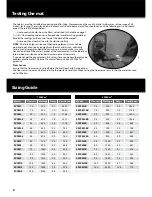


Testing the mat
Sizing Guide
The heaters must be tested before, during and after tiling. We recommend the use of a digital multi-meter set to a range of 0-2
K ohms for testing. The resistance (ohms) of each mat should be measured. You should carry out the following tests and should
expect the results detailed below:
• Live to neutral should show the Ohms value listed in the table on page 7.
A +/- 5% Ohm reading tolerance is allowed under manufacturing guidelines.
Record the readings on the control card at the back of the manual.
• Live to earth and neutral to earth should show infinity.
NOTE: Due to the high resistance of the heating element, it may not be
possible to get a continuity reading from the mat and as such, continuity
testers are not recommended. When checking resistance, make sure your
hands do not touch the meter’s probes as the measurement will include your
internal body resistance and render the measurement inaccurate.
If you do not get the expected results or at any time you believe there may be
a
problem, please contact Warmup’s Technical Team on 0845 345 2288 for
guidance.
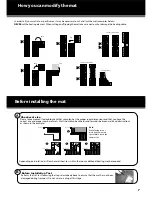
Floor Sensor
Ensure that the floor sensor is tested before the final floor finish has been laid.
The floor sensor values can be found in the thermostat instructions. When testing the floor sensor ensure that the meter can read
up to 20k ohms.
6
150W/m
2
200W/m
2
Model
Size (m
2
)
Wattage Amps
Resistance
Model
Size (m
2
)
Wattage
Amps
Resistance
PVCM1
1.0
150
0.7
352.7
2PVCM1R
1.0
200
0.9
264.5
PVCM1.5
1.5
225
1.0
235.1
2PVCM1.5R
1.5
300
1.3
176.3
PVCM2
2.0
300
1.3
176.3
2PVCM2R
2.0
400
1.7
132.3
PVCM2.5
2.5
375
1.6
141.1
2PVCM2.5R
2.5
500
2.2
105.8
PVCM3
3.0
450
2.0
117.6
2PVCM3R
3.0
600
2.6
88.2
PVCM3.5
3.5
525
2.3
70.5
2PVCM3.5R
3.5
700
3.0
75.6
PVCM4
4.0
600
2.6
88.2
2PVCM4R
4.0
800
3.5
66.1
PVCM4.5
4.5
675
2.9
78.4
2PVCM4.5R
4.5
900
3.9
58.8
PVCM5
5.0
750
3.3
70.5
2PVCM5R
5.0
1000
4.4
52.9
PVCM6
6.0
900
3.9
58.8
2PVCM6R
6.0
1200
5.2
44.1
PVCM7
7.0
1050
4.6
50.4
2PVCM7R
7.0
1400
6.1
37.8
PVCM8
8.0
1200
5.2
44.1
2PVCM8R
8.0
1600
7.0
33.1
PVCM9
9.0
1350
5.9
39.2
2PVCM9R
9.0
1800
7.8
29.4
PVCM10
10.0
1500
6.5
35.3
2PVCM10R
10.0
2000
8.7
26.5
PVCM12
12.0
1800
7.8
29.4
2PVCM15R
15.0
3000
13.0
17.6
PVCM15
15.0
2250
9.8
23.5


