background image


WARN INDUSTRIES  


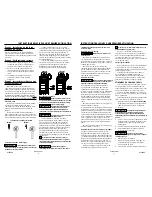
GENERAL SAFETY PRECAUTIONS

MOVING PARTS ENTANGLEMENT HAZARD

Failure to observe these instructions could lead to 
serious injury or death.

Winching Safety:

• 

Always

 inspect winch rope, hook, and slings before 

operating winch.  Frayed, kinked or damaged winch 
rope must be replaced immediately.  Damaged 
components must be replaced before operation.  
Protect parts from damage.

• 

Always

 remove any element or obstacle that may 

interfere with safe operation of the winch.

• 

Always

 be certain the anchor you select will 

withstand the load and the strap or chain will not 
slip.

• 

Always

 use supplied hook strap whenever spooling 

winch rope in or out, during installation and during 
operation.

• 

Always

 require operators and bystanders to be 

aware of vehicle and or load.

• 

Always

 be aware of stability of vehicle and load 

during winching, keep others away.  Alert all 
bystanders of an unstable condition.

• 

Always

 unspool as much winch  rope as possible 

when rigging. Double line or pick distant anchor 
point.

• 

Always

 take time to use appropriate rigging 

techniques for a winch pull.

• 

Never

 touch winch rope or hook while someone else 

is at the control switch or during winching operation.

• 

Never

 engage or disengage clutch if winch is under 

load, winch rope is in tension or drum is moving.

• 

Never

 touch winch rope or hook while under tension 

or under load.

• 

Always

 stand clear of winch rope and load and keep 

others away while winching.

• 

Never

 use vehicle to pull load on winch rope. 

Combined load or shock load can damage, overload 
and break rope.

• 

Never

 wrap winch rope back onto itself. Use  a 

choker chain or tree trunk protector on the anchor.


FALLING OR CRUSHING HAZARD

Failure to observe these instructions could lead to 
serious injury or death.

• 

Always

 stand clear, keep hands clear, keep others away.

• 

Never

 operate winch with less than 5 wraps of rope 

around the drum.  Rope could come loose from the 
drum, as the rope attachment to the drum is not 
designed to hold a load.

• 

Never

 use winch as a hoist or to suspend a load.

• 

Always

 be certain anchor will withstand load, use 

appropriate rigging and take time to rig correctly.

• 

Never

 use winch to lift or move persons.

• 

Never

 use excessive eff ort to freespool winch rope.

• 

Always

 use proper posture/lifting technique or get 

lifting assistance while handling and installing product.

• 

Always 

wind the winch rope on bottom (mountside) 

of drum.

• 

Never

 wind rope over top of drum.

• 

Always

 spool the winch rope onto the drum in the 

direction specifi ed by the drum rotation labels on the 
winch and/or in the documentation.  This is required 
for the automatic brake (if so equipped) to function 
properly.

CUT AND BURN HAZARD

Failure to observe these instructions could lead to 
serious injury or death.

To avoid injury to hands and fi ngers:

• 

Always

 wear heavy leather gloves when handling 

winch rope. 

• 

Always

  be aware of possible hot surfaces at winch 

motor, drum or rope during or after winch use. 

  WARNING

  WARNING

  WARNING


WARN INDUSTRIES  


6

GENERAL SAFETY PRECAUTIONS


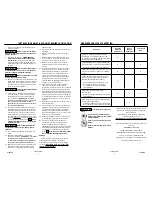
AVOID WINCH AND EQUIPMENT DAMAGE

• 

Always

 avoid side pulls which can pile up winch  rope 

at one end of the drum. This can damage winch  rope 
or winch.

• 

Always

 ensure the clutch is fully engaged or 

disengaged.

• 

Always

 use care to not damage the vehicle frame 

when anchoring to a vehicle during a winching 
operation.

• 

Never

 submerge winch in water.

• 

Always

 store the remote control in a protected, clean, 

dry area.

N OT I C E

MOVING PARTS ENTANGLEMENT HAZARD

Failure to observe these instructions could lead to 
minor or moderate injury.

To avoid injury to hands or fi ngers:

• 

Never

 leave remote control where it can be activated 

during free spooling, rigging, or when the winch is not 
being used.

• 

Never

 leave the winch remote control plugged in 

when installing, freespooling, rigging, servicing or 
when the winch is not being used.

CHEMICAL AND FIRE HAZARD

Failure to observe these instructions could lead to 
serious injury or death.

• 

Always

 remove jewelry and wear eye protection.

• 

Never

 route electrical cables across sharp edges.

• 

Never

 route electrical cables near parts that get hot.

• 

Never

 route electrical cables through or near moving 

parts.

• 

Always 

place the supplied terminal boots on 

wires and terminals as directed by the installation 
instructions.

• 

Never

 lean over battery while making connections.

• 

Never 

route electrical cables over battery terminals.  

• 

Never

 short battery terminals with metal objects.

• 

Always

 verify area is clear of fuel lines, fuel tank, 

brake lines, electrical wires, etc., when drilling.

• 

Always

 consult operator’s manual for proper wiring 

details.

• 

Always

 insulate and protect all exposed wiring and 

electrical terminals.

CUT AND BURN HAZARD

Failure to observe these instructions could lead to 
minor or moderate injury.

• 

Never

 let winch rope slip through your hands.

  CAUTION

  WARNING

  CAUTION

Safety

When installing your WARN winch system, read 

and follow all mounting and safety instructions. 

Always use caution when working with electricity 

and remember to verify that no exposed electrical 
connections exist before energizing your winch 
circuit.

For specifications and performance data, refer to 

the specification sheet supplied with your winch.

97003A0

97003A0

Summary of Contents for VR

Page 1: ...2900 S E Capps Road Clackamas OR USA 97015 8903 1 503 722 1200 FAX 1 503 722 3000 www warn com Customer Service Service Clients 1 800 543 9276 2016 Warn Industries Inc WARN the WARN logo are registere...

Page 2: ...English 1 Fran ais 18 Espa ol 34 97003A0 97003A0...

Page 3: ...es a basic understanding of the winch and teaches basics of proper winching techniques It is a valuable resource to help winch safely and efficiently Product Specification and Performance Data Provide...

Page 4: ...ver use a hook whose throat opening has increased or whose tip is bent or twisted Always use a hook with a latch Always ensure the operator and bystanders are aware of the stability of the vehicle and...

Page 5: ...d by the drum rotation labels on the winch and or in the documentation This is required for the automatic brake if so equipped to function properly CUT AND BURN HAZARD Failure to observe these instruc...

Page 6: ...Figure 1 WARN INDUSTRIES 8 MOUNTING Mounting Orientation and Hardware Feet down mounting 4 3 8 Lock Washer 4 3 8 16 x 1 1 4 Hex Head Bolt 4 3 8 16 Square Nut For feet forward mounting 2 3 8 16 x 1 1...

Page 7: ...ll the Wiring WARN INDUSTRIES 10 MOUNTING WARNING To prevent serious injury or death Always place the supplied terminal boots on wires and terminals as directed by the installation instructions WARNIN...

Page 8: ...ion instructions WARNING To prevent serious injury or death from electrical fire Never route electrical cables across sharp edges Never route electrical cables near parts that get hot Never route elec...

Page 9: ...ope Avoid shock loads when spooling by pulsing the control switch to take up winch rope slack Shock loads can momentarily far exceed the winch and rope ratings Spooling In Under No Load WARNING Never...

Page 10: ...rom the beginning with more brake pedal pressure 21 When you are convinced the winch rope is winding onto the winch drum properly repeat steps until the vehicle is within 6 ft 2 m of the winch anchor...

Page 11: ...n globale du treuil et vous enseigne les techniques de treuillage Il s agit d une ressource utile qui favorise l utilisation efficace et s re du treuil Caract ristiques du produit et donn es de perfor...

Page 12: ...t courb e ou tordue Toujours utiliser un crochet avec loquet Toujours s assurer que l op rateur et les personnes pr sentes sont conscients de la stabilit du v hicule et ou de la charge Toujours garder...

Page 13: ...dans le sens sp cifi par les tiquettes de rotation du tambour appos es sur le treuil et ou par la documentation du treuil Cela est n cessaire pour que le frein automatique le cas ch ant fonctionne co...

Page 14: ...ge des pieds vers le bas 4 Rondelle de blocage 3 8 4 Boulon t te bouton 3 8 16 x 1 1 4 4 crou carr 3 8 16 Montage des pieds vers l avant 2 Boulon t te bouton 3 8 16 x 1 1 4 2 Rondelle d appui 3 8 2 Bo...

Page 15: ...stallation du c blage WARN INDUSTRIES 26 MONTAGE 3 Retirez les quatre vis pack de commande et soulevez doucement le contr le emballer hors treuil 4 Contr le de position plaque pack cravate en position...

Page 16: ...bles lectriques par dessus des bords tranchants Ne jamais faire passer les c bles lectriques proximit de pi ces qui s chauffent Ne jamais faire passer les c bles lectriques travers des pi ces mobiles...

Page 17: ...rieures de s enfoncer dans les spires int rieures ce qui peut coincer et endommager le c ble Pour viter les charges de choc durant l enroulement du c ble actionner l interrupteur de commande de mani...

Page 18: ...n appliquant davantage de pression sur la p dale de frein 21 Apr s s tre assur que le c ble du treuil s enroule correctement sur le tambour r p ter la proc dure jusqu ce que le v hicule soit moins de...

Page 19: ...onocimiento b sico del cabrestante y ense a las t cnicas apropiadas y fundamentales de su uso Es una fuente valiosa para ayudar a utilizar el cabestrante de forma segura y eficiente Especificaciones d...

Page 20: ...doblada o retorcida utilice siempre un gancho con seguro aseg rese siempre de que el operador y otras personas sean conscientes de la estabilidad del veh culo o de la carga mantenga siempre el cable d...

Page 21: ...e en la parte superior del tambor enrolle y desenrolle siempre el cable al tambor en la direcci n especificada en las etiquetas de rotaci n del tambor en el cabrestante o en la documentaci n Esto es n...

Page 22: ...remoto Figura 1 WARN INDUSTRIES 40 MONTAGE Orientaci n y piezas de montaje Montaje con los pies hacia abajo 4 Arandela de presi n de 3 8 4 Perno de cabeza hexagonal 3 8 16 x 1 1 4 4 Tuerca cuadrada 3...

Page 23: ...INDUSTRIES 42 MONTAJE 3 Retire los cuatro tornillos del paquete de control y levante suavemente el control paquete de placa de anclaje cabrestante 4 Coloque la placa de anclaje paquete de control en s...

Page 24: ...los terminales tal como se indica en las instrucciones de instalaci n ATENCI N Para prevenir lesiones graves o accidentes mortales debidos a incendios de origen el ctrico no pase nunca los cables el c...

Page 25: ...ueltas internas asimismo evita atascamientos y da os al cable del cabrestante Evite las sacudidas de la carga cuando est enrollando para ello pulse el interruptor de control a fin de tensar y hacer en...

Page 26: ...ndo el bot n de desenrollado en el control remoto y repita este paso desde el principio con m s presi n en el pedal del freno 21 Cuando est convencido de que el cable del cabrestante est enroll ndose...

Reviews: