

©2018 Warn Industries, Inc. WARN® and the WARN logo are trademarks of Warn Industries Inc.
6
101799A0
I N S T A L L A T I O N I N S T R U C T I O N S
Figure 4
Figure 5
Figure 6
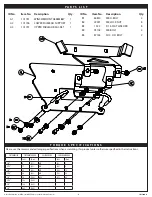
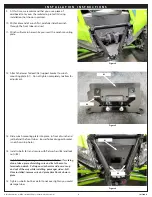
A2
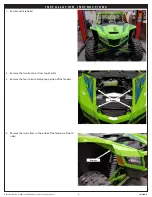
9. At this time, we recommend that you use a piece of
cardboard to lay over the radiator to protect it during
installation (not shown in picture).
10. With motor end of winch first, carefully slide the winch
through the front tubes and rest.
11. Winch will remain here while you insert the winch mounting
plate.
12. Attach the lower fairlead (A2) support bracket to winch
mounting plate (A1). Do not tighten completely to allow for
adjustment.
13. Slide winch mounting plate into place, in front of winch and
just behind the front tubes. (Lower fairlead support bracket
is not shown in photo).
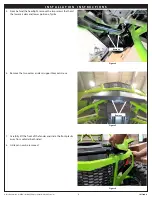
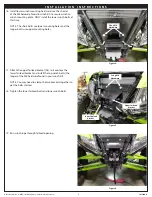
14. Install u-bolts (B1) and secure with flat washers (B3) and lock
nuts (B2).
Helpful Hint for passenger side u-bolt installation: If working
alone, take a piece of welding wire and tie to the motor
terminal on winch. Pull up on winch motor side, secure up
and out of the way while installing passenger side u-bolt.
Once installed, remove wire and place winch back down in
place.
15. Tighten u-bolts, but be careful to not over tighten you could
damage tubes.
A1
A1
A2


