background image

WINCH MANUAL 

konserWacja

49

PL


TECHNIKI WCIĄGANIA A-Z

a. Poświęć trochę czasu na ocenę swojej sytuacji i zaplanuj wciąganie.
b. Załóż rękawice, aby chronić ręce.
c. W miarę możliwości zwolnij sprzęgło, aby umożliwić swobodny bieg i 

oszczędzać energię akumulatora.
d. (Jeśli jest w zestawie) Zamocuj hak Hand Saver (chroniący dłonie) do 

haka widełkowego.
e. Bezpiecznie wyciągnij linę stalową do żądanego punktu kotwiczenia.
f. Zamocuj hak widełkowy w punkcie kotwiczenia: Zawiesie, łańcuch lub 

zblocze otwierania.  Nie przyczepiaj haka z powrotem do liny stalowej.
g. Włącz sprzęgło.
h. Podłącz przewód zdalnego sterowania do wciągarki. 
i. Uruchom silnik, aby zapewnić zasilanie akumulatora pojazdu.
j. Naciągnij prowadnicę liny prowadzącą linę w celu naciągnięcia luzu w 

linie.  Kiedy lina jest już naprężona, stań w bezpiecznej odległości. Nigdy 

nie stawaj ani nie przechodź nad napiętą liną stalową.
k. Dokładnie sprawdź kotwy i upewnij się, że wszystkie połączenia są 

bezpieczne.
l. Sprawdź linę stalową.  Upewnij się, że na bęben wciągarki jest nawinięte 

co najmniej 5 zwojów liny stalowej (zwykle zaznaczone na czerwono).
m. Rozłóż koc lub żagiel (sprzedawany oddzielnie) na linie stalowej w 

odległości około 5 do 6 stóp (1,5 – 2 m) od haka.  Otwórz maskę, aby 

uzyskać dodatkową ochronę.
n. Nakaż osobom postronnym opuścić teren.  Upewnij się, że wszystkie 

osoby czy gapie są daleko z tyłu, i że nikt nie znajduje się bezpośrednio 

przed lub za pojazdem lub punktem kotwiczenia.
o. Rozpocznij wciąganie.  Upewnij się, że lina stalowa jest owinięta 

równomiernie i ciasno wokół bębna.  W razie potrzeby można powoli 

jechać pojazdem, który jest wciągany, aby wspomóc proces wciągania.  

Unikaj obciążenia wstrząsowego; utrzymuj linę stalową w naprężeniu.
p. Pojazd, który ma być wciągnięty, powinien być ustawiony w położeniu 

neutralnym i mieć zwolniony hamulec awaryjny.  Zwalniaj pedał hamulca 

tylko przy pełnym napięciu.  Unikaj obciążenia wstrząsowego wciągarki.  

Może to spowodować uszkodzenie wciągarki, liny i pojazdu.
q. Wciągarka jest przeznaczona do użytku przerywanego.  Przy pełnym 

obciążeniu z zestawem z pojedynczą liną nie włączaj zasilania na dłużej 

niż 8 minut, następnie wyłącz silnik na kilka minut do ostygnięcia i wznów 

operację wciągania.
r. Operacja wciągania jest zakończona, gdy pojazd stoi na stabilnym 

podłożu i/lub może jechać o własnym napędzie.
s. Zabezpiecz pojazd.  Pamiętaj o zaciągnięciu hamulców i zaparkowaniu 

pojazdu.  
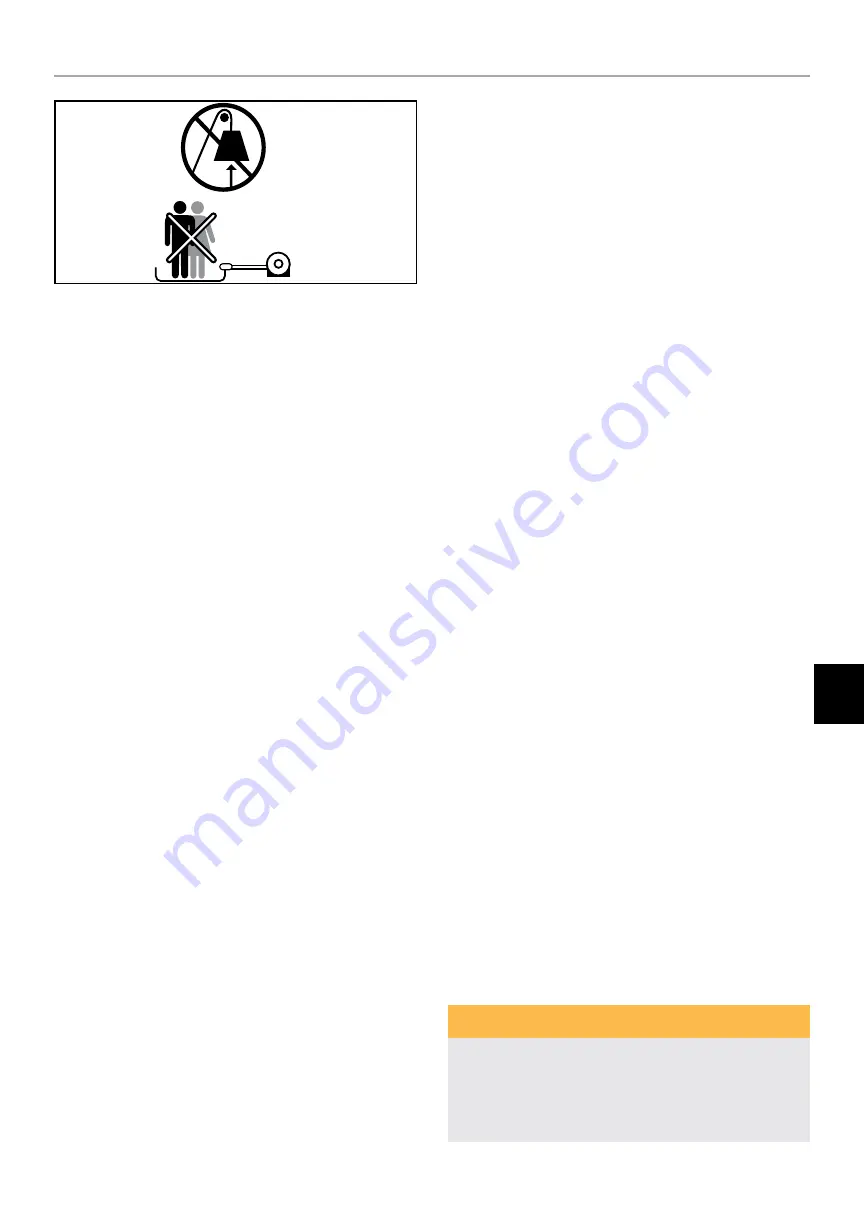
t. Zwolnij napięcie liny stalowej.  Wciągarka NIE jest zaprojektowana jako 

urządzenie zabezpieczające i NIGDY nie powinna utrzymywać ładunku ani 

zabezpieczać podczas transportu; lina wciągarki MUSI zostać zwolniona, 

gdy sprzęt lub pojazd są zabezpieczone. Nieprzestrzeganie tego zalecenia 

może spowodować uszkodzenie hamulca i wciągarki oraz utratę gwarancji.
u. Odłącz linę stalową od zakotwiczenia i NIGDY nie zostawiaj jej 

podłączonej.
v. Zwiń linę stalową.  Upewnij się, że drut znajdujący się już na bębnie 

jest ciasno i równo nawinięty na szpulę.  Jeśli nie jest, wyciągnij drut i 

ponownie nawiń szpulę od miejsca, w którym lina jest napięta.
w. Trzymaj ręce z dala od bębna wciągarki i prowadnicy podczas wciągania 

liny.
x. Zamocuj hak i pasek haka.
y. Odłącz przewód zdalnego sterowania i złóż go w czystym, suchym 

miejscu.
z. Oczyść i sprawdź połączenia i elementy mocujące przed następnym 

użyciem wyciągarki.

KONSERWACJA

1.  Okresowo sprawdzaj dokręcenie śrub mocujących i połączeń 

elektrycznych.  Usuwaj wszelkie zabrudzenia lub korozję i zawsze 

utrzymuj urządzenie w czystości.

2.  Nie próbuj demontować skrzyni biegów.  Naprawy powinny być 

wykonywane przez producenta lub autoryzowany serwis.

3.  Skrzynia biegów została nasmarowana wysokotemperaturowym 

smarem litowym i jest fabrycznie uszczelniona.  Nie jest wymagane 

wewnętrzne smarowanie.

WYMIANA LINY

Jeśli lina stalowa jest zużyta lub zaczyna wykazywać oznaki wystrzępienia, 

należy ją wymienić przed ponownym użyciem.  

1.  Ustaw sprzęgło w pozycji „CLUTCH OUT” („SPRZĘGŁO 

WYŁĄCZONE”). 

2.  Rozwiń linę na pełną długość. Zwróć uwagę na to, jak obecna lina jest 

podłączona do bębna. 

3.  Usuń starą linę i podłącz nową w taki sposób, jak stara lina jest 

podłączona do bębna. Włóż koniec nowej liny i przykręć śrubę 

M8x10.

4.  Upewnij się, że nowa lina jest zwinięta w tym samym kierunku 

co stara. Lina powinna wychodzić z bębna od dołu, pod bębnem. 

(Rozwijanie z dołu).

5.  Ustaw sprzęgło w pozycji „CLUTCH IN” („SPRZĘGŁO WŁĄCZONE”).
6.  Nawiń linę wciągarki na bęben, przez pierwsze pięć owinięć uważaj, 

aby nie dopuścić do załamań, następnie linę wciągarki należy 

nawinąć na bęben pod obciążeniem wynoszącym co najmniej 10% 

znamionowego uciągu liny.


OSTRZEŻENIE

W przypadku wymiany liny stalowej należy używać wyłącznie 

identycznych części zamiennych zalecanych przez producenta. Liny 

stalowe lub syntetyczne NIE są objęte żadną ofertą gwarancyjną, 

a właściciel lub użytkownik ponosi wyłączną odpowiedzialność za 

konserwację i wymianę w razie potrzeby.

Summary of Contents for GLADIATOR 80FTA12

Page 1: ...fore operating the product Failure to do so could result in serious injury Specifications descriptions and images in this manual are as accurate as known at the time of publication but are subject to...

Page 2: ...h 4 Wire Rope Your winch has a galvanized aircraft cable designed specifically for load capacity of the rated line pull of this winch The wire rope feeds on from underneath the drum position it is loo...

Page 3: ...ers or hands DO NOT let your hands get within 12 30cm of the winch while re spooling Turn off the winch and repeat the procedure until a few feet of cable is left Disconnect the remote control and fin...

Page 4: ...be followed to reduce the risk of personal injury and damage to the equipment Read all these instructions before using this tool WARNING Keep children away Children must never be allowed in the work...

Page 5: ...If it does you must replace immediately DANGER Do not move your vehicle with the cable extended and attached to the load You could easily exceed the winch rating and snap the cable When the vehicle i...

Page 6: ...e winch motor as detailed below Black long wire assembly connect the earth terminal on the motor Connect to Motor F1 Yellow Connect to Battery Positive Connect to Motor F2 Red Connect to Motor A Blue...

Page 7: ...ld be done with the wire rope in a straight line to winch vehicle see above illustration CAUTION When pulling a heavy load place a blanket or jacket over the wire rope five or six feet from the hook b...

Page 8: ...vehicle Be sure to set the brakes and place the vehicle in park t Release the tension on the wire rope The winch is NOT designed as securing device and should NEVER hold a load or secure whilst in tr...

Page 9: ...ns but drum does not turn Clutch not engaged Turn clutch to the In position If problem persists ask a technician to check and repair Motor runs slowly or without normal power Insufficient current or v...

Page 10: ...duct 2 a written description of the problem 3 Buyers name address and contact number 4 copy of the original purchase receipt or BPE Limited can arrange a suitable collection method Charges apply Warra...

Page 11: ...t Lbs kg 70 5 lbs 32kg Mounting bolt pattern 10 x 4 5 254mmx114 3mm 4 M10 Line Pull Line Speed and Amperes First layer Line Pull Ibs kgs Line Speed ft min m min Motor current Amps Max 12V DC 0 36 11 0...

Page 12: ...t Lbs Kg 71 2 32 3 Mounting bolt pattern 10 x 4 5 254mmx114 3mm 4 M10 Line Pull Line Speed and Amperes First layer Line Pull Ibs kgs Line Speed ft min m min Motor current Amps Max 12V DC 0 36 11 0 50...

Page 13: ...Lbs Kg 71 6 32 5 Mounting bolt pattern 10 x 4 5 254mmx114 3mm 4 M10 Line Pull Line Speed and Amperes First layer Line Pull Ibs kgs Line Speed ft min m min Motor current Amps Max 12V DC 0 27 9 8 5 45 6...

Page 14: ...Lbs Kg 94 43 Mounting bolt pattern 10 x 4 5 254mmx114 3mm 4 M10 Line Pull Line Speed and Amperes First layer Line Pull Ibs kgs Line Speed ft min m min Motor current Amps Max 12V DC 0 27 9 8 5 45 6000...

Page 15: ...as Seil gelagert ist Sie kann mithilfe der Fernbedienung bewegt werden um das Seil auf oder abzuwickeln 4 Drahtseil Die Winde ist mit einem verzinkten Flugzeugseil oder einem Kunststoffseil ausgestatt...

Page 16: ...r diesen Zweck ausgelegt Bei Fehlgebrauch kann es zu einer Besch digung der Winde und der Bremse kommen In diesem Fall erlischt die Garantie Die in den Tabellen angegebenen Werte f r die maximale Zug...

Page 17: ...h digtes Seil muss sofort ausgetauscht werden Verwenden Sie nur identische Ersatzseile des Herstellers mit den richtigen Spezifikationen Seile fallen nicht unter die angebotene Garantie berpr fen Sie...

Page 18: ...steht Lesen Sie die Warnschilder auf der Verschreibung um festzustellen ob Ihr Urteilsverm gen oder Ihre Reflexe w hrend der Einnahme von Medikamenten beeintr chtigt sind Im Zweifelsfall darf das Wer...

Page 19: ...1 Ihre Winde hat ein Lochbild das in dieser Windenklasse Standard ist Es gibt viele Windenmontages tze die dieses Lochbild f r die g ngigsten Fahrzeuge und Montageschienen verwenden Wenn Sie keinen M...

Page 20: ...freien Auf und Abwickeln des Drahtseils immer den Handsicherungshaken optional Der Handsicherungshaken h lt Ihre H nde und Finger von der rotierenden Trommel fern 8 Pr fen Sie ob sich die Trommel ric...

Page 21: ...itshaken am Gabelkopfhaken e Ziehen Sie das Drahtseil sicher zu Ihrem gew nschten Befestigungspunkt f Befestigen Sie den Gabelkopfhaken am Befestigungspunkt Schlinge Kette oder Umlenkrolle Befestigen...

Page 22: ...Sie das Fernbedienungskabel ab und bewahren Sie die Fernbedienung an einem sauberen trockenen Ort auf z Reinigen und berpr fen Sie die Verbindungen und Befestigungselemente f r den n chsten Einsatz de...

Page 23: ...aber Trommel dreht sich nicht Kupplung nicht eingelegt Schalten Sie die Kupplung in die Position In Einkuppeln Wenn das Problem weiter besteht muss ein qualifizierter Techniker das Ger t berpr fen un...

Page 24: ...die Adresse des Herstellers senden BPE Limited kann auch eine geeignete Abholmethode arrangieren dabei fallen Geb hren an Garantieausschl sse Die Garantie deckt nicht die Arbeitskosten oder die Trans...

Page 25: ...wicht lbs kg 70 5 lbs 32kg MusterderBefestigungsschrauben 10 x 4 5 254mmx114 3mm 4 M10 Zug Geschwindigkeit Ampere Volt erste Lage Zugkraft Seilgeschwindigkeit ft min m min Strom A 12V DC 0 36 11 0 50...

Page 26: ...wicht lbs kg 71 2 32 3 MusterderBefestigungsschrauben 10 x 4 5 254mmx114 3mm 4 M10 Zug Geschwindigkeit Ampere Volt erste Lage Zugkraft Seilgeschwindigkeit ft min m min Strom A 12V DC 0 36 11 0 50 3000...

Page 27: ...cht lbs kg 71 6 32 5 MusterderBefestigungsschrauben 10 x 4 5 254mmx114 3mm 4 M10 Zug Geschwindigkeit Ampere Volt erste Lage Zugkraft Seilgeschwindigkeit ft min m min Strom A 12V DC 0 27 9 8 5 45 6000...

Page 28: ...icht lbs kg 94 43 MusterderBefestigungsschrauben 10 x 4 5 254mmx114 3mm 4 M10 Zug Geschwindigkeit Ampere Volt erste Lage Zugkraft Seilgeschwindigkeit ft min m min Strom A 12V DC 0 27 9 8 5 45 6000 272...

Page 29: ...oule le c ble m tallique dans un sens 3 Tambour de treuil Le tambour de treuil est le cylindre sur lequel le c ble m tallique est rang Il est tre enroul en mode In entr e ou Out sortie en utilisant la...

Page 30: ...euil comme dispositif d arrimage il n est pas con u pour cela Cela endommagera le treuil et le frein ce qui annulera toute garantie NE PAS exc der les tractions nominales de ligne maximum indiqu es da...

Page 31: ...que utilisation Un c ble effiloch ou endommag doit imm diatement tre remplac Utilisez uniquement un c ble de rechange identique du fabricant avec les sp cifications exactes Les c bles ne sont pas couv...

Page 32: ...identiques L utilisation de toute autre pi ce annulera la garantie AVERTISSEMENT N utilisez pas l outil si vous vous trouvez sous l influence de l alcool ou de drogues Lisez les tiquettes d avertisse...

Page 33: ...te ASSEMBLAGE ET MONTAGE DU TREUIL Remarque des fins d illustration uniquement le treuil sera diff rent de celui du sch ma 1 Le treuil est con u avec un mod le de boulons standard dans cette classe de...

Page 34: ...tronc d arbre ou un rocher solide Utilisez TOUJOURS un harnais ou une sangle comme point d ancrage sur un objet N utilisez jamais le c ble ou le crochet comme point d ancrage fix un objet PR CAUTION...

Page 35: ...c ble de t l commande au treuil i D marrez votre moteur vous assurer que la batterie de votre v hicule se recharge j L nergie dans le c ble guide le c ble sous tension pour rattraper le mou du c ble...

Page 36: ...nlevez toute salet ou corrosion et gardez toujours propre 2 N essayez pas de d monter la bo te d embrayage Les r parations doivent tre effectu es par le fabricant ou dans un centre de r paration agr 3...

Page 37: ...mbour ne tourne pas Embrayage non engag Mettez l embrayage en position In Si le probl me persiste demandez un technicien qu il v rifie et proc de une r paration Le moteur tourne lentement ou la puissa...

Page 38: ...cture d achat originale ou BPE Limited peut organiser une m thode de collecte appropri e des frais s appliquent Exclusions de la garantie La garantie ne couvre pas le co t de la main d uvre ou les fra...

Page 39: ...t Lbs kg 70 5 lbs 32kg Mod le de boulon de montage 10 x 4 5 254mmx114 3mm 4 M10 Traction Vitesse Amp res Volts premi re couche Traction de ligne lbs kg Vitesse de ligne pi min m min Courant A 12V DC 0...

Page 40: ...t Lbs kg 71 2 32 3 Mod le de boulon de montage 10 x 4 5 254mmx114 3mm 4 M10 Traction Vitesse Amp res Volts premi re couche Traction de ligne lbs kg Vitesse de ligne pi min m min Courant A 12V DC 0 36...

Page 41: ...Lbs kg 71 6 32 5 Mod le de boulon de montage 10 x 4 5 254mmx114 3mm 4 M10 Traction Vitesse Amp res Volts premi re couche Traction de ligne lbs kg Vitesse de ligne pi min m min Courant A 12V DC 0 27 9...

Page 42: ...Lbs kg 94 43 Mod le de boulon de montage 10 x 4 5 254mmx114 3mm 4 M10 Traction Vitesse Amp res Volts premi re couche Traction de ligne lbs kg Vitesse de ligne pi min m min Courant A 12V DC 0 27 9 8 5...

Page 43: ...owa Mo na go nawija lub rozwija za pomoc zdalnego prze cznika 4 Lina stalowa Twoja wci garka jest wyposa ona w ocynkowany kabel lotniczy lub lin syntetyczn zaprojektowan specjalnie do ud wigu znamiono...

Page 44: ...ie naciskaj c przycisk pilota aby wci gn lin Podchodz c do wci garki NIGDY nie dopuszczaj aby lina wci garki prze lizgn a si przez palce lub d onie NIE zbli aj r k na odleg o mniejsz ni 30 cm od wci g...

Page 45: ...uszkodzenia sprz tu Przeczytaj wszystkie te instrukcje przed u yciem tego narz dzia OSTRZE ENIE Trzymaj z daleka od dzieci Nigdy nie wolno dopuszcza dzieci do obszaru roboczego ani pozwala im obs ugiw...

Page 46: ...iku kontaktu z chemikaliami solami i rdz Nie przechod na drug stron ani pod lin wci garki gdy jest ona obci ona U ywaj r kawic podczas obs ugi liny OSTRZE ENIE Nigdy nie u ywaj wci garki je li lina wy...

Page 47: ...ana u Zapewni to wystarczaj cy prze wit aby wci garka mog a zosta umieszczona bez przeszk d w kanale 3 Zamontuj wci gark na opcjonalnym kanale monta owym najpierw poci gaj c i zwalniaj c ga k sprz g a...

Page 48: ...yk ad mocny pie drzewa lub g az ZAWSZE u ywaj zawiesia lub paska jako punktu zaczepienia na obiekcie Nigdy nie u ywaj liny ani haka jako punktu zaczepienia przymocowanego do przedmiotu PRZESTROGA NIGD...

Page 49: ...bezpiecz pojazd Pami taj o zaci gni ciu hamulc w i zaparkowaniu pojazdu t Zwolnij napi cie liny stalowej Wci garka NIE jest zaprojektowana jako urz dzenie zabezpieczaj ce i NIGDY nie powinna utrzymywa...

Page 50: ...je ale b ben si nie obraca Sprz g o nie jest w czone Przekr sprz g o do pozycji In Je li problem b dzie si powtarza popro technika o sprawdzenie i napraw Silnik pracuje wolno lub bez normalnej mocy Ni...

Page 51: ...Lbs Kg 70 5 lbs 32kg Schemat rub mocuj cych 10 x 4 5 254mmx114 3mm 4 M10 Ci gni cie pr dko ampery wolty pierwsza warstwa Ci gni cie liny Pr dko liny stopy min m min Pr d A 12V DC 0 36 11 0 50 2000 90...

Page 52: ...Lbs Kg 71 2 32 3 Schemat rub mocuj cych 10 x 4 5 254mmx114 3mm 4 M10 Ci gni cie pr dko ampery wolty pierwsza warstwa Ci gni cie liny Pr dko liny stopy min m min Pr d A 12V DC 0 36 11 0 50 3000 1360 1...

Page 53: ...bs Kg 71 6 32 5 Schemat rub mocuj cych 10 x 4 5 254mmx114 3mm 4 M10 Ci gni cie pr dko ampery wolty pierwsza warstwa Ci gni cie liny Pr dko liny stopy min m min Pr d A 12V DC 0 27 9 8 5 45 6000 2722 11...

Page 54: ...bs Kg 94 43 Schemat rub mocuj cych 10 x 4 5 254mmx114 3mm 4 M10 Ci gni cie pr dko ampery wolty pierwsza warstwa Ci gni cie liny Pr dko liny stopy min m min Pr d A 12V DC 0 27 9 8 5 45 6000 2722 11 5 3...

Page 55: ......

Page 56: ...Winch Manual DANE TECHNICZNE 56 WINCH ASSEMBLY DRAWING 80FTA12 CAD...

Page 57: ...21 W800300 Gear Carrier Assembly Output 1 22 W800400 Gear Carrier Assembly Intermediate 1 23 W800019 Circlip For Hole 1 24 W800500 Break Shaft Assembly 1 25 W800600 Gear Carrier Assembly Intput 1 26 W...

Page 58: ...Winch Manual DANE TECHNICZNE 58 WINCH ASSEMBLY DRAWING 10FTA12 CAD...

Page 59: ...21 W100300 Gear Carrier Assembly Output 1 22 W100400 Gear Carrier Assembly Intermediate 1 23 W100019 Circlip For Hole 1 24 W100500 Break Shaft Assembly 1 25 W100600 Gear Carrier Assembly Intput 1 26 W...

Page 60: ...Winch Manual DANE TECHNICZNE 60 WINCH ASSEMBLY DRAWING 12FTA12 CAD...

Page 61: ...21 W120300 Gear Carrier Assembly Output 1 22 W120400 Gear Carrier Assembly Intermediate 1 23 W120019 Circlip For Hole 1 24 W120500 Break Shaft Assembly 1 25 W120600 Gear Carrier Assembly Intput 1 26 W...

Page 62: ...Winch Manual DANE TECHNICZNE 62 WINCH ASSEMBLY DRAWING 12RTS12 CAD...

Page 63: ...nd Bearing 1 19 W120017 Sealing Strips 1 20 W120018 Gear Ring 1 21 W120300 Gear Carrier Assembly Output 1 22 W120400 Gear Carrier Assembly Intermediate 1 23 W120019 Circlip For Hole 1 24 W120500 Break...

Page 64: ...Q UK service bpeholdings co uk Germany BPE Solutions Deutschland GmbH Altrottstra e 31 D 69190 Walldorf Germany support bpeholdings de France BPE Solutions France SAS 3 Boulevard de Belfort 59000 Lill...

Reviews: