background image


WDT 3200 Product Reference Guide 


17 


The Bar Code Scanner 


The WDT3200 has an integrated laser scanner capable of reading all major bar code 
labels. 


Chapter 3. Power system 


Charging the Lithium-Ion Battery Pack 


The WDT3200's batteries can be charged via the USB or serial communication 
cable, or via the optional docking station - both using the included AC adaptor.   
Please charge the battery for at least 4 hours per session to ensure a full charge.   
Please note that the first time charge should be for at least 12 hours (see below). 


Charging the Main and Backup Battery for the First Time 
 

When first charging the WDT3200, please allow at least 12 hours to fully charge 
both the main and backup batteries.    When the WDT3200 arrives from the 
factory the backup battery switch is in the OFF position in order to protect the 
backup battery.    Before charging the WDT3200, make sure the backup battery 
switch is moved to the ON position.    The backup battery switch can be found 
inside the main battery compartment.    Data loss can occur if the backup battery 
is not adequately charged - therefore it is imperative to ensure that the backup 
battery switch is in the ON position before charging for the first time. 


Note: 

  A properly charged backup battery can store data for up to 72 hours 

without power from the main battery.    This is not recommended.    Please make 
sure an adequately charged main battery or AC power is connected.    Do not rely 
on the backup battery for other than unusual or emergency situations.    To 
prevent data loss due to backup battery failure (always a slim possibility), please 
minimize the amount of time that the backup battery has to operate without the 
main battery pack installed or while disconnected from AC power. 


Environmental Consideration for Charging 


It is important to consider the temperature when you are charging the Lithium-Ion battery 
pack. The process is most efficient at normal room temperature or slightly cooler. It is 

Summary of Contents for WDT 3200

Page 1: ...WDT 3200 Product Reference Guide Wasp Barcode Technologies...

Page 2: ...oard Windows CE Keyboard 16 Other Character Support from WinCE Keyboard 16 The Bar Code Scanner 17 Charging the Lithium Ion Battery Pack 17 Charging the Main and Backup Battery for the First Time 17 E...

Page 3: ...rovides you with a standard Windows based environment that is easy to operate and customize This WDT3200 Product Reference Guide provides simple step by step instructions on how to operate the device...

Page 4: ...charged from external power or the main battery if the main battery still has enough power to turn on If it is charged for the first time the back up battery will charge at the same time the main bat...

Page 5: ...Li ion 3 7V 1950mAH Li ion Battery Recharging Time 4 hours 4 hours Battery Life BT 12 hours RF 8 hours BT 12 hours RF 8 hours Backup Battery Type 120AH Li polymer 120AH Li polymer Display color Touch...

Page 6: ...wer Supply The AC Power Supply connects the WDT3200 to an electrical power outlet in order to power the terminal and or charge the battery pack The power supply utilizes either 110 or 220 Volt 100 to...

Page 7: ...WDT 3200 Product Reference Guide 7 WDT3200 Product Introduction Accessory Kit Terminal Communication Cable Battery Adaptor Plugs Hand Strap Stylus Communication Cradle...

Page 8: ...WDT 3200 Product Reference Guide 8 WDT3200 Front View LED Touch Screen Display Indicator RS232 Interface Trigger Power Function Alpha...

Page 9: ...WDT 3200 Product Reference Guide 9 WDT3200 Back View Bar Code Scanner SD Memory Slot Speaker Battery Door Hand Strap Stylus...

Page 10: ...nected to the AC adaptor For this reason it is crucial that before you charge the main battery you make sure the backup battery switch is set to ON For further information on turning on the backup bat...

Page 11: ...g Cable or USB Charging Cable to the WDT3200 and connect the AC adapter to the cable s power jack and an electrical outlet Alternately you can place the WDT3200 into the Docking Station first connect...

Page 12: ...the touch screen to start up the WinCE system Examples of the align prompts are shown below Adjusting Screen Brightness To adjust the original default setting of the screen brightness the backlight se...

Page 13: ...Time check box if necessary 4 Tap the APPLY button 5 Select Automatically adjust clock for daylight saving for a Daylight Savings Time zone Setting Date Time Tap the Left or Right arrows to scroll to...

Page 14: ...sed in conjunction with specific number keys to operate as Hotkeys see next page Bksp The backspace key erases the character to the left of the cursor ESC The escape key returns you to a previous page...

Page 15: ...ction key and the appropriate numeric key for the following functions listed below Func 6 Task Manager Func 7 Scanner Setting Func 8 Power Properties Func 9 System Info Hotkeys can be modified to suit...

Page 16: ...s the layout of a standard PC keyboard Opening the Windows CE Keyboard The Windows CE keyboard can be opened by tapping the keyboard icon on the Task bar Refer to picture Other Character Support from...

Page 17: ...e the backup battery switch is moved to the ON position The backup battery switch can be found inside the main battery compartment Data loss can occur if the backup battery is not adequately charged t...

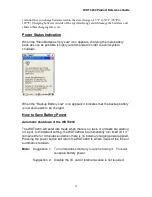
Page 18: ...appears it indicates that the backup battery is low and needs to be charged How to Save Battery Power Automatic shutdown of the WDT3200 The WDT3200 will enter idle mode when there is no task or all t...

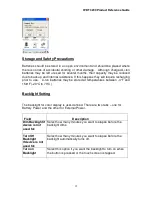
Page 19: ...batteries may be stored at temperatures between 4 F and 158 F 20 C to 70 C Backlight Setting The backlight for color display is user defined There are two tabs one for Battery Power and the other for...

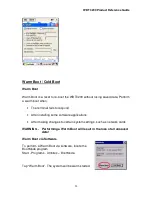
Page 20: ...fails to respond After installing some software applications After making changes to certain system settings such as network cards WARNING Performing a Warm Boot will result in the loss of all unsaved...

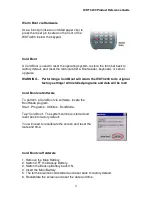
Page 21: ...its original factory settings All installed programs and data will be lost Cold Boot via Software To perform a Cold Boot via software locate the BootMode program Start Programs Utlitities BootMode Ta...

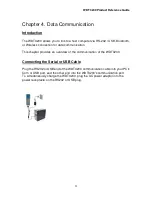
Page 22: ...a communication This chapter provides an overview of the communication of the WDT3200 Connecting the Serial or USB Cable Plug the RS232 or USB end of the WDT3200 communication cable into your PC s Com...

Page 23: ...s RS232 USB port To simultaneously charge the WDT3200 plug the AC power adaptor into the power receptacle on the Docking Station RF Communication This section is only for WDT3200 equipped with a wire...

Page 24: ...ized For example you can choose how many weeks of past appointments you want synchronized Before beginning installation carefully read the following Because you will be restarting your computer during...

Page 25: ...dow you can Select your WDT3200 to use Microsoft ActiveSync features such as changing synchronization options as described in the Synchronization section Open the Explorer window by double clicking yo...

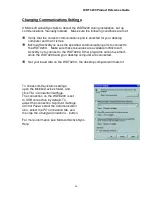
Page 26: ...ure these resources are available for Microsoft ActiveSync to connect to the WDT3200 Other programs cannot use them while the WDT3200 and your desktop computer are connected Set your baud rate on the...

Page 27: ...e default symbologies place delimiter characters behind scanned data and save the settings Run this program from Start Setting Control Panel Scanner Setting exe An example of the Scanner Control Panel...

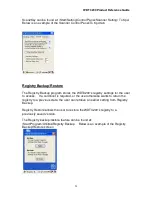
Page 28: ...egistry settings for the user to access If a cold boot is required or the user otherwise wants to return the registry to a previous state the user can retrieve an earlier setting from Registry Backup...

Reviews: