background image

Part 4 - How to Sew

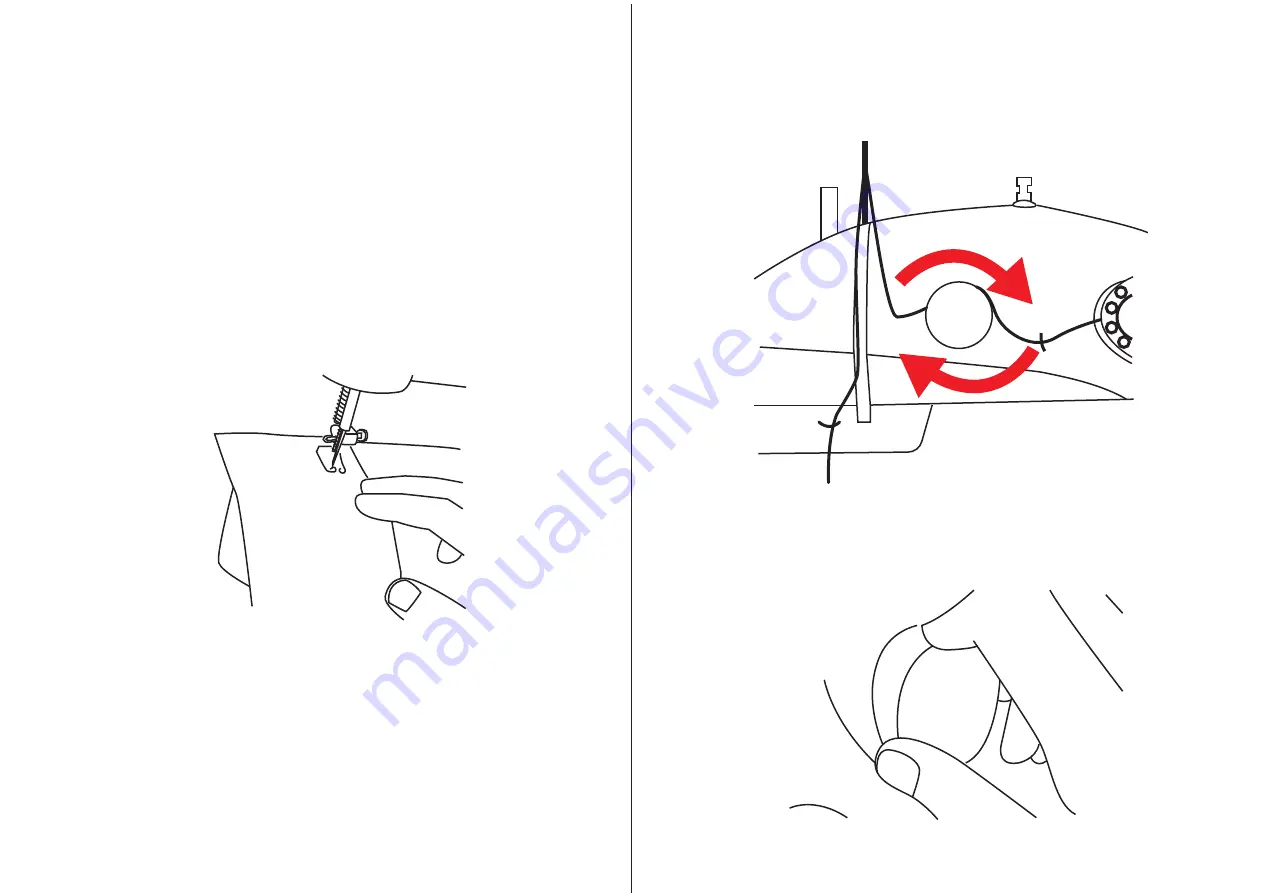
Part 5 - Adjusting Tension

Part 6 - How to Change Needles 

Note: It is important that the top and bottom threading is 
correct. Check carefully and practice before beginning to sew. 
Improper threading will damage the lockstitch.

1. 

After you have finished sewing, place your cloth or fabric 


of choice beneath the Presser Foot (F). Using the Hand 


Wheel or the Foot Pedal, begin sewing. 

2. 

Control the speed using the Speed Button (L) and to use 


the foot pedal, use the On/Off Switch (A). 

1.  

In normal circumstances you do not need to adjust the 


tension and it has already been set for maximum  


performance. However, if you think that the stitches are 


too loose or too tight you can adjust the tension. 

2.  

Loosen the stitch by turning the tension screw (N) 

 counterclockwise.

3.  

Tighten the stitch by turning the tension screw (N)  


clockwise. Sewing heavier fabric may require loosening 


the stitch. Very light fabric may require tightening the 


stitch. Bobbin tension cannot be adjusted.

1. 

Turn the handwheel (K) clockwise to raise the needle (R) to 


its highest position.

Summary of Contents for DARTWOOD Mini Sewing Machine for Beginners and...

Page 1: ...and unplug the cord when not in use Never open the main motor case of the machine The mechanism has been factory adjusted When operating the sewing machine keep your hands away from the needle hand wh...

Page 2: ...s required Suitable for sewing clothes bedsheets curtains and more Includes a foot pedal for extra efficiency Comes with double stitch double thread and two speed control Introduction to parts Operati...

Page 3: ...rn it clockwise to release the Bobbin Holder 3 Place an empty metal bobbin on the raised Bobbin Holder and put the thread around the metal bobbin as below 4 Once you have some thread on the metal bobb...

Page 4: ...nstalled ones on the machine To remove simply pull out the threads Also remove the metal bobbin in the Bobbin Compartment I 1 Pull out the metal bobbin from the Bobbin Holder V and be careful not to l...

Page 5: ...the second thread guide Here the thread goes over the tension screw N and must be positioned between the two washers 6 Pull the thread in the direction towards the front of the machine through the th...

Page 6: ...ng the threader from the front toward the back of the machine You can raise the needle R by turning the handwheel K clockwise 10 Pull approximately 9 84 inches of thread through the needle R and lay i...

Page 7: ...wise The needle will go down picking up the bobbin thread Continue to turn the handwheel until the needle R has descended fully and then returned to the highest raised point Raise the presser foot F a...

Page 8: ...d Button L and to use the foot pedal use the On Off Switch A 1 In normal circumstances you do not need to adjust the tension and it has already been set for maximum performance However if you think th...

Page 9: ...in against the needle clamp P Push the needle up gently as far as it will go and against the needle clamp P Tighten the needle clamp screw O while holding the needle R in place No electric power Possi...

Reviews: