Installing the Firebox III
Hardware Guide
9
You can connect to and initialize a new Firebox in several ways:
•
Using TCP/IP. This is the quickest way to configure a Firebox in most
situations.
•
Using a serial cable. Use this method if you want to isolate the Firebox
during configuration.
•
Using a modem. Use this method if the Firebox is located remotely
from the Management Station.
•
Using remote provisioning. Use this method in the case where a
router sits between the Management Station (the computer on which
you install the WatchGuard Firebox System Control Center software)
and the Firebox network connection.
Cabling a Firebox using TCP/IP
This process uses TCP/IP over Ethernet to connect and initialize a new
Firebox. The Firebox will automatically obtain its IP address.
1
Place the Firebox on a desktop or in a rack in a location convenient to
the external router.
2
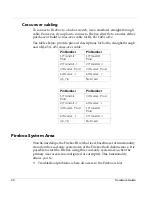
Use the red (cross-over) cable (provided with the Firebox) to connect
the Firebox Trusted interface to the same network as the computer
that will act as the Firebox Management Station.
If the Firebox is to be connected to the Firebox Management Station in isolation,
you must use either a hub or the red cable.
3
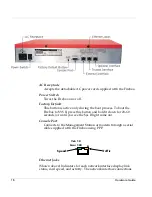
Install the power cord from the AC receptacle on the Firebox to a
power source.
4
When prompted to do so during the QuickSetup wizard (described in
“Running the QuickSetup Wizard” on page 11), select
Use TCP/IP to
Configure
as the confirmation access method.
Cabling a Firebox for serial cable initialization
This process requires that you manually create an IP address.
1
Place the Firebox in a location convenient to the Management Station.
2
Use the blue serial cable to connect the Firebox console port with the
Management Station COM port. Use the red crossover cable to
connect the Trusted interface to the Management Station Ethernet
port.


