Hardware Guide
19
Hardware Installation
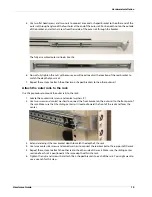
5. Use two flat head screws and two nuts to connect a second L-shaped bracket to the other end of the
outer rail through any two of the four holes at the end of the outer rail. Position each nut on the outside
of the bracket, and attach a screw from the inside of the outer rail through the bracket..
The fully assembled outer rail looks like this:
6. Do not fully tighten the nuts yet because you will need to adjust the location of the rear bracket to
match the depth of your rack.
7. Repeat these steps to attach the other two L-shaped brackets to the other outer rail.
Attach the outer rails to the rack
Use this procedure to mount the outer rails to the rack.
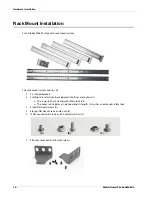
1. Locate the countersink screws and conical washers (C).
2. Use two screws and conical washers to connect the front bracket on the outer rail to the front post of
the rack. Make sure that the sliding center rail is located toward the front of the rack and faces the
center.
3. Extend and adjust the rear bracket depth to match the depth of the rack.
4. Use two countersink screws and conical washers to connect the rear bracket to the rear post of the rack.
5. Repeat these steps to attach the other rail to the other side of the rack. Make sure the sliding center
section of each rail is positioned at the same depth within the rack.
6. Tighten the nuts and screws that attach the L-shaped brackets to each of the rails. You might want to
use a wrench for this step.

