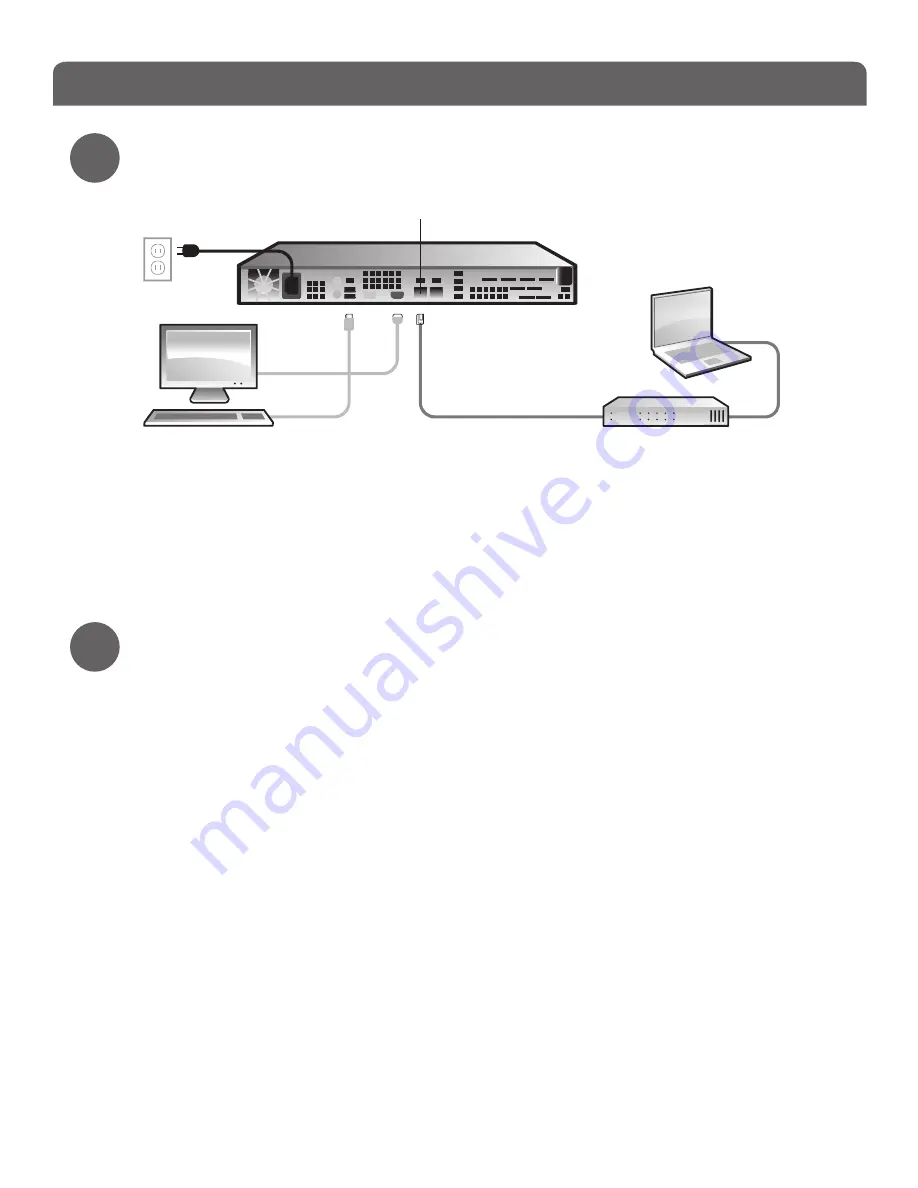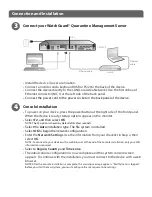
Connect your WatchGuard® Quarantine Management Server
Connection and Installation
3
•
Install the device in a secure location.
•
Connect a monitor and a keyboard (USB or PS/2) to the back of the device.
•
Connect the device directly to the LAN (Local Area Network). Use the first onboard
Ethernet connector (NIC 1) at the left side of the back panel.
• Connect the power cord to the power socket on the back panel of the device.
Console Installation
•
To power on your device, press the power button at the right side of the front panel.
When the device is ready, startup options appear on the monitor.
• Select
F2
, and then select
OK
.
NOTE: The F2 option is chosen by default after a few seconds.
• Select the
Auto
installation type. The file system is installed.
• Select
OK
to begin the network configuration.
•
Enter the
Network Settings
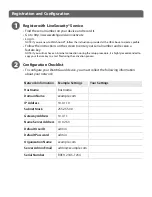
. Use the information from your checklist in Step 2, then
select
OK
.
NOTE: To connect to your device with a web browser at the end of the console installation, only your LAN
information is required.
• Select a
Region
,
Country
and
Time zone
.
•
The initial console configuration is now complete and the system console screen
appears. To continue with the installation, you must connect to the device with a web
browser.
NOTE:
After the console installation is complete, this warning message appears: “Mail System is stopped”.
Before you start the mail system, you must configure the spam quarantine settings.
4
Switch
Ethernet
cable
Ethernet cable
QMS 500
NIC 1


